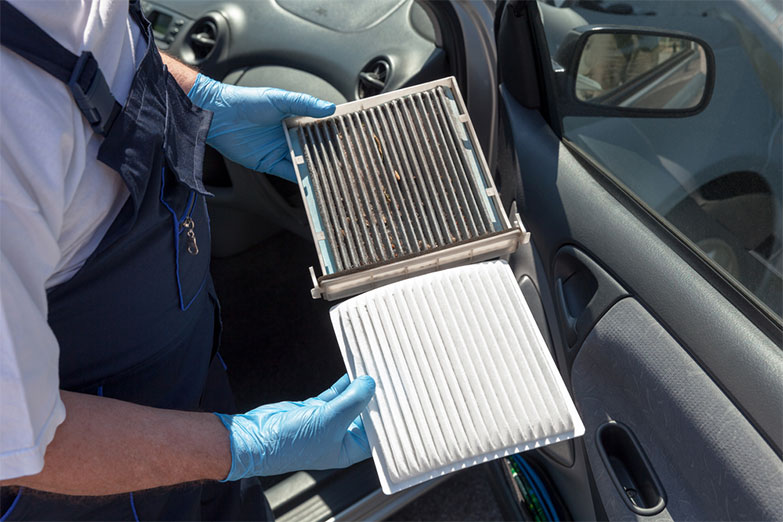

To change a car’s air filter, first identify whether you mean the engine intake or cabin ventilation filter. Confirm the correct replacement and the vehicle-specific access procedure, switch off the relevant system, remove the old element without spreading debris, install the new one in its prescribed position and refit every cover and connection. The exact fasteners, orientation and safety precautions depend on the car; there is no single removal sequence for all vehicles.
Use this guide to organize that work alongside the instructions for your actual model. It covers replacing an element in its intended housing, not installing a modified intake or opening a high-voltage battery assembly. If the job shown in the manual requires equipment or disassembly you cannot manage safely, have a qualified repairer perform it rather than improvising access.
Order the part before dismantling the vehicle. Match the year, engine and other application details using a reliable manufacturer catalog such as MANN-FILTER’s vehicle lookup, and confirm whether the service needs one element or a set. Check that the supplied item and its instructions agree with the order. Similar dimensions or a familiar brand name alone are not enough to confirm the application.
Keep the packaging until the job is complete so the exact reference remains available if a problem arises. Have the specified hand tools, adequate lighting and a suitable way to contain the removed element ready. Read the whole procedure first, including reassembly. Discovering a hidden fastener or required replacement clip halfway through is avoidable if the access instructions are reviewed before starting.
Establish the reason for the replacement
Use the vehicle’s maintenance schedule and relevant inspection findings. A filter that is damaged, incorrectly fitted or contaminated raises different questions from an ordinary scheduled replacement. If the housing contains unusual moisture, damaged material or evidence of an intake problem, replacing the element alone may leave the cause unresolved. Document the condition and obtain appropriate assessment rather than treating every dirty-looking item as the same fault.
Set realistic expectations for the result. DOE/EPA maintenance guidance does not support a general promise that replacing a clogged filter improves fuel economy on modern fuel-injected vehicles, although acceleration can improve. A filter change is also not a complete diagnosis of a warning light or poor running. Record existing symptoms separately so a service task is not mistaken for a confirmed repair.
Identify which instructions govern each item. An engine filter may be under the hood, while a cabin element can require interior access. A hybrid or electric vehicle may have additional equipment. Our guide to counting a car’s air-filter elements helps separate the different systems. Do not assume that changing one element completes every air-filter maintenance item listed for the vehicle.
Prepare the car and the work area
Park securely and follow the manual’s shutdown and access directions. Let hot engine components cool before reaching into their area, and keep the engine off throughout intake-filter work. Ford’s cited procedure warns against starting or running the engine with its air cleaner removed. For hybrids, account for the possibility of automatic engine starting and follow the specified power-off procedure; an engine that happens to be quiet is not sufficient confirmation.
For cabin access, switch off the ventilation system as instructed and clear the relevant footwell or storage compartment. Support trim and the glovebox where the procedure calls for it rather than letting them hang from wires or a damper. Tesla’s Model 3 cabin-filter instructions illustrate why access deserves attention: they identify nearby high-voltage cables and warn against damaging them. Those precautions belong to the relevant vehicle, not to an assumption that every cabin-filter job is trivial.
Before releasing anything, compare the actual assembly with the instructions. Photograph the installed orientation and fastener positions as a reference, while remembering that a previous installation might already be wrong. Stop if access would require forcing a mismatched cover, disturbing an unidentified cable or removing a component not covered by the procedure. Obtain the correct information or professional help before proceeding.
Remove, inspect and install the correct element
For the engine filter, release only the specified clamps, clips or screws and lift the cover as directed. Avoid straining attached ducts or wiring. Withdraw the element carefully and keep loose dirt away from the clean-air opening. Inspect the housing, sealing area and cover for damage or debris before fitting the replacement. Ford’s Bronco Sport instructions describe cleaning the housing and reconnecting the intake boot as part of the job; a new element cannot compensate for debris or a disconnected duct. Follow the relevant cleaning method rather than blowing dirt toward the engine.
For a cabin filter, remove the correct cover and withdraw the element or elements in the specified sequence, controlling loose leaves and dust. Identify the replacement’s orientation from its markings and the applicable instructions. FRAM distinguishes airflow arrows from UP/DOWN orientation marks: an UP mark identifies physical orientation, while an airflow arrow describes the air path. Do not automatically turn every arrow downward. As a concrete exception, FRAM’s CF11966 installation listing specifies an upward airflow arrow for the procedure it describes. That example is not a universal direction for every vehicle that uses a cabin filter. Resolve conflicting or missing markings through the correct application instructions.
Position the new element without folding its edges or using the cover to force an incorrect shape into place. Confirm that the sealing perimeter, tabs and locating features sit where the instructions require. Where the system uses several elements, install the complete specified arrangement in the correct order. Refit the cover, clips, ducts and any removed trim using the prescribed sequence and tightening requirements. There is no useful universal screw torque for all housings. If the cover will not seat normally, remove it and investigate the fit instead of applying more force or leaving a latch unsecured.
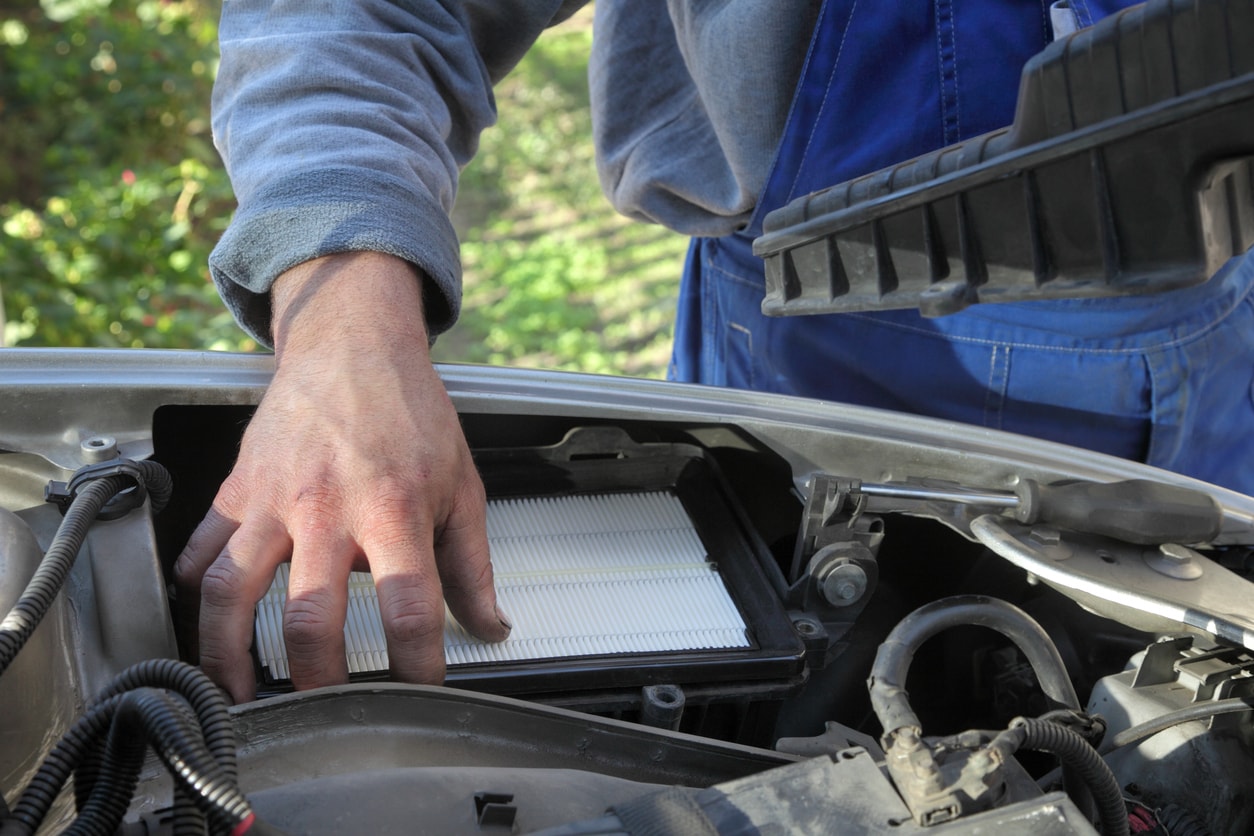
Credit: www.aaa.com
Check the completed assembly before normal use
Inspect the perimeter of the housing or access cover and account for all fasteners. Reconnect any components the procedure required you to disconnect, and make sure ducts are properly seated. Remove tools and loose materials from the work area. Inside the cabin, check that trim and floor mats are secure and clear of the pedals. Complete the manufacturer’s specified final checks only after the assembly is fully restored.
During the prescribed functional check, pay attention to a new warning, unusual intake or blower noise, or an unexpected change in operation. Shut down and inspect the work when appropriate; do not assume the vehicle needs an arbitrary learning drive to accept a filter. If the car runs severely poorly or visibility cannot be maintained, follow its safety instructions and arrange help. A successful idle or a quiet fan alone does not prove that every hidden seal is seated correctly.
- Keep replacement and cleaning tasks distinct. A new disposable element is fitted as supplied under its instructions; washing the removed part does not automatically make it reusable. K&N publishes separate procedures for different filter media, illustrating why a cleaning method cannot be transferred merely because both products look pleated. Use our reuse identification guide if the installed product is genuinely designed for servicing.
- Apply no extra oil, scent, solvent or household treatment by habit. Some reusable products require a specified oiling stage and others do not. Identify the exact product before treating it, and keep any cleaner away from components it is not intended to contact. A product’s instructions should establish preparation and drying requirements; neither color nor texture reliably replaces that information.
- Record the date, mileage, part reference and system serviced. If the vehicle provides a relevant maintenance reminder, reset or record only the completed task according to its instructions. Do not clear unrelated maintenance items. Retain any findings that need follow-up, including a damaged housing, unexplained contamination or a symptom that remained after the replacement.
- Plan the next inspection or replacement from the actual vehicle schedule and operating conditions. A generic mileage printed in an online tutorial may describe another application. Keep the old element contained until disposal, then follow local guidance for its material and contamination; do not shake the collected dust into the passenger compartment or assume every filter belongs in household recycling.
Complete the specified job, including the closing checks
A successful air-filter replacement includes identifying the right part, controlling debris, respecting orientation, restoring the seal and checking the finished installation. The task is not complete simply because the old element has been removed and a new one is present. Use the vehicle procedure for access details, and the filter manufacturer’s instructions for any product-specific requirements. Keep uncertainty visible when the supplied part or actual assembly differs from the documentation.
If you hand the job to a workshop, describe the system and the reason for service, and request the installed reference on the invoice. That creates a useful record for future maintenance without relying on a vague “air filter changed” entry. Where a documented part supersession was used, keep the previous and new references together with that explanation so a later order does not accidentally revert to the wrong item. This article provides a planning and verification sequence; it does not claim a timed installation or hands-on test of your vehicle.


Automotive reference information. Confirm specifications in the manual for your exact vehicle. Original replacement guides link to their research sources. About us