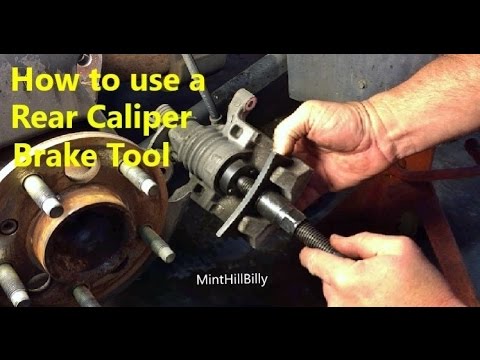

Use a brake caliper tool only after identifying the piston-reset method required by the fitted brake. A straight piston press, a threaded wind-back tool and an electronic parking-brake service function are not interchangeable. Choose the correct tool and adapter, confirm a sound reaction point, align the tool with the piston and follow the vehicle and tool instructions. If the setup slips, loads a protective boot or meets unexpected resistance, stop before applying more force.
The tool’s job is to carry out a known service movement in a controlled way. It cannot identify the brake design for you or make a seized assembly serviceable. A case labelled universal means it offers a range of fittings; it does not establish that every piston can be moved with the same adapter and direction. Verify the application rather than selecting whichever disc in the case appears close enough.
This guide focuses on tool compatibility and setup. It does not supply one reset sequence for every caliper, a universal pressure limit or a rear-piston rotation rule. If the actual service method is unknown, start with identifying the correct piston-reset method. If the piston remains resistant after the procedure has been verified, investigate the fault instead of treating a larger tool as the next step.
Match the tool family and adapter to the actual mechanism
A straight-press tool applies controlled axial movement to a piston that the service procedure permits to move directly inward. A wind-back tool combines the required rotation and inward movement on appropriate mechanical designs. A diagnostic tool can prepare certain electronic parking brakes for service, but that command and the mechanical piston operation are separate functions. Confirm what your vehicle requires before choosing equipment from a rental kit or workshop drawer. HELLA explains the importance of centred piston force and distinguishes reset tools for different movements. Its guidance warns that unsuitable levering tools can damage the housing, piston or protective boot. The practical lesson is to match the tool to the operation, not assume that any device capable of producing pressure is suitable. Pliers and an improvised lever are not equivalent to a correctly supported reset tool. Check the fitted caliper rather than relying only on the vehicle badge.
Brake options, production changes and aftermarket conversions can alter the assembly. The tool manufacturer’s application chart is useful only when it matches the actual brake and current instructions. A chart describing one model year or axle may not cover another arrangement under the same model name. Resolve mismatches before forcing the tool into position. For a wind-back adapter, verify that its locating features match the piston’s intended engagement points and seat fully. Pin spacing, depth and clearance matter, not just the outside diameter of the adapter. A disc that balances on the edge of a recess can slip under load. Do not grind an adapter or reshape the piston face to make an uncertain match fit. Obtain the specified adapter or appropriate alternative identified by the tool maker.
The reaction plate or support also needs to suit the caliper and tool. It must transfer force through the intended sound part of the assembly without bearing on a hose fitting, electrical connector or fragile feature. Tool components from different kits should not be mixed simply because their threads appear to engage. Confirm the manufacturer permits the combination and that its load path and operation remain correct. Where a wind-back mechanism requires a particular rotation, identify that direction from the actual service instruction. HELLA’s integrated-handbrake information illustrates differing adjustment arrangements. Left and right wheels should not be assumed identical, and the direction a tool handle turns is not a substitute for understanding the required piston movement. A useful setup record names the vehicle, axle, caliper, adapter and prescribed movement together.
Prepare the vehicle and inspect the tool before loading it
- Read the complete vehicle procedure and the instructions for the exact tool model. Establish any required parking-brake maintenance state, isolation precautions and final commissioning steps before dismantling. A general code reader may not support the necessary parking-brake function. Do not replace a failed service command with direct battery power to a motor or random mechanical movement. If the required preparation cannot be completed, the piston operation must wait. Support and restrain the vehicle through its approved lifting procedure, and independently support the caliper when it is moved for access. Neither its hydraulic hose nor electrical wiring should carry its weight. Plan enough space for the tool and your hands to move without contacting surrounding components.
- A tool that fits only when the hose is stretched does not provide acceptable access. Inspect the tool for damaged threads, bent plates, worn locating pins or missing components. Confirm that its moving parts work as described before placing it under load. Laser Tools supplies model-specific instructions for its caliper rewind kits, including setup and correct-use requirements. Follow the instructions for the kit in your hands rather than copying an operation from a similar-looking case. A secondhand tool with missing identification needs clarification before use. Inspect the visible piston and boot before resetting.
- Leakage, significant damage or a trapped protective component can change the job from routine pad service to repair assessment. A piston’s resistance should not be explored by escalating force while the setup remains uncertain. Also arrange reservoir monitoring and fluid handling according to the vehicle procedure, because piston movement can displace fluid. Do not automatically open a bleed screw or hydraulic fitting just because a tool leaflet discusses that method. Resolve the vehicle’s required fluid procedure and include any bleeding or restoration obligations before opening the circuit. Conversely, do not ignore a specified fluid-handling step simply to keep the job dry. The tool’s mechanical instructions and the vehicle’s hydraulic requirements need to be compatible parts of the same plan.
Set the load path, move carefully and recognize stop signs
- With the required service preparation complete, assemble the tool using the prescribed adapter and reaction arrangement. Confirm full engagement and a centred line of action before taking up load. Check that no protective rubber is trapped between the tool and a contact surface. Keep the piston and boot visible enough to monitor during movement. If the tool obscures the area completely, improve access rather than operating blindly.
- Take up clearance in the tool according to its instructions without treating initial contact as permission for unlimited force. Verify that the adapter remains seated as load begins. On an appropriate wind-back setup, confirm the piston follows the prescribed combination of movement. On a straight-press setup, avoid side loading that can cock the piston. A tool that tilts or walks off its contact point must be reset before continuing.
- Use the drive method the tool is designed for. Do not add an impact wrench, extension pipe or power drive merely because the operation seems slow. An adapter that breaks or slips can damage the piston or surrounding parts. The absence of a published universal force value does not mean the user may keep increasing effort indefinitely. Abnormal behavior requires diagnosis of the setup and assembly.
- Watch the boot as well as the piston face. A boot that begins to twist, fold into the wrong area or pull out of its seat needs attention under the proper procedure. Do not use a sharp tool to push it aside while continuing to load the piston. Likewise, stop if there is fresh fluid, a cracking sound, a visibly damaged part or movement inconsistent with the expected method. The goal is controlled resetting, not completion at any cost.
- Multiple-piston calipers can require a suitable tool arrangement to control more than one piston. Moving one piston can affect another through the hydraulic connection, so a single contact point is not automatically sufficient. Follow the application’s instructions for supports and coordinated movement. Do not let an unrestrained piston emerge while concentrating on the one beneath the tool. If the kit cannot provide the required control, use the appropriate equipment.
- When the prescribed position is reached, unload and remove the tool as instructed. Do not continue tightening against an assumed stop to make the piston extra secure. Check the protective components and any required piston orientation before fitting new pads. A pad locating feature may need to align with the piston face on some designs. The correct final position comes from the service procedure, not how the adapter happens to leave the piston.
Keep tool maintenance separate from brake-component lubrication. A tool maker may specify care of its force screw, but that does not authorize transferring oil or grease onto the piston seal, boot or friction surfaces. Clean handling matters throughout the job. If contamination occurs, follow the relevant component remedy rather than assuming the next brake application will remove it.
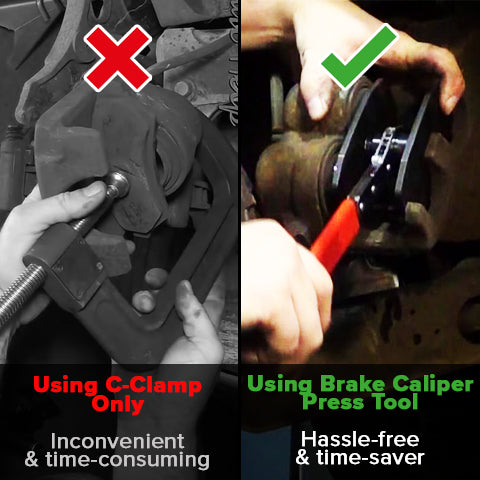
Credit: bestcargurus.com
Common tool questions and completion checks
Can the same kit serve every vehicle? Only the documented applications and supported configurations can be assumed. A large adapter count does not confirm electronic service coverage, correct reaction geometry or compatibility with every piston. Verify the actual kit contents and instructions before relying on it for a particular job.
An absent adapter is a reason to obtain the right part, not select the nearest size. What if the tool will not fit between the piston and caliper? Check that the correct components and assembly orientation have been chosen, then compare the application instructions. Do not remove required support pieces or substitute a thinner improvised plate solely to gain room.
The brake or tool configuration may differ from the expected one. Resolve the fit issue before load is applied.
Does a piston that moves prove the caliper is healthy? No. Movement during service does not establish hydraulic integrity, proper operating release, sound guides or a functioning parking brake.
A damaged assembly can still move under tool force. Evaluate the original complaint and required inspection separately, particularly if the job began because of leakage, heat or drag.
What must happen after the tool comes off? Reassemble the brake with correct hardware, routing and tightening instructions. Complete any required hydraulic and parking-brake procedures, establish the specified working position and verify pedal response before the vehicle moves.
Brembo’s fitting guidance illustrates the importance of post-assembly brake checks. A successful tool operation is one stage of the repair, not a full return-to-service test.
Record the adapter and method if the installation was unusual or required manufacturer clarification. That information can prevent the same uncertainty during later service.
The right way to use a caliper tool is to establish compatibility, create a sound centred setup and stay within the documented operation. Stop when the evidence no longer matches the expected movement rather than trying to overcome uncertainty with force.


Automotive reference information. Confirm specifications in the manual for your exact vehicle. Original replacement guides link to their research sources. About us