
Identify the reset method before pressing the piston
To depress a brake caliper for pad installation, first identify how its piston is designed to reset. Some assemblies permit controlled straight compression, some require rotation with pressure, and some require an electronic parking-brake service state before the specified mechanical action. Do not choose a method simply because the caliper is at the front or rear of the vehicle. The exact assembly and its service instructions determine the operation. If the correct method is uncertain, stop before applying force. The phrase depress the caliper usually means moving its piston inward to accommodate the replacement pad thickness. It does not mean pressing the brake pedal with the pads removed, squeezing the housing itself or dismantling the piston. Normal release after braking is a different movement from this service reset. The piston-retraction explanation covers that operating distinction.
This article focuses on selecting the correct reset branch and recognizing when the work should pause. Start with the vehicle, axle and brake-package identification. If an aftermarket system is installed, obtain the kit and caliper references rather than assuming the original vehicle procedure applies unchanged. Compare the actual assembly with a reliable service illustration. Determine whether the parking brake acts within the caliper or through a separate mechanism. Visible motor wiring or a cable connection can guide identification, but an incomplete view through the wheel is not enough to establish the whole procedure. Gather the applicable instructions before removing parts. For a conventional push-back arrangement, the procedure will identify a suitable tool and contact method that keep the force controlled and aligned. HELLA’s piston-reset guidance explains the value of centred loading and warns that unsuitable levering tools can damage the housing, piston or protective boot.
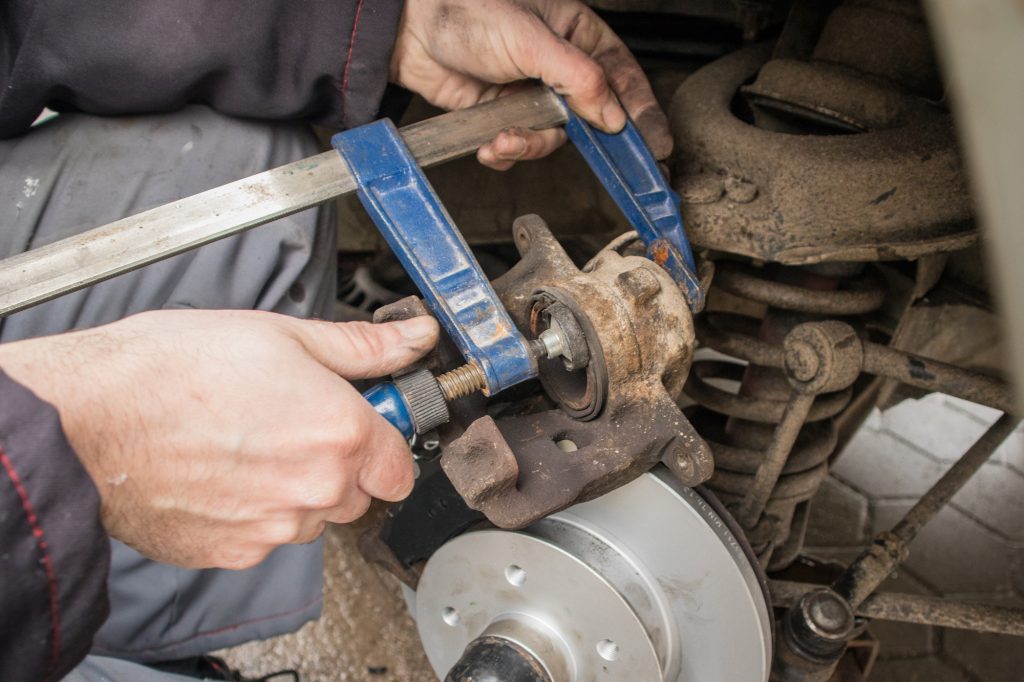
A clamp that spans the casting is therefore not automatically an appropriate tool. Check the intended reaction points and the tool's alignment throughout movement. Do not rest a jaw on a hose connection, actuator or other convenient but unsuitable feature. For a wind-back arrangement, establish the correct adaptor engagement, direction and any final piston-position requirement. HELLA’s integrated-handbrake guidance illustrates why the mechanism needs its own handling instructions. Slots or recesses on the piston face can be useful identification clues, but they should not replace the application data. Do not assume every rear piston turns clockwise or that the left and right sides follow a rule inferred from their location. A tool that engages a recess can still be wrong for the required operation.
For an electronic parking brake, releasing the switch is not necessarily the required maintenance state. The procedure may require supported diagnostic functions or another manufacturer-defined sequence. TRW’s Easycheck instructions describe service functions for supported systems, demonstrating that coverage and procedure matter. A scanner that reads engine codes does not automatically perform the necessary brake function. If the system will not enter its required state, resolve that problem before compression. Do not substitute direct battery power to the motor or arbitrary actuator removal for a missing service routine. Some calipers contain multiple pistons, which changes the control problem even when the permitted motion is straight inward. The reset arrangement may need to manage more than one piston rather than forcing the most accessible one and leaving the others free to move.
Use the specified tool or method for the design. Piston count alone does not tell you the required contact geometry. A larger tool is not a substitute for understanding which parts must be restrained and how. The decision should end with a clear instruction for the actual assembly: its preparation state, permitted piston motion, suitable tool and completion requirements. If the information only says compress the piston without identifying these points, obtain a more complete source. Do not use resistance as a way to discover the design by trial and error. A piston that resists the wrong operation has not yet been shown to be seized. Conversely, movement achieved with excessive force does not establish that the part is healthy.
Prepare, reset and verify without forcing an uncertain result
Prepare the vehicle according to its lifting, restraint and brake-system service instructions. Use approved support points and suitable equipment; a jack alone is not support for working around a raised brake assembly. Account for a parking brake that will be released or placed in a service state. Prevent another person from operating controls unexpectedly while components are apart. Let dangerously hot brakes cool before handling them. Plan where the caliper will be supported so that its hose and wiring do not carry its weight. Inspect before resetting. A leak, damaged boot, unusual pad wear or evidence of overheating needs assessment rather than being hidden by installing new pads. Record the original complaint and the condition found. If the vehicle arrived with a dragging brake, the reset operation is not itself the diagnosis or repair. Guides, pad fit, piston condition, parking components and the hydraulic path may each require appropriate checks.
| Do not decide that fresh pads will solve a brake that was failing to release. Plan fluid management from the vehicle procedure. Moving a piston inward displaces fluid, and the reservoir or prescribed fluid-handling arrangement needs attention. Brembo’s caliper fitting instructions note the level change during the piston movement they describe. That observation does not establish that every vehicle should have a bleeder opened or the same reservoir procedure used. Follow the actual system instructions, protect nearby materials and keep contamination out. If the hydraulic circuit is opened, complete its specified restoration and bleeding requirements afterward. Fit the correct tool using the approved contact surfaces or adaptor. Check that it is seated securely and that the boot is not trapped, twisted or loaded by the tool. Confirm access through the intended movement rather than checking only the starting position. |
| Do not stack loose objects to compensate for poor reach. Do not add a long pipe, impact tool or other force multiplier unless the specific equipment and procedure permit it. The tool should control the movement, not turn an uncertain operation into a stronger attempt. Perform the prescribed motion and observe the assembly. Stop if the tool shifts, a piston tilts, a boot distorts or the expected movement does not occur normally. Pause if a cable, connector or hose is being strained. Do not force the piston to its presumed limit or assume a flush appearance is the required endpoint for every design. The correct position and any alignment requirement come from the service procedure. With a wind-back system, reaching an inward position does not necessarily complete the required final orientation. Unexpected resistance needs interpretation. |

Credit: www.youtube.com
It may reflect a wrong method, an unfinished parking-brake preparation step, a mechanical defect or a hydraulic condition. Wagner’s inspection guidance includes hose restriction among possible reasons for abnormal piston behaviour. Its diagnostic discussion belongs to a controlled workshop assessment, not a reason to crack a fitting at the roadside and continue driving. Releasing pressure can change movement without uniquely identifying the failed component or completing the repair. Do not spray lubricant beneath the boot to make a reluctant piston move. Hydraulic assembly lubrication, guide lubrication and exterior cleaning are separate tasks with specific material requirements. A chemical shortcut does not inspect a seal or restore a damaged surface. If the piston needs rebuilding or replacement, follow a supported repair process for the identified assembly. If the necessary information or equipment is unavailable, a qualified brake technician should take over before more force causes additional damage. After the reset, install the correct pads and associated hardware in their prescribed positions.
Restore attachments and routing, and complete the specified tightening procedures. Do not infer bolt torque from the tool used to retract the piston. Check that boots and other protective parts remain correctly located. Any parking-brake service state must be completed according to the application, including required adjustment or initialization. That step is separate from confirming that the piston moved inward. Before moving the vehicle, establish the prescribed pedal condition and complete the required static checks. If the circuit was opened, verify that its bleeding and leakage checks are complete. Confirm brake application and release, and any parking function disturbed during the work. A cleared warning or a wheel that turns freely on a lift is not the whole acceptance test. An abnormal pedal, leak or continued binding requires investigation before normal use.
For a practical example, a rear piston that will not move under straight pressure may need a defined winding action, but it might also belong to an electronic system awaiting service preparation. Appearance alone cannot choose between those explanations reliably. Another piston may accept the correct motion yet still have a torn boot or a diagnosed release fault that requires repair. Keep identification, movement and serviceability as separate decisions. This prevents both condemning a good part because of the wrong method and reusing a damaged part because it can be pushed back. Record the reset method and any unexpected findings with the brake service history. If a workshop finishes a job that was interrupted, explain exactly what tools and operations were already attempted. That information helps it check for damage and select the correct next step. For equipment geometry, see the brake clamp selection guide. The governing rule remains to identify the piston mechanism first, use its approved reset process and verify the completed brake assembly before returning the vehicle to service.


Automotive reference information. Confirm specifications in the manual for your exact vehicle. Original replacement guides link to their research sources. About us