
There is no C-clamp size that is correct for every brake caliper. Before measuring for a clamp, establish whether the piston is designed to push straight back, turn while retracting or follow an electronic parking-brake service procedure. A clamp is unsuitable when it cannot apply controlled, centred force or when the mechanism requires a different method. The familiar advice to buy a particular number of inches skips both of those checks.
For a caliper that permits straight compression, the required opening and throat depth depend on the actual assembly and the approved contact arrangement. A purpose-made brake piston reset tool is often the more useful starting point. This guide is about selecting equipment for the specified job, not using extra leverage to overcome a stuck brake. A piston that resists the proper method may need diagnosis.
Increasing clamp size or handle force can conceal the fact that the wrong procedure is being used. If you do not have the exact vehicle instructions, identify the caliper and obtain them before buying tools or dismantling the brakes. Keep the vehicle safely supported and do not rely on its parking brake alone when that system is being serviced.
First match the tool to the piston mechanism
A conventional push-back piston and a mechanically adjusted rear piston can look similar from a distance. However, the second design may need simultaneous rotation and pressure using a matching adaptor and the specified direction. The presence of an electric parking brake introduces another set of application-specific preparation and reset steps. Releasing the parking-brake switch is not automatically the same as entering maintenance mode. A universal C-clamp cannot command an actuator or prove that an internal mechanism is ready for compression. Do not power a parking-brake motor directly or force the piston to compensate for a missing service procedure. HELLA’s piston-reset guidance recommends appropriate brake tools and explains why centred loading matters. It distinguishes straight resetting from variants that require rotation, and warns that unsuitable tools can damage the piston, housing or dust protection. TRW’s service instructions also distinguish caliper arrangements rather than prescribing one force-only method.
For an EPB application, use the vehicle's supported maintenance process; TRW’s Easycheck instructions illustrate that these functions depend on supported systems and tool procedures. These sources establish the need to identify the mechanism, not permission to use the same sequence on every car. Also identify how many pistons must be controlled. On a multi-piston assembly, moving one piston can displace another, so a tool designed for the arrangement may be needed to control their movement together. A small clamp aimed at one accessible point may leave the other pistons unsupported. Do not assume that being able to reach a piston means the setup is suitable. Check the instruction for the actual caliper, including any spacers or pad contact surfaces it specifies. If a tool's packaging says universal, read its limits and adaptor requirements rather than treating the word as a guarantee.
Check the service equipment list before relying on a tool already in the garage. A wind-back kit may include several adaptors that look close to the piston pattern, but the correct adaptor must engage securely and suit the specified direction and method. A reset spreader may suit one fixed caliper yet lack the capacity or contact arrangement needed for another. Borrowing or renting the correct tool can be more practical than buying a general clamp and discovering its limitations halfway through the job. Inspect a borrowed tool as carefully as a new one, and obtain its operating instructions rather than accepting an improvised explanation. If a tool is missing its plates, spindle adaptor or retaining parts, do not replace them with loose hardware selected by appearance. The complete tool configuration is part of how it controls the load. Tell the supplier the caliper type and intended procedure, not just the vehicle name, especially where several brake packages were available.
Measure the working geometry, then assess the setup
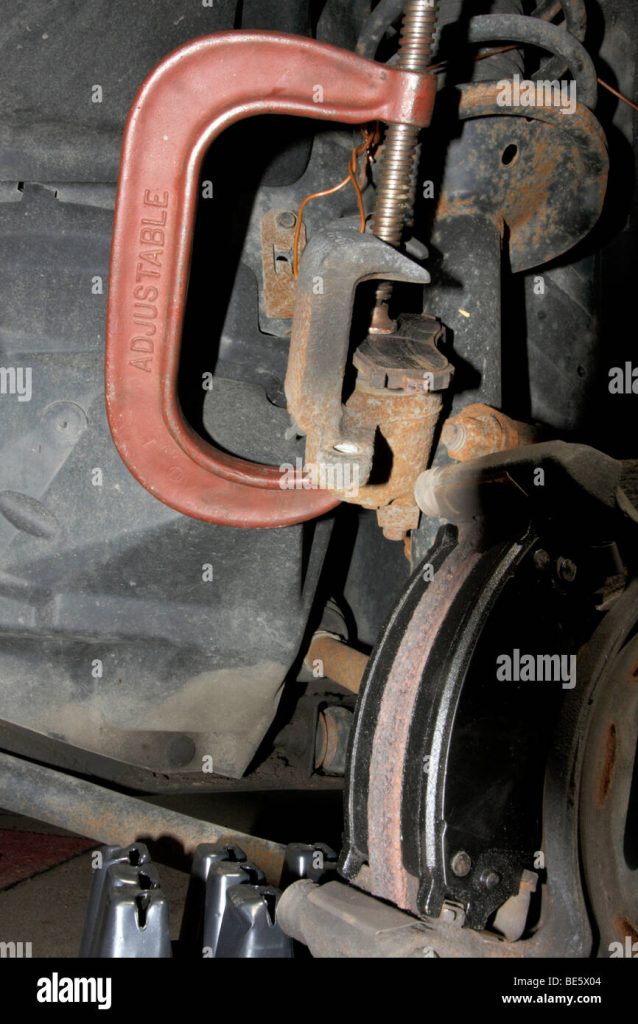
When the specified method allows straight compression, distinguish the clamp's opening from its throat depth. Opening is the distance available between its opposing contact points; throat depth determines how far those points can reach inward from the frame. Both must suit the caliper and any approved load-spreading pad or plate. An opening large enough to span the assembly is not useful if the screw cannot line up with the piston. Likewise, adequate reach is not enough if the jaw rests on a fragile feature or the screw pad slips sideways. Measure the actual intended contact arrangement, not only the piston diameter or the outside width of the casting. Look at the tool with the job's full movement in mind. The frame must clear the caliper, hose and nearby components while the piston travels through the required range.
The screw and swivel pad must remain aligned rather than progressively leaning as the gap closes. A larger clamp can be awkward and still provide poor contact; more nominal capacity is not automatically safer. Check the tool's condition, including damaged threads, distorted jaws and insecure contact pads. Do not extend the handle with a pipe or use an impact tool unless the specific brake tool is designed and instructed for that method. Tool strength does not establish how much force the caliper should receive. The contact surfaces require particular care. A dust boot, hose connection, bleeder or parking-brake actuator is not a convenient reaction point. Nor should a small screw tip load an unsupported part of the piston face just because it fits through the opening.
Use the tool and contact arrangement specified for the brake assembly. If an old pad is used as a load spreader under the applicable procedure, verify that it is positioned securely and does not trap or cut a boot. Do not improvise a stack of loose objects to gain reach. If stable centred contact cannot be established, select the proper brake tool or have the work performed by someone equipped for the assembly. Before retraction, follow the vehicle's fluid-management and system-preparation instructions. Moving a piston displaces fluid, so reservoir level and the prescribed handling method matter. Brembo’s fitting instructions note the reservoir-level consequence during the piston movement covered by that procedure.
That is a reason to plan fluid handling, not to open a bleeder indiscriminately on every vehicle. Different service procedures may require particular isolation, bleeding or diagnostic steps. Protect painted surfaces and maintain cleanliness, and never let an opened system run dry through neglect. Any required fluid must meet the vehicle specification rather than a generic preference. Apply only the controlled motion described by the approved method and observe what the piston and tool actually do. Stop if the clamp shifts, the piston tilts, a boot twists or the required movement does not occur normally. Resistance can result from an incorrect retraction method, a mechanical problem or a hydraulic condition; the clamp itself cannot identify which.

Credit: www.amazon.com
Do not take eventual movement under excessive force as proof that the assembly was healthy. If the piston had been dragging before service, investigate the fault rather than simply pushing it back and fitting fresh pads. A new pad set does not correct a seized guide or an unresolved fluid-return problem. Here is a useful purchasing comparison. One tool may have enough opening but insufficient reach to centre its screw; another may reach correctly but lack the adaptor required to rotate a rear piston. Neither is the right choice for that job, despite both being sold for brake work. A purpose-made spreader may solve the first problem, while the second requires the correct wind-back system.
An EPB job may additionally require a supported scan function or a manufacturer-defined service sequence. Write the required mechanism and geometry on the shopping list before considering price. This prevents buying a bigger version of the wrong tool. After the piston has been reset and the brake reassembled, tool selection is no longer the main concern: the completed system must pass the specified checks. Confirm secure hardware, correctly positioned pads and boots, the necessary fluid or bleeding work and any parking-brake initialization. Establish the prescribed pedal condition before moving the vehicle. Do not drive with a soft or abnormal pedal, a leak or an unresolved warning merely to see whether it improves.
If further testing is needed, it belongs within the vehicle's service procedure and the repairer's controlled verification process. Record which tool and procedure were used if an unexpected problem occurred, since that information can help diagnose damage or incorrect setup. For the common question about whether a six-inch clamp will work, the accurate answer is that its nominal opening alone cannot decide. Confirm the caliper mechanism, measure opening and reach at approved contact points, and check the tool's alignment through its travel. If any of those conditions fail, a different tool is required. Our separate guide to pushing a brake piston back explains the procedural distinctions, while this page focuses on choosing the equipment. The goal is predictable controlled movement with a suitable tool, not the largest clamp or the strongest hand force available.


Automotive reference information. Confirm specifications in the manual for your exact vehicle. Original replacement guides link to their research sources. About us