Install brake caliper covers only when the exact kit is approved by its manufacturer for the fitted brakes and wheels, and follow that kit’s instructions for hardware, clearance and tightening. A cover that resembles the caliper or fits behind a wheel is not automatically suitable. Do not use a universal clip position, improvised adhesive or a guessed fastener setting. If the cover or its attachment touches a moving component, stop and resolve the mismatch before driving.
Caliper covers are accessories placed over part of the visible brake assembly. They do not replace a damaged caliper, repair corrosion or establish improved stopping performance. Treat the project as a fitment and attachment check around a safety-critical system. Any existing leak, drag, severe corrosion or abnormal brake behavior should be assessed before an accessory is installed over the area.
This guide explains the decisions and checkpoints that apply when evaluating a cover installation. It uses MGP’s published instructions as a named manufacturer example, not as authorization to install another brand in the same way. The document supplied for your exact kit and vehicle controls the actual procedure. If the instructions are missing or conflict with the parts received, contact the manufacturer before proceeding.
The most important checks happen before the wheel is removed: identify the actual brake package, verify wheel clearance requirements and obtain the correct installation sheet. Completing those checks can prevent a partly assembled car and a last-minute attempt to bend or modify a bracket. A cosmetic result is optional; secure brakes and unobstructed moving components are essential.
Choose by brake and wheel fitment, not appearance alone
Start with the vehicle model year, axle and brake package, then compare the installed equipment with the kit application. Factory options, replacement calipers and aftermarket brake conversions can change the answer. A cover listed for a vehicle with its original brakes may not suit a larger performance caliper. Our guide to application-specific caliper compatibility explains why the vehicle badge alone does not identify every brake assembly. Wheel diameter is only one fitment detail. Spoke shape, the inner barrel and the relationship between the wheel and the brake also determine available space. MGP publishes minimum wheel and clearance checks for its applications, including checks at different locations around the caliper. Do not reduce that guidance to one universal gap measurement for every wheel or cover.
| Confirm the exact product listing and ask the manufacturer about any nonstandard wheel or brake equipment. If the vehicle uses seasonal wheels, check both sets before buying. A kit that clears one wheel design may not clear another wheel of the same nominal diameter. Keep the wheel make, model and relevant specifications available when asking about fitment. A photo can help the manufacturer understand the arrangement, but it is not a substitute for the required measurements. Inspect what the package actually contains and which parts belong at each axle or side. Front and rear cover hardware may differ. |
Keep labels and bags separate until each location is identified. Do not assume that an extra clip or nut is interchangeable with a missing one. Resolve missing or damaged parts through the supplier rather than substituting generic hardware. Avoid making an incompatible kit fit through grinding, drilling, improvised spacers or bending beyond an expressly documented adjustment. Modifying the caliper or its mounting parts to accommodate an accessory is not an ordinary installation step. Likewise, adding wheel spacers introduces a separate wheel-fitment decision that cannot be approved merely because a cover needs more room. If the combination is unsupported, choose a compatible accessory or leave the brake uncovered.
Prepare the vehicle, instructions and inspection area
Read the entire application-specific instruction sheet, including removal and troubleshooting information, before starting. Identify the required tools, tightening method and clearance gauge. MGP directs owners to the vehicle-specific instructions supplied with the order and distinguishes front and rear attachment arrangements. That is a useful reminder that a general demonstration is only an introduction. Do not transfer a short video’s sequence to a kit with different hardware. Work on a firm level surface with the vehicle secured according to its lifting instructions.
Use rated supports at approved locations; a jack alone is not sufficient support for the installation. Allow the brakes to cool and use appropriate eye protection. Follow the vehicle’s parking and lifting procedure rather than relying on an accessory leaflet to cover every vehicle configuration. Before fitting a cover, inspect the visible brake area for leakage, loose hardware, damaged hoses or wiring and obvious interference. A cover should not be used to conceal a condition that needs repair.
If an inspection raises a concern, stop the cosmetic work and have the brake assessed. Cleaning for access should use a method compatible with the brake components and must not contaminate pad or rotor friction surfaces. Do not open the hydraulic system or dismantle the caliper unless a separate, legitimate repair procedure requires it. A cover installation does not justify loosening a hose, removing piston seals or disturbing body bolts. Brembo’s fitting guidance illustrates the separate responsibilities involved in actual caliper service.
Keep the accessory task distinct from hydraulic or mechanical brake repair. Arrange removed wheels and tools so that they do not compromise the support setup or block access. Retain the installation sheet and product identifiers at the work area. If the fasteners require a measured setting, use a suitable tool and confirm its units. Small accessory fastener settings must never be confused with caliper mounting or wheel-fastener specifications.
Fit the exact mounting system and verify each clearance
Remove the wheel using the vehicle’s procedure and expose the intended mounting area. Compare the cover, clips and caliper with the application illustration before attaching anything.
Check that the location labels match the axle and side you are working on. If the illustration and the actual assembly disagree, pause and establish whether the kit or the fitted brake is different from the expected application.
Position the parts only as the kit instructions describe. Do not assume that every clip slides behind the same feature or that the front sequence also applies to the rear.
- A retaining point must engage the intended structure without loading a hose, boot, sensor wire or other component. The cover should not depend on pressure against a moving disc to remain in place.
- Use the supplied or expressly specified hardware. Do not substitute glue, wire or a cable tie for a missing retention component.
-
An accessory that appears secure while stationary can still be incorrectly attached. The documented mounting arrangement, not a hand-pull impression alone, establishes how the product is intended to be retained.
- Align the cover as specified before final tightening. Keep an eye on the clips and surrounding brake components as the fasteners are secured.
- Stop if tightening distorts the attachment or draws a part into contact. More torque is not a way to correct the wrong clip, an incorrect position or incompatible geometry.
- Apply the exact setting and method from the kit instructions, with the correct unit. Do not borrow a value from another cover brand or from the brake’s own mounting hardware.
-
Where the instructions contain an unclear dimension or unit, obtain clarification from the manufacturer. Guessing whether a printed measurement means inches or millimetres is unacceptable near rotating components.
- Check the specified clearance between the retaining hardware and the rotor using the method and gauge called for by the kit. This is a different check from cover-to-wheel clearance.
- Passing one does not imply the other has passed. Inspect every specified location, rather than assuming that the easiest visible gap represents the whole assembly.
- Check that the cover and mounting hardware leave required brake movement and surrounding components unobstructed. Look for trapped wiring, contact with a boot or altered hose routing.
- A cosmetic accessory should not require moving a safety component out of its designed position. If the attachment changes how the brake can move or be inspected, seek manufacturer guidance before continuing.
- Reinstall the wheel carefully so that it does not strike or displace the cover. Verify cover-to-wheel clearance in the manner specified before lowering the vehicle.
- Do not treat the fact that the wheel can be bolted on as proof of clearance. The required inspection must account for the wheel’s actual inner shape, not just the visible spoke opening.
-
Complete any prescribed rotation or movement check only with the vehicle safely supported and in the state required by its procedure.
- Keep hands and tools clear of moving parts.
- Do not run the drivetrain on improvised supports to test an accessory.
-
If a check cannot be performed safely with the available equipment, use a qualified installer.
- Repeat the documented process at each fitted location.
- Different axle hardware and wheel designs mean that one successful corner does not certify the others.
- Use the vehicle manufacturer’s procedure for wheel installation and final wheel-fastener tightening.
Accessory installation is not complete until those separate wheel requirements are satisfied.
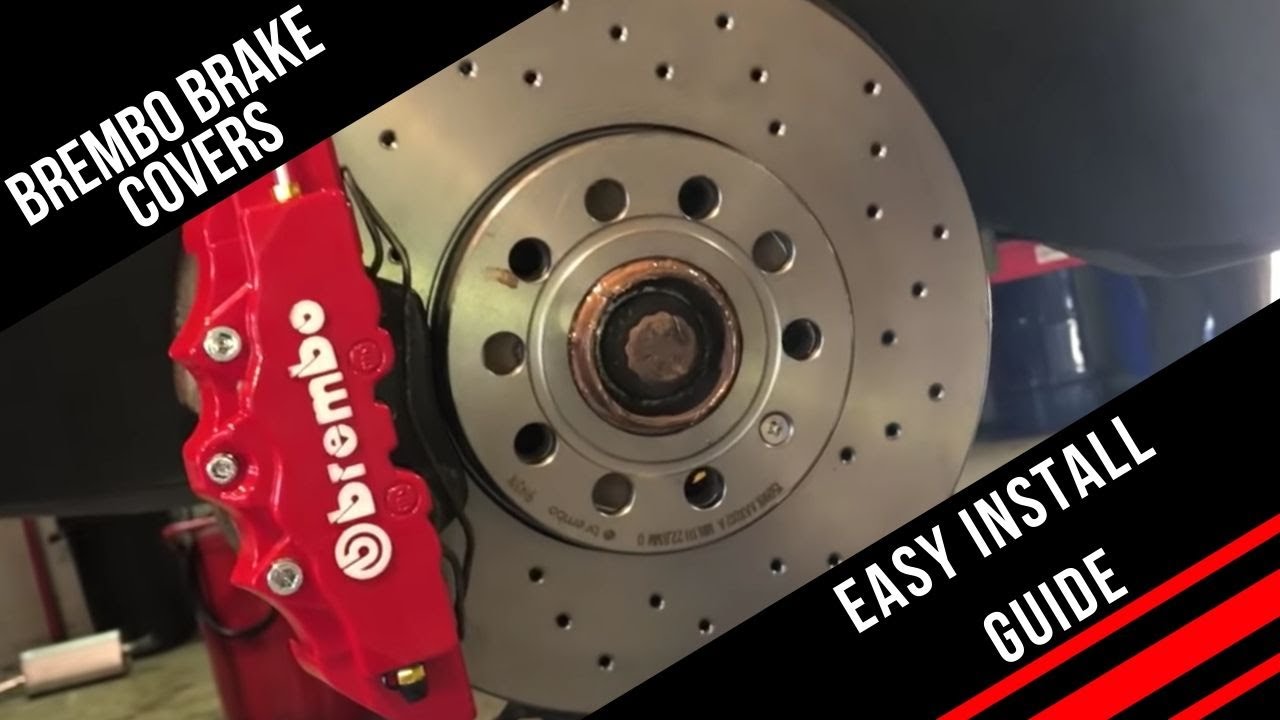
Credit: m.youtube.com
Finish with a verified attachment, not just a visual result
Before the vehicle moves, account for the tools and confirm that every intended fastener and clip is present. Check the covers for secure placement and review the clearance findings at each wheel. Confirm that no brake hose, cable or electrical lead was displaced during the work.
A neat appearance from outside the wheel is not enough to verify these hidden details. Follow the kit’s final inspection and any recheck instructions. A short drive should not be used to wear away a rubbing point or make an uncertain cover settle into place.
If contact, scraping, looseness or a change in braking is detected, stop safely and arrange inspection. Do not continue driving simply because the accessory is cosmetic. If installation cannot meet the stated requirements, remove the cover using the approved procedure or have the installer do so.
Restore and inspect any disturbed components before returning the vehicle to use. Contact the supplier with the part number, vehicle and wheel details, photographs and the failed clearance location. That evidence supports a fitment resolution more effectively than repeatedly repositioning the accessory without guidance.
Retain the kit instructions and tell future brake-service technicians that covers are fitted. They may need to be removed for inspection or repair and reinstalled under their own instructions afterward. Check compatibility again if the wheels or brake components change.
A previously acceptable combination does not establish fitment after a modification. Do covers improve braking or cooling?
This installation guide provides no independent performance testing, so it does not make that claim. Choose them for an appearance goal only after the safety and fitment requirements are met.
They are not a substitute for sound calipers, correct pads or normal maintenance. The successful outcome is a documented compatible kit with secure retention, verified clearances and normal brake operation.
If any of those conditions remains uncertain, leaving the cover off is the appropriate result. An optional accessory should never turn an otherwise serviceable brake into an unresolved clearance or attachment problem.


Automotive reference information. Confirm specifications in the manual for your exact vehicle. Original replacement guides link to their research sources. About us