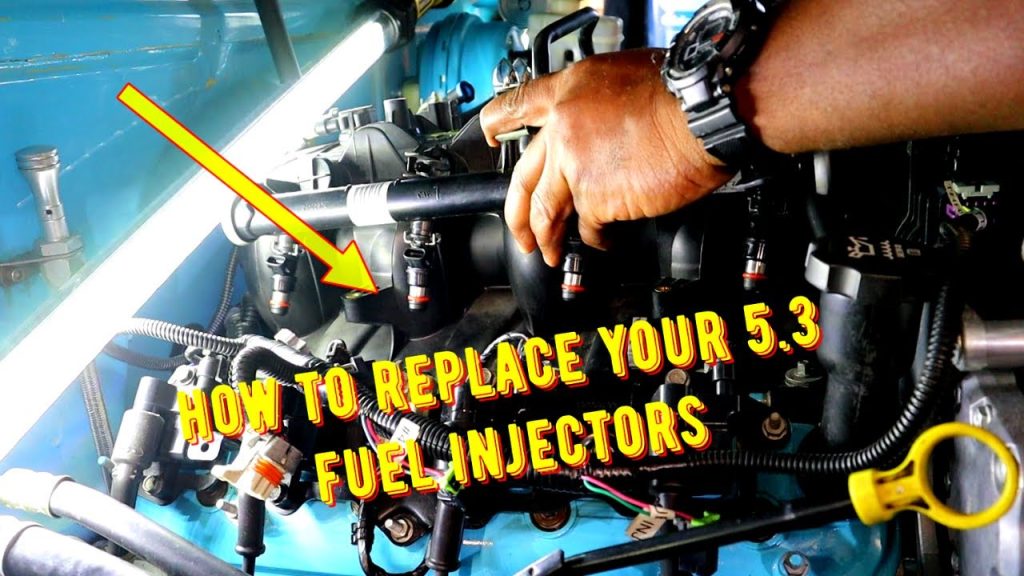

Do not start a 5.3-liter GM injector replacement from the words “5.3 Vortec” alone. Owners use that description broadly, but the correct repair depends on the actual engine, model year and injection system. Older port-injected applications and later direct-injected applications are not one interchangeable procedure.
Identify the engine code and obtain its current service information before ordering injectors, seals or tools. This guide is a planning and verification checklist, not a universal removal sequence. It intentionally does not supply one torque value, seal kit or pressure-release method for every 5.3-liter truck.
A fuel odor or persistent misfire also needs diagnosis before a parts order. If leakage is suspected, avoid repeated starts and arrange professional assessment.
Replacement should follow a confirmed finding
A rough-running 5.3-liter engine does not automatically need injectors. Ignition, mechanical condition, air leaks and fuel supply can produce overlapping symptoms. Ask which test identified an injector fault and whether it involves delivery, an electrical circuit or external sealing.
Those findings can change both the parts list and the labor required. Replacing all eight injectors solely because one cylinder has a misfire code is not an evidence-based rule.
Use the VIN and engine identification together
Record the VIN. Confirm the installed engine identification.
- Note the model year and vehicle model. Check whether the engine has been replaced or modified.
- Use the correct parts catalog for that combination. If the installed engine differs from the vehicle’s original specification, a VIN-only lookup may not describe everything now fitted.
- Ask the supplier to explain how the replacement number matches the application. A superseded number can be legitimate, but its compatibility should be traceable.
- Do not select injectors by body color, connector appearance or displacement alone. A part that plugs in is not automatically calibrated or mechanically correct.
Keep the original identification available until the repair is verified.
Separate a leak from a delivery problem
A gasoline odor can arise outside the injector’s internal metering path. A seal or another fuel-system connection may leak.
- A delivery fault can exist without an external leak. A circuit problem can prevent correct operation without establishing a blockage.
- Record what was actually found. Do not let the shorthand “bad injector” erase these distinctions.
- For certain listed GM vehicles and engines, bulletin 18-NA-137 addresses fuel odor or extended cranking associated with injector seals. Its scope is defined in the document.
- It is not a diagnosis for every 5.3-liter vehicle and should not be treated as a current parts catalog.
Verify applicability and current service information for the vehicle being repaired.

Credit: www.amazon.com
Build the parts list from the actual procedure
The list may extend beyond an injector. Access gaskets, seals, clips, fasteners or fuel pipes can have replacement requirements. Obtain the service instructions before deciding which items can be reused.
A package advertised as complete may contain only the supplier’s chosen components. Compare its contents with the vehicle procedure rather than assuming the wording covers the entire job.
Tool requirements depend on the system
An accessible port-injected rail and a direct-injection installation can require different equipment. Special seal-fitting or extraction tools may be necessary.
- Pressure-rated diagnostic equipment must match the system. A general socket set does not establish readiness for every stage of the repair.
If a required tool or setup capability is missing, arrange suitable service before dismantling.
Flow specification matters as well as fit
GM’s application-specific bulletin discusses injector flow identification and directs technicians to the parts catalog. That is an example of why visually similar injectors should not be mixed casually.
Do not use its historical part information as a universal shopping list. Confirm the current replacement and any applicable identification requirements with the correct catalog.
Keep a record of the part installed in each relevant position.
Prepare a clean and organized work area
Keep replacement parts sealed until needed. Organize removed components by location.
- Protect open fuel connections with appropriate clean caps. Keep debris away from the injector bore and rail.
- Photograph routing before disassembly when helpful. Keep labels and service information accessible throughout the work.
- Avoid placing a removed injector on a dirty bench and then returning it to a precision fuel system. Do not use a cloth that can shed fibers as an improvised internal plug.
- Cleanliness is part of the repair, not a final cosmetic step.
A contamination problem introduced during installation can obscure whether the original diagnosis was correct.
Read the complete sequence before starting
Check pressure release, access, removal, seal installation, tightening and verification instructions together. A step discovered halfway through the job may require a tool or replacement component that is not available. Planning the complete sequence reduces the temptation to improvise around a missing requirement.
Make the vehicle safe for fuel-system work
Use the specified precautions for electrical isolation, fuel pressure, ventilation and hot components. Switching off the ignition does not establish that every section of a fuel system is depressurized. Do not loosen a connection to find out whether pressure remains. Follow the prescribed confirmation method.
Do not use a universal pressure-release shortcut
Identify whether the engine uses direct injection. Recognize that its pressure arrangements differ from a conventional port-injection system.
Follow the engine’s waiting and release instructions. Use equipment rated for the relevant pressure.
- Keep ignition sources away. Never search for a high-pressure leak with a hand.
- Stop if the procedure or system condition is uncertain. Bosch’s direct-injection overview explains the different injection location and architecture in general terms.
- It is useful background, not GM-specific service authorization.
- The working instructions still need to match the exact engine.
- A video of another 5.3-liter vehicle is not sufficient evidence that the same pressure-handling steps apply.
Protect connectors and access components
Release connector locks using their intended method. Do not pull on the wiring.
Support components removed for access. Keep intake openings protected.
- Avoid bending a fuel pipe to gain space. Record hose and harness routing.
- Replace damaged retainers as required rather than leaving connections insecure. Age and previous repairs can change how easily components separate.
- If a connector will not release, inspect its locking arrangement instead of increasing force.
Damage during access can create a new intermittent fault that resembles the original complaint.
A careful repair plan accounts for that possibility without assuming every old plastic part must be replaced.
Remove only by the specified method
Follow the correct sequence for the rail and injectors. Do not lever against a vulnerable casting or force a misaligned assembly.
A seized component may need dedicated equipment. Stop before excessive force damages a seating surface or rail.
The cost of specialist removal can be lower than repairing damage caused by an improvised extraction.
Inspect what the removal reveals
- Look for evidence relevant to the original diagnosis. Check the condition of the specified sealing areas.
- Note debris or abnormal contamination. Assess damaged components before reassembly.
- Do not polish or enlarge precision surfaces merely to make a replacement fit.
- Use the cleaning and inspection limits in the service information.
Install the correct seals with the correct tools
GM’s earlier PIP5234 document illustrates that seal requirements were explicitly addressed for certain direct-injection applications.
- Later service information must be checked rather than assuming an old bulletin remains the complete instruction.
- A new injector can still require specified seal preparation.
- Do not presume every seal fitted in the box is ready for installation.
- Follow material-specific fitting and sizing instructions where required.
Tightening and alignment are application-specific
Use the specified torque. Include any required angle stage.
- Follow the tightening sequence. Replace designated one-time-use parts.
- Keep pipes and connectors correctly aligned. Do not add sealant unless instructed.
- Do not compensate for leakage by tightening beyond the specification. A wrench size tells you which tool fits, not how tight the connection should be.
- A torque value from another generation may be wrong even when the fastener looks similar.
Record the service information used for the repair.
This is especially helpful when the vehicle contains a replacement engine or aftermarket components.
Verification begins before the road test
Complete the prescribed setup and priming process. Check for leaks using the approved method. Do not proceed to a drive if the installation checks fail.
A successful engine start is only one part of verification. The repaired system must also remain safe and address the original complaint.
Restore everything disturbed during access
Confirm connectors and retainers are secure. Check hose routing and intake connections.
Account for tools, protective caps and removed parts. Complete any required electronic setup.
An unrelated connection left loose can make a correctly replaced injector appear unsuccessful.
Respond to an abnormal first start
Stop if there is fuel leakage or another concerning result. Do not repeatedly crank to overcome an unresolved problem.
Recheck the relevant procedure and installation. If the original fault may have put fuel into a cylinder or the oil, that condition needs assessment before further running.
A replacement injector does not automatically reverse prior consequences.
Keep a record that supports future diagnosis
Save the confirmed fault. Record the engine identification.
Keep the installed part numbers. Note associated seals and components replaced.
Retain any setup information. Record the final checks.
Compare the result with the original symptom under appropriate safe conditions.
For general planning across injection types, see the injector replacement workflow.
For a suspected restriction, see what injector tests can establish.
The main safeguard on a vehicle described as a 5.3 Vortec is accurate identification: the correct engine, correct parts and correct procedure must agree before the repair begins.


Automotive reference information. Confirm specifications in the manual for your exact vehicle. Original replacement guides link to their research sources. About us