Install an electric fuel pump only after confirming that it suits the vehicle’s fuel system and intended use. An in-tank replacement, an external carburetor pump and an electronically controlled injection pump are different jobs. Choosing a pump because its hose fittings fit can leave the engine with incorrect delivery or unsafe controls.
Start with the exact vehicle and pump instructions. If the job involves opening a tank, modifying plumbing or adapting an original controller, use a technician equipped for fuel-system work. This article provides a planning and acceptance checklist, not a universal tank-removal procedure.

Credit: www.craigscobras.com
Define replacement versus conversion
A like-for-like replacement restores an existing design. A conversion must account for features the original system may never have provided: electrical protection, pump shutoff, suitable plumbing and the required regulation arrangement. Treating a conversion as merely adding two wires overlooks most of the work.
Record the vehicle identification, engine and existing fuel-system configuration. Identify any prior modifications. A parts catalog based on the factory engine cannot establish compatibility with an aftermarket fuel system that has replaced it.
Match the pump to the fuel and delivery requirements
Confirm the pump’s documented fuel compatibility and application. Obtain the pressure and flow requirements from the engine or fuel-system manufacturer, including the required regulator and return arrangement. A pump’s advertised capacity is not proof that it delivers correctly in your installation.
Check whether the replacement is a motor alone or a complete assembly. The assembly may contain other vehicle-specific components, so compare the supplied part and installation requirements before dismantling the vehicle. Do not discard the old assembly until its identifying information has been recorded.
Use the prescribed mounting and plumbing
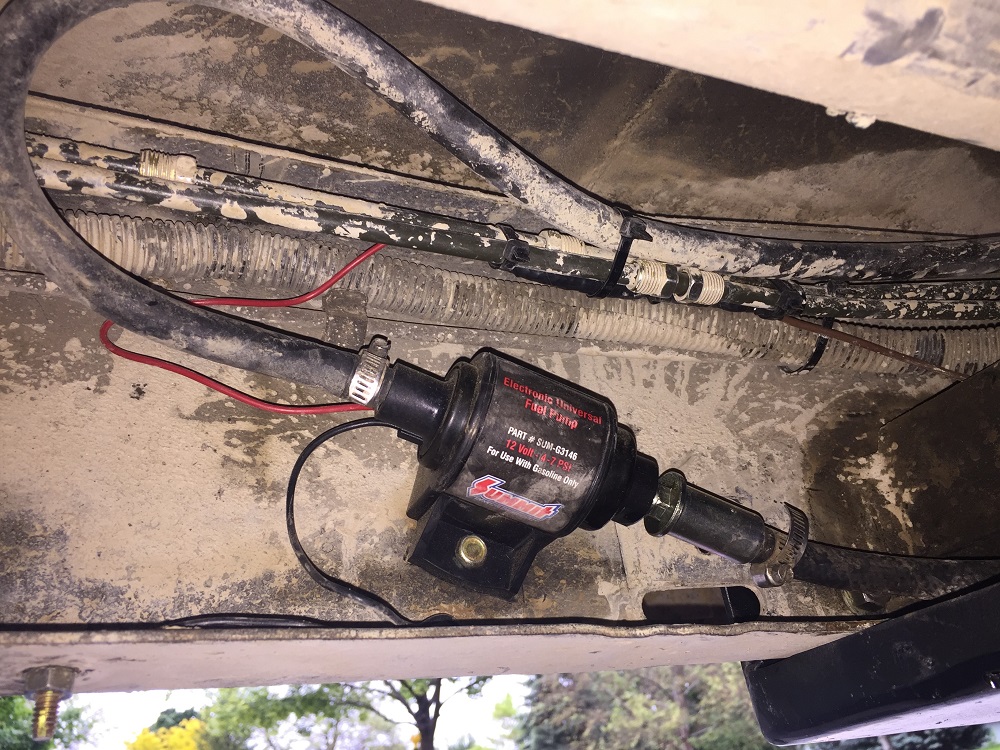
For an external pump, follow that model’s mounting position, orientation and inlet requirements. Do not generalize a mounting instruction from another pump. Holley’s pump support library separates instructions by product, which is a useful reminder that even one manufacturer has multiple installation designs.
Route approved fuel plumbing away from heat, abrasion and moving components. Confirm the correct fittings, seals and retention method. Do not adapt mismatched threads with extra sealant or force a hose onto an unsuitable connection. A fitting that starts to screw in is not necessarily compatible.
Credit: www.onallcylinders.com
Include electrical protection and shutoff controls
The wiring must meet the pump manufacturer’s requirements and preserve the vehicle’s intended safety behavior. Identify the protected supply, control method and ground before installation. For a replacement, investigate damaged connectors rather than transferring them unchanged to an expensive new pump.
A Holley electric-pump manual illustrates a safety-switch arrangement for its specified installation. That example is not permission to copy its fuse rating or wiring into an unrelated car. The separate relay planning guide explains the questions your circuit needs to answer.
Prepare for opening the fuel system
Follow the vehicle procedure for relieving pressure, isolating power and safely handling fuel. Work away from ignition sources with equipment appropriate for flammable liquid. Do not drain fuel into an improvised household container or use an inspection method that introduces sparks.
If the tank must be lowered, its safe support and the vehicle’s lifting procedure become part of the job. Stop if you lack the required equipment or cannot identify the connections. Installation shortcuts are not worth creating an unseen leak above the tank.
Commission the system before road use
Use the prescribed priming and leak-check procedure. Examine all disturbed connections and confirm the required delivery with the correct test method. Do not assume that an engine starting proves the system is correctly regulated, electrically sound or leak-free.
Check control operation as well as pressure. Resolve warning lights or faults associated with the repair instead of clearing them repeatedly. Where setup or programming is specified, complete it using the correct service procedure before treating the work as finished.

Credit: www.youtube.com
Keep a useful installation record
Save the part number, receipt, installation instructions and any measured results. For a conversion, include the wiring diagram and the location of protection devices. This makes later diagnosis possible without reconstructing the installer’s decisions.
If the vehicle still hesitates or stalls, do not immediately blame the replacement pump. Review fitment, connections, control and measured delivery. The next useful step is a documented diagnosis, not installing a larger pump without understanding the original failure.


Automotive reference information. Confirm specifications in the manual for your exact vehicle. Original replacement guides link to their research sources. About us