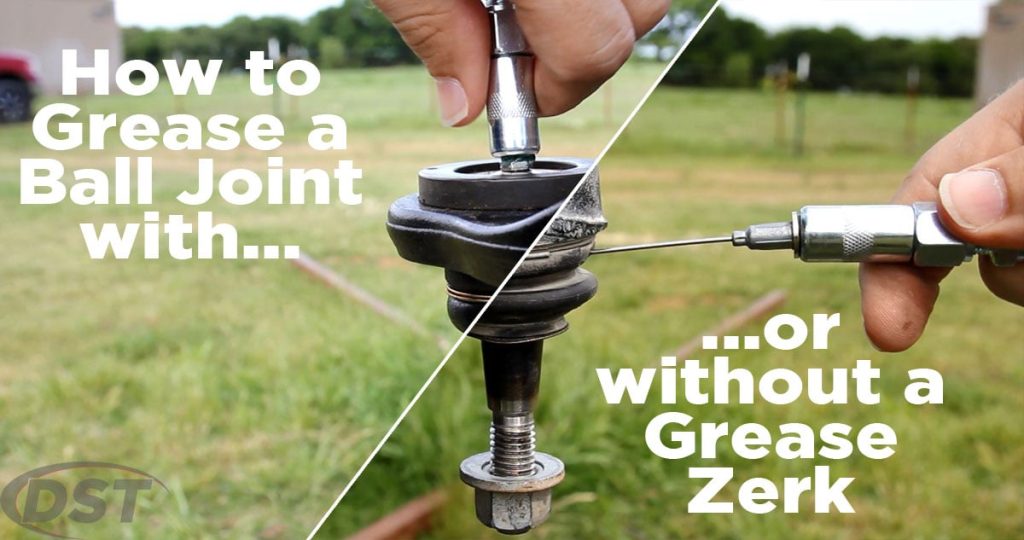

Use a grease gun on a ball joint only after confirming that the joint is designed for lubrication and identifying its correct service fitting. Load the specified grease, prime the gun according to its manual, attach the correct coupler and deliver slowly while watching the component. Stop at the joint manufacturer’s filling indication, or sooner if the boot distorts, the fitting leaks unexpectedly or pumping becomes abnormal.
There is no universal number of strokes that works for every gun and joint. This article focuses on the tool connection and delivery process. For the earlier decisions about serviceable versus sealed parts, lubricant choice and maintenance intervals, read how to grease ball joints.
A gun that pumps successfully into a container has demonstrated tool output; it has not proved that grease enters the joint when the coupler is attached. Keep those two questions separate when troubleshooting a service that seems unsuccessful.
Set up the gun and connection before pumping
Start by reading the instructions for the particular grease gun, hose and coupler. Lever guns, pistol-grip guns and powered tools do not share one loading or pressure-release sequence. The available space under a vehicle also changes what can be operated without pulling sideways on the fitting.
A flexible hose can improve access, but it still needs an undamaged connection and room to bend without kinking. Do not choose a powered gun merely because a manual one encounters resistance. Pressure capability is a tool limit, not a target pressure for a suspension boot.
Mevotech’s service guidance favors a manual gun for controlled lubrication of its covered components and cautions against rapid overfilling with powered equipment. Inspect the barrel, hose, coupler and connections before use. Do not use visibly worn, split or damaged pressure-containing parts.
- Grease under pressure can injure skin; a hand or finger is not a leak detector. Keep the outlet directed away from people when checking delivery and follow the manufacturer’s protective-equipment instructions. Milwaukee’s operator manual addresses high-pressure hazards, priming and model-specific operation.
Its instructions should be applied to the stated tool models, not transplanted as a universal battery-gun procedure. For example, the correct way to release trapped pressure must come from the tool and coupler documentation you actually have. Confirm the cartridge contents before loading the gun.
-
A familiar barrel may contain a product left from a different maintenance job. Keep dirt away from the opened barrel and use the loading method permitted by the manufacturer. Cartridge installation, bulk filling and pump loading can involve different follower or rod positions.
- Do not improvise an air-release technique by loosening a pressurized connection. If you cannot identify the gun or find its operating instructions, resolve that uncertainty before attaching it to the vehicle. A poorly primed tool makes later diagnosis harder because a handle movement no longer tells you whether lubricant is moving.
- Prime the gun safely using its prescribed procedure and confirm steady delivery into an appropriate waste container. An empty cartridge or trapped air can produce little output despite repeated strokes. Output that becomes steady after correct priming helps isolate the problem to tool setup, without pressurizing a ball joint during every trial.
- Stop the tool before approaching or adjusting the outlet. Do not touch a live outlet to check whether grease is emerging. Avoid running an unfamiliar powered tool continuously while waiting for a result; use its troubleshooting instructions and stop if delivery cannot be established.
-
Clean and protect the coupler after the check so dirt from the bench is not carried to the fitting. Identify the ball joint’s service point and make it accessible with the vehicle safely positioned. Follow the vehicle’s support requirements if lifting is needed, never relying on a jack alone.
- Do not put your body under an unsupported vehicle to reach a difficult fitting. The hose should approach without being pinched by suspension movement or requiring steering changes while hands are in the mechanism. Inspect the visible fitting and remove surface contamination before connection.
- An exterior mound of old grease may conceal the fitting’s shape or an existing leak. Cleaning it first makes the result of the new service easier to interpret. Fit the adapter specified for the actual service connection.
- A conventional coupler and a low-profile adapter are not interchangeable just because both can touch the housing. MOOG’s K3185 bulletin describes a particular low-profile passage with a specified style of needle-nozzle adapter; that is a purpose-made access point, not permission to puncture a rubber boot.
-
Do not drill, force or reshape a fitting to accept the tool at hand. If the correct adapter cannot reach, identify a suitable approved access arrangement instead of levering the housing or fitting.
- A coupling that feels awkward may be a compatibility or clearance problem rather than evidence that more force is needed. Attach and release the coupler according to its design.
- Some tools have a locking mechanism, while conventional couplers rely on their own gripping arrangement. Avoid using the hose as a lever or loading the small fitting sideways.
- Before pumping, position yourself so that the boot and connection can be observed. If you cannot see the relevant response, improve safe access or have the work performed with suitable facilities.
-
A helper should not change the steering or support position unexpectedly while the tool is connected. Controlled service depends on both a secure connection and a clear view of what filling does to the component.
- Pump slowly, pausing to observe instead of using a continuous stream. Watch for grease escaping around the coupling, at a documented relief outlet or through a damaged area.
- Those locations indicate different situations. Leakage at the coupler does not prove that the internal bearing has been lubricated.
- Stop if the fitting loosens, the hose becomes damaged or the boot visibly distorts. After completing the manufacturer’s filling procedure, release pressure and disconnect as instructed by the tool maker.
Never pull hard on a stuck hose connection simply to finish the job faster. Clean the surrounding area, inspect the boot again and record whether service was completed normally or interrupted by a fault.
Why a pump count is not a reliable filling measurement
A stroke count is useful only when the gun output and the component’s required quantity or endpoint are known. Different tools dispense different amounts, and a partial stroke is not necessarily equivalent to a full one. An air pocket, empty cartridge or leaking connection can further separate the count from the quantity entering the joint. The original amount of grease in the assembly also varies with service history and part design. These differences explain why copying another owner’s three-pump or ten-pump routine can underfill one joint and overfill another. A specified quantity from the correct instructions takes priority over an informal rule.
MOOG’s chassis service instructions describe monitoring the grease discharge and boot response on its serviceable designs. Do not turn that into a requirement to make an unrelated sealed joint purge grease. Similarly, a gun’s maximum pressure rating tells you what the tool can generate, not how much pressure a particular component needs. Filling should stop at the part maker’s defined indication, with attention to abnormal resistance or seal distortion throughout. If instructions for the installed part are unavailable, obtain them instead of treating a hard handle as the desired endpoint. A boot should not be inflated as if it were a pressure gauge.
Separate gun trouble from a blocked or damaged joint
If grease does not appear where expected, stop and identify which stage failed. A gun that produces no output when safely disconnected needs loading, priming or tool-service checks first. A gun with verified output that leaks at the coupler suggests a connection problem to resolve before continuing. A correctly matched, secure connection that still encounters abnormal resistance requires investigation of the service point and component. These observations narrow the problem; they do not by themselves prove that a ball joint is worn out. Do not jump from resistance directly to a stronger gun, a drill or a new fitting of an unknown size. The fitting, passage and internal assembly have different failure possibilities, and repair instructions must determine which intervention is appropriate. A stuck coupler is also a reason to stop. Follow the tool’s pressure-relief and release procedure rather than twisting the hose against the fitting. Do not open a pressurized hose connection or probe a suspected blockage with the tool operating. If the documented release method does not work, obtain help from the tool supplier or a suitably equipped repairer. Preventing a damaged fitting or a pressure injury matters more than completing a routine lubrication task on the first attempt. Record that service was incomplete so nobody assumes the joint received lubricant merely because the gun was attached.
Check the result without mistaking lubrication for repair
- After disconnecting, remove excess grease where the component instructions permit and inspect the visible boot and fitting. Keep lubricant off brake friction surfaces and tires, and address any contamination properly before returning the vehicle to use.
- Do not leave a hose or adapter attached as a shortcut for the next service. If a fitting or cap is damaged, note the defect and arrange the correct repair.
- A normal service record should identify the joint location, product used and any limitation, not just a broad statement that everything was greased. This gives the next technician a useful starting point if a symptom later appears.
- Grease delivery does not measure mechanical play. If the original concern was looseness, a knock or changed steering behavior, investigate it using the correct suspension inspection procedure.
The ball-joint diagnostic guide separates warning signs from confirmation. Do not use a quieter sound after lubrication as proof that a worn assembly is safe.

Credit: m.youtube.com
Nor does a torn boot become repaired because it holds some fresh lubricant for a short time. Tool success and component condition are separate conclusions, and both should be clear when the job ends.
If this was your first service with an unfamiliar gun, keep its manual and the joint instructions together. Note which coupler was required and whether access posed a problem, so the next visit does not repeat the same uncertainty.
Replace worn tool components according to their manufacturer’s requirements before another job. The useful measure of success is controlled delivery to a confirmed serviceable joint without damage, followed by an honest record of its observed condition.
It is not the amount of grease consumed, the pressure reached or the number of times the handle moved.


Automotive reference information. Confirm specifications in the manual for your exact vehicle. Original replacement guides link to their research sources. About us