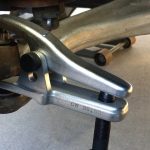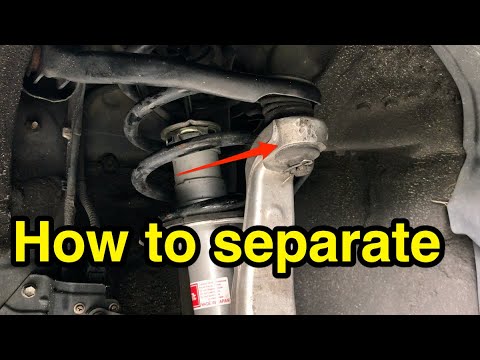

Removing a ball joint from the knuckle often means separating the joint's stud from the knuckle's receiving connection. It does not necessarily mean pressing the entire joint housing out of the control arm. Identify which component contains the housing and which connection the service procedure requires you to release. That distinction determines the tool, contact points, support and inspection needed afterward.
On a tapered-stud design, a suitable application-approved separator releases the fitted connection in the manner specified by the vehicle procedure. Other designs may use a different retention arrangement and should not be treated as tapers. Do not assume that loosening a visible nut makes every connection ready for the same tool. This guide explains the planning and inspection specific to the stud-to-knuckle interface; it does not supply universal striking points or a generic suspension-load procedure.
Keep the vehicle out of use while the connection is incomplete or its condition is uncertain. Use the required lifting, restraint and support equipment, and account for component movement when the connection releases. If the necessary procedure or tooling is unavailable, arrange qualified assistance before separation. A controlled release should preserve the parts intended for reuse and leave the knuckle ready for a meaningful inspection.
Prepare the knuckle and surrounding assembly
Read the complete service procedure for the exact vehicle and joint position. Identify whether the stud is tapered, clamped by a pinch bolt or retained through another specified design. Determine which fasteners must be removed or positioned at each stage. Do not generalize from the direction of the stud or the appearance of a nearby nut. The procedure should identify the retention and the permitted separation method explicitly. Determine how the suspension carries load before releasing the connection.
The upper or lower label alone does not establish a safe support point. Use the specified arrangement for the vehicle, including any required control of spring or arm movement. Never rely on a hydraulic jack alone. An auxiliary jack or support used for a defined task must not destabilize the main support. If you cannot identify what holds the knuckle after release, the operation is not ready. Trace the brake hose, sensor wiring, steering linkage and any driveshaft around the knuckle.
Plan the movement and support allowed by the service instructions. A freed knuckle can pull a hose or wiring lead tight if nothing else restrains it. Do not use those components as straps. If a caliper must move for access, support it independently. Avoid opening the brake hydraulic circuit unnecessarily; doing so creates additional bleeding and leak-check work.
Record the installed routing and part orientation before moving clips or brackets. Keep fasteners organized by connection. A similar-looking bolt from another suspension location may have a different specification or replacement rule. Confirm what new hardware will be needed for reassembly before the old connection is released. A missing final nut or locking device is not a reason to leave the job in a temporary state and drive the vehicle.
Decide whether the joint is being reused or replaced. Tool choice may affect whether a boot and joint remain serviceable. Do not select a destructive method solely because it is available if the plan depends on reusing the joint. Even when the joint is being discarded, the knuckle, hose and nearby parts may need to survive unchanged. Define those preservation requirements before applying the separator.
Select a separator for the actual stud connection
- Check the separator's opening, reach and intended contact surfaces against the assembly. It must fit without loading a boot, a sensor, a thin edge or an unintended part of the casting. Follow the tool instructions for operation and limitations. A product described as universal still has dimensional restrictions. Do not assume that a tool is suitable merely because its jaws can be forced into the available space. Delphi’s press-in joint example includes stud separation within a specific Honda Civic replacement sequence. It illustrates that separation is one stage of the job, distinct from pressing the housing.
It should not be copied as a general procedure for all knuckles. Our separator-tool guide examines compatibility and tool handling, while this article focuses on the receiving connection and what must remain controlled around it. Check tool condition and access before loading it. Damaged threads, unstable contact or insufficient visibility are reasons to stop. Do not stack improvised spacers or modify the tool to clear an obstruction without manufacturer support. If the correct setup cannot be achieved on the vehicle, follow an approved alternative procedure rather than assuming more force compensates for poor access.
Control release and inspect the knuckle afterward
-
Confirm that the specified stud retainer has been dealt with at the correct stage. Some procedures manage the release through a defined fastener position or restraint; follow the actual instructions rather than a universal rule to remove every nut completely at the start. Keep hands and body out of the expected movement path. A taper can release suddenly once its fit breaks.
- The knuckle and connected components must remain controlled at that moment. Apply the separator only in its intended manner. Do not add impact operation, hammer blows or extensions unless the tool instructions and vehicle procedure support that specific use. A forceful method used successfully on another knuckle may be inappropriate for a different material or construction.
- Avoid heating the receiving area as a generic shortcut. The surrounding components and their material requirements are part of the decision, not obstacles to ignore. Watch the setup for movement that was not intended. If the tool slips, the knuckle support changes or a hose becomes taut, stop.
- Safely unload the tool before adjusting anything. Do not reach into the loaded gap to reposition a jaw. Recheck the connection type and retention if the stud does not release as expected. Resistance alone does not prove corrosion; it may indicate an unsuitable contact arrangement or an overlooked feature.
- Distinguish a stuck stud from an unfamiliar component attached to it. MOOG’s knuckle-insert guidance describes applications where an insert can remain on the stud during separation. If a sleeve comes out with the joint, identify its function and the specified repair decision. Do not automatically treat it as disposable rust or force the replacement stud through the remaining opening.
- The knuckle may no longer contain all the components required for its intended fit. Once the stud releases, support the knuckle in the position allowed by the procedure. Avoid excessive driveshaft articulation or strain on lines and cables. Keep the freed joint and surrounding components from striking one another.
-
Do not leave the assembly hanging while looking for replacement hardware. If another stage of removal follows, reassess the support before releasing the next connection. Inspect the stud and receiving surface under the applicable service criteria. MOOG’s stud-fit bulletin emphasizes that damage or an unsuitable receiving taper cannot be corrected simply by installing a new joint.
- Evidence that the stud moved in service matters. Record deformation, unexpected wear or an insecure fit and obtain the supported replacement decision. A new nut tightened harder is not a repair for a damaged knuckle opening. Clean only as directed for inspection and installation.
- Do not grind, ream or reshape a taper to make a different stud fit without a specific supported repair procedure. The shape of the connection is functional. Removing visible material until parts assemble can create an apparently convenient but insecure fit.
- Likewise, do not add adhesive or improvised shims to conceal a mismatch. If the correct part does not fit, identify the reason. If the joint is intended for reuse, inspect the boot, threads and other areas exposed to the tool.
-
A joint that was satisfactory before removal may be damaged by the separation attempt. Reuse depends on the applicable criteria after the operation, not merely on the original plan. If the boot was cut or a thread deformed, address that finding before reassembly.
- Do not hide tool damage under a new nut and assume it has no consequence. If housing removal is also required, treat it as a separate operation with its own tooling and retention checks. The stud being free does not identify the housing's press direction or make a separator suitable for pressing it out.
- Our press-fit housing guide explains the installation load path, and the corresponding removal procedure must also match the assembly. Keep these interfaces distinct even when the same repair involves both. For reassembly, confirm the correct stud and receiving component combination.
- Use the prescribed hardware and seating method. MOOG’s fastener guidance explains why supplied nut geometry may be part of the intended design, particularly where inserts are involved. Do not transfer old hardware automatically or stack washers to alter the final position.
Resolve differences against the replacement instructions. Complete the specified measured tightening sequence and locking arrangement. A stud that spins during tightening needs the approved holding or seating method, not pliers on a protected surface.

Credit: www.reddit.com
Confirm that any cotter pin, self-locking nut or other retention is installed as required. Do not interpret a fitted locking device as evidence that an incorrect taper fit is acceptable. The connection must satisfy both fit and fastening requirements.
Restore all displaced lines, wiring, brackets and other components. Complete the required wheel fastening, stationary checks and alignment assessment associated with the repair. Do not road-test an uncertain suspension connection.
If a symptom remains or new steering resistance appears, stop and investigate before further use. A successful separation does not by itself establish that the complete repair is ready. Keep a record of the connection type, tool method, receiving-component condition and parts renewed.
This is especially useful if an insert or previous repair changed the expected assembly. A clear description that the stud was separated from the knuckle is more informative than saying the ball joint was removed when its housing remains installed. Accurate terminology helps the next technician understand the work completed and the checks still required.


Automotive reference information. Confirm specifications in the manual for your exact vehicle. Original replacement guides link to their research sources. About us