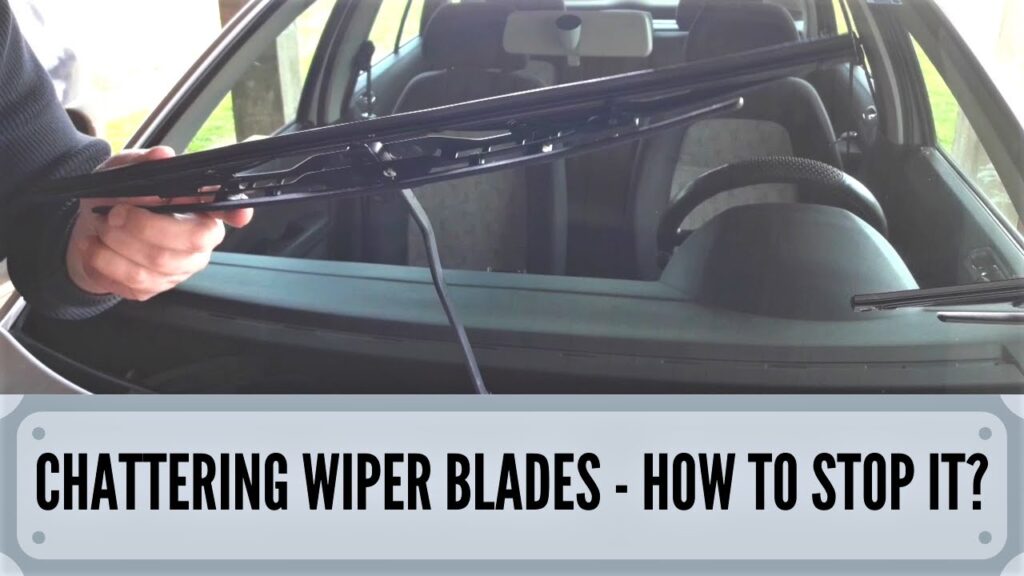

Stop the skipping by finding its cause
To stop wiper blades from chattering, inspect the rubber for damage, clean the blades and windshield with products approved for their surfaces, and verify the blade fit and attachment. Then check the result on wet glass while parked. Replace damaged or ineffective blades; have persistent contact or arm problems inspected. Chatter means repeated jumping or juddering across the glass, sometimes accompanied by a squeak. Silencing the noise alone is not the goal: the blades must clear your view. If they cannot do that during a journey, pull over where it is safe and arrange a remedy before continuing in conditions that require them.
What the chatter pattern can tell you
A useful first step costs nothing: remember when the problem began. Was it present before the latest blade replacement, car wash, glass treatment or windshield work? Note whether one blade or both are affected and whether the trouble happens throughout the sweep. These clues guide inspection; they do not identify a failed part on their own. Avoid repeatedly running the wipers just to recreate the noise on dry glass.
- Repeated jumps with a missed band: Look for damage or uneven contact in that part of the wiping edge. Dirt and deteriorated rubber can both interrupt clearing. A visible split is a reason to replace the blade, not a reason to keep experimenting with cleaner.
- Both blades became troublesome together: Include the glass surface and recently used products in the investigation. Two blades sharing one windshield does not prove they failed together. Write down the exact cleaner, washer fluid or treatment name instead of describing everything as glass cleaner.
- The problem followed a blade change: Check the application and connector before buying another set. A blade being new does not establish that it fits this vehicle or is fully secured. Our discussion of noise from brand-new wiper blades covers that narrower starting point.
- It happens mainly in light rain: Notice whether the selected wiping frequency suits the available water. A symptom that disappears on properly wetted glass is useful information, but it does not prove the rubber is healthy or that a particular coating is compatible.
Use this inspection order before replacing parts
Work in a safe parking place with the vehicle secured and the wipers switched off. Disable automatic wiping as the owner’s manual directs before touching the system. Some arms need a service position to clear the hood. Do not force them upward from their parked position. The following order separates a visibly defective blade, a surface problem and a fitting problem without assuming that every case needs the same repair.
- Check for an immediate replacement reason. Inspect the full wiping edge, including both ends. Torn rubber, loose components or an insecure connection take priority over noise diagnosis. Do not run a blade that could detach or leave a bare arm against the glass.
- Record the starting condition. Note the affected side and whether the issue preceded recent work. A short written description is enough. If safe observation is difficult, let a technician reproduce it in controlled conditions instead of leaning over an operating wiper.
- Clean both contact surfaces. A clean blade working across contaminated glass still has a contaminated contact surface. Complete the compatible cleaning process below before judging the result. Avoid adding several treatments at once, because that makes the next change harder to interpret.
- Confirm the fitted parts. Compare the blade part numbers, side assignments and adapter instructions with the vehicle application. Check the attachment with the system stopped. Correct a documented fitting error; leave uncertain arm geometry or damaged hardware for professional inspection.
- Assess the result on wet glass. Restore the arms to their normal operating position and clear hands, cloths and tools. Use the normal washer function while stationary. Stop if a blade catches, strikes something, detaches or behaves abnormally; further cycling will not establish a safe repair.
Clean the wiping edge without trying to reshape it
Cleaning is intended to remove contamination, not restore missing material or rebuild a hardened edge. DENSO’s troubleshooting advice describes mild detergent and warm water for dirt on the rubber edge. That is a useful starting reference, subject to the instructions for your particular blade and vehicle. Do not assume that every solvent permitted for one original-equipment blade is suitable for another rubber formulation or coating.
- Prepare the approved method. Read the blade packaging or maintenance instructions before choosing a cleaner. Use a clean, soft cloth rather than an abrasive pad. The separate guide to cleaning wiper blades addresses routine maintenance; here the purpose is to isolate chatter.
- Keep control of the arm. Lift it only as far as the vehicle procedure allows, support it while working and protect the glass as directed. Never assume it locks upright. A spring-loaded arm falling without its blade can damage the windshield.
- Wipe gently along the accessible edge. Remove loose residue without stretching the rubber, pulling its end from the holder or forcing the blade into a different shape. Change to a clean area of cloth so material already removed is not spread along the edge again.
- Do not scrub away the blade’s finish. Some products use a friction-reducing coating: Bosch’s Aerotwin information, for example, identifies a graphite coating. That does not establish the construction of your blade; it explains why aggressive stripping is a poor general cleaning rule.
- Complete the cleaner’s instructions. Remove or rinse residue as its label requires. Do not add oil, penetrating lubricant or rubber dressing to quiet the wipe. Unless the blade manufacturer specifically prescribes a treatment, there is no basis for treating it as a chatter repair.
- Reinspect before lowering. Cleaning may reveal a split that dirt previously obscured. Replace a visibly damaged blade rather than sanding, trimming or soaking it to change its shape. Lower the arm gently, then keep hands clear before operating the system.
Check the windshield and recent surface treatments
A windshield can look acceptable from a distance while still carrying material that interferes with wiping. Rain-X’s blade-care guidance identifies road film, oil, pollen, wax and worn repellent as possible contributors. This is a reason to inspect the surface, not proof that every water-repellent product causes chatter. The right cleaning method depends on the vehicle’s glass instructions and any coating already present.
- Choose a compatible glass cleaner. Check approval for the actual surface rather than relying on a household cleaning tip. Do not improvise with abrasive powders, steel wool, razor scraping or machine polishing to chase a noise. Obtain a product-specific procedure for stubborn contamination.
- Clean the entire swept area. Include its upper and lower boundaries, where residue can remain after a quick wipe of the middle. Use separate clean cloth surfaces for removing dirt and finishing so the last pass does not spread the same film back across the screen.
- Investigate the timing of a coating problem. If chatter began immediately after a glass treatment, review its preparation and finishing directions. For example, Rain-X Original Glass Water Repellent includes final haze removal in its application instructions. That example is not a removal procedure for another brand’s coating.
- Ask before stripping an unfamiliar treatment. Give the installer or product manufacturer the treatment name, blade type and symptom. A compatible cleaning or correction method may be available. Avoid layering a second product over the first merely to see whether the chatter disappears.
- Notice glass damage as well as dirt. A chip, crack or damaged surface in the sweep deserves assessment. DENSO’s PowerEdge maintenance guidance includes checking glass damage because it can also harm the wiping rubber. New blades do not repair damaged glass.

Credit: www.wikihow.com
Check fitment before considering arm adjustment
Blade length alone does not establish compatibility. The connection, application and intended side also matter. Use the exact vehicle, production year and relevant body or steering configuration in the blade manufacturer’s fitment information. Our explanation of why wiper blades do not fit every car separates those checks. Keep the packaging or part number until the fitted blades have been verified, especially when several adapters came in the box.
- Confirm the specified application. Compare the catalog result with both installed part numbers. Do not copy another vehicle’s lengths simply because its windshield looks similar. DENSO’s installation guidance explains using vehicle details and left- or right-hand drive in its catalog search.
- Follow the exact locking sequence. A connector partly engaged may look convincing without being secure. Use the checks provided for that fixing system. If a part requires force or the latch will not close normally, stop and recheck the application instead of modifying the adapter.
- Check preparation and orientation. Remove a transport cover if the new blade’s instructions identify one, and follow any side or direction markings. Do not peel off an unrecognized component. Also avoid treating a curved beam blade as bent merely because it does not look like a straight conventional frame.
- Leave uncertain geometry to a technician. Chatter on one sweep direction can justify further inspection, but does not tell you how far to twist an arm. Tesla’s 2017–2023 Model 3 adjustment procedure specifies a dedicated measuring tool and an angle. Those specifications are not transferable to other vehicles.
- Escalate damaged or persistent faults. Corroded hardware, a visibly distorted arm or continuing chatter with correct clean blades needs inspection. Request a check of the vehicle’s wiping system rather than authorizing blind arm bending. The useful finding is which component or adjustment is wrong, not simply that the noise exists.
Use washer fluid as a test aid, not a repair additive
A wet-glass check helps separate behavior during proper washing from behavior as the surface dries. It cannot establish that an unsuitable blade or damaged arm has been repaired. Manufacturer restrictions also differ: the current Model S owner’s manual warns against formulated washer fluids containing water repellent or bug wash because they can cause smearing, streaking or noise. Apply that instruction to the covered Model S; consult your own manual for another vehicle.
- Verify the fluid already installed. Check its label against the vehicle requirements and expected temperatures. Do not add detergent, solvent or a second additive to change how the blades slide. If an unsuitable product was added, obtain the vehicle-specific correction procedure.
- Check that washing reaches the glass. Little or no spray makes a dry wiping test misleading. If the supply is empty, frozen, leaking or not operating, address that fault before assessing blade performance. Do not repeatedly run the washer pump without an effective supply.
- Watch clearing from the driver’s position. With the car parked and the windshield adequately wetted, observe whether water clears evenly and whether jumping recurs. DENSO’s current replacement guide includes a washer-assisted final check. Do not reach outside to steady a moving blade.
- Record a limited conclusion. “Smooth during the wet stationary check” is more accurate than “permanently fixed.” Note any remaining haze or missed band. Recheck normal operation when conditions permit, without deliberately driving into rain to reproduce an unresolved visibility problem.

Credit: m.youtube.com
Decide whether to replace the blades or request service
Use the inspection result rather than a universal calendar deadline. Follow the maintenance interval for your vehicle or blades, but do not wait for that interval when the rubber is visibly damaged or wiping is ineffective. Equally, a recently fitted blade does not need to be old to be incorrect or defective. The decision should answer what remains wrong after the safe checks, rather than relying on age or price alone.
- Replace damaged rubber. A split, torn section or deteriorated wiping edge needs a suitable replacement. Cleaning cannot restore the missing edge. Inspect the other blade separately and follow any pair-replacement instruction for the application; do not assume both have identical damage.
- Replace blades that remain ineffective after appropriate cleaning. Persistent streaks, skipped areas or chatter warrant action. Confirm the replacement application first so a new set does not repeat a fitting mistake. Keep evidence of a recent purchase if a defective-product inquiry may be appropriate.
- Seek inspection when correct new blades still chatter. Supply the part numbers and explain what cleaning and fitting checks were completed. Include any recent glass replacement or coating work. This gives the technician a focused history instead of an unexplained request to keep changing blades.
- Stop using an unsafe system. A loose attachment, collision with surrounding parts or inability to clear the driver’s view needs correction before driving in conditions that depend on the wipers. A quieter noise after a temporary intervention does not override those visible defects.
What a successful chatter fix should achieve
The useful result is secure blades that move smoothly and leave a clear view during an appropriate wet check. Keep a simple record of the blade part numbers, products used and the change that resolved the symptom. If the problem returns, that record narrows the next inspection. This guide combines manufacturer maintenance guidance with a diagnostic order for owners; it does not report firsthand product testing or prescribe a universal arm angle. Where instructions differ, use those for your exact vehicle, blade and treated glass surface.


Automotive reference information. Confirm specifications in the manual for your exact vehicle. Original replacement guides link to their research sources. About us