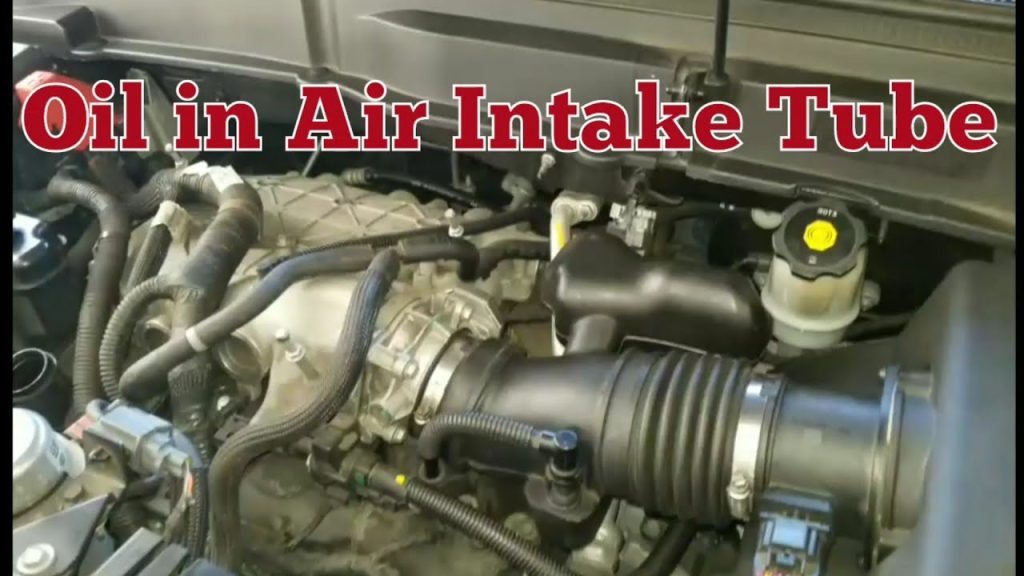

Oil inside an air-intake hose can come from the crankcase-ventilation path, but it should not be dismissed or diagnosed from a photograph alone. A light stain, fresh droplets and pooled oil are different findings. The exact hose location also matters: a duct before the turbocharger is not the same as a charge-air pipe after it.
Record what you found, check the engine’s guidance and relate it to oil consumption, smoke or running problems. Do not assume that any trace proves a failed turbocharger, and do not assume that a large accumulation is normal because a small film can occur on some systems.
If there is heavy smoke, rapid oil loss or abnormal engine behavior, stop operation and arrange assessment. This guide explains what information helps identify the source without offering a universal acceptable quantity.
Trace the oil path before blaming a component
Identify the engine and the exact section of intake. Note whether it is naturally aspirated or turbocharged. Locate any crankcase-ventilation connection using the correct diagram. Check whether the intake is original or modified.
- Distinguish oil inside the duct from oil on its exterior. Record whether the material is a film or a collectable amount. Note when it was last inspected. Include any recent oil service.
- Keep those observations together rather than reducing the finding to “oil in the intake.” Crankcase ventilation routes gases through an engine-specific arrangement that can introduce oil mist into parts of the intake. That makes location important. A stain near a ventilation connection can have a different explanation from an external leak dripping onto the hose.
-
The presence of a ventilation connection does not prove the system is functioning correctly, however. Its condition must be assessed against the vehicle’s design and specifications. GM bulletin PI0675B distinguishes normal staining from leakage on its listed LUJ/LUV applications. It also describes checks intended to prevent unnecessary turbocharger replacement.
- This is an application-specific example, not a rule that all oil in every intake is harmless. Use its scope correctly and obtain the relevant instructions for other engines. A photograph from the bulletin cannot set a universal limit for an unrelated hose or vehicle. Oil level is another basic fact to establish using the correct checking procedure.
- Record the actual result rather than estimating from how much was poured in during the last service. An apparent overfill or an unexplained rise needs investigation. Do not remove a guessed amount of oil and assume the diagnosis is complete. The reason for an abnormal level may matter as much as correcting the reading.
- On a turbocharged engine, oil found in intake plumbing does not automatically identify an internally failed turbo. Garrett explains that external system conditions can contribute to apparent turbo oil leakage. Ventilation and oil-drain conditions may be relevant to diagnosis. Replacing the turbo without addressing a contributing condition can leave the complaint unresolved.
-
Ask what tests distinguish the turbo itself from those other possibilities. An aftermarket intake, ventilation modification or added separator changes the context. Record the parts installed and how hoses are routed.
- A missing connection, restriction or unsuitable arrangement can complicate the diagnosis. Do not install another modification merely to hide oil from view. The goal is to establish correct system operation, not simply to relocate the evidence.
Inspect safely and preserve useful evidence
- Check the owner’s and service information before opening the intake. Let hot components cool and follow the specified engine-off precautions. Do not put fingers or tools near a turbocharger wheel or moving drive components. Do not run the engine with intake parts removed as an informal test. Keep dirt and loose items out of open ducting. Use appropriate support if access underneath is required.
- Stop if the inspection needs equipment or procedures you do not have. Photograph the location before cleaning, if it can be done safely. Include enough surrounding detail to show which hose is involved. A close-up of an oily finger gives little information about the source. Note whether the hose was disconnected during another repair and whether oil could have been spilled onto it. These details help avoid diagnosing an installation artifact as a developing engine fault.
-
Review the oil-consumption history. A single dipstick reading is less informative than measurements made consistently according to the manufacturer’s procedure. Record additions, distance and dates rather than describing consumption only as “a little.” Do not invent a universal acceptable consumption rate. The applicable specification and operating history are needed to interpret the record.
- Look for associated symptoms without deliberately provoking them. Smoke, warning lights, reduced power or unusual running should be documented. Their timing can matter: startup, load and idle are different conditions. None identifies the oil source by itself. A technician can choose the appropriate tests after considering the complete pattern.
- If the symptoms are severe, recovery is preferable to a diagnostic drive by the owner. Garrett’s diagnostic guidance includes checking ventilation, intake condition and oil drainage when investigating smoke or oil consumption. Those are professional diagnostic considerations, not instructions to dismantle a turbo casually. Ask a workshop to explain the finding that supports its proposed repair. A statement that the hose is oily is not enough to show which component failed.
- Do not clean every component with a general solvent. Hose materials, sensors and coatings can have different compatibility requirements. An oiled reusable filter also has its own servicing instructions; it should not be treated like a disposable dry element. Use the specified method for the actual component. Cleaning that damages a sensor or leaves liquid in the intake can create another fault.
If the hose is damaged, replace it with the correct application part and check its connections. A split or poorly secured hose may create an air leak in addition to the oil observation. The replacement should preserve the specified routing and fittings. Avoid a generic hose that fits the diameter but cannot tolerate the required conditions. See the intake-leak guide if a leak has also been identified.

Credit: mechanics.stackexchange.com
Decide what needs repair and how to verify it
A small stain without symptoms may call for an application-specific inspection rather than immediate major parts replacement. Pooled oil or a changing amount deserves a more detailed assessment. Heavy smoke or rapid oil loss changes the urgency.
Do not use one fixed volume for all engines. Do not diagnose ring wear from the hose alone. Do not condemn a turbo solely because it is nearby.
Do not block the ventilation hose to keep the duct dry. Do not remove oil-separation equipment to simplify the system. Do not assume cleaning proves the source is gone.
Compare the final result with the initial findings. Ask the repairer to separate the observed condition from the suspected cause. For example, oil collected in a specific charge-air pipe is an observation; failure of a particular component is a conclusion requiring evidence.
The estimate should explain the inspection or measurement behind that conclusion. This is especially important when the proposed repair is expensive. A clear diagnosis can prevent replacing a good component while a ventilation or drainage problem remains.
Verification should address both function and recurrence. If a ventilation fault was corrected, the relevant checks should show that the system operates as required. If oil was removed from affected plumbing, the repair record should explain the approved cleaning or replacement work.
If another fault caused smoke or poor running, it should be tracked separately. One smooth start is not a complete answer to an oil-consumption complaint that develops over distance. Keep the baseline photographs and oil-use record after the repair.
Follow any reasonable recheck instructions provided by the technician. Compare the same location under comparable conditions rather than judging a different hose as though it were the original finding. If fresh accumulation returns, report the timing and quantity as accurately as practical.
Do not repeatedly clean away evidence while postponing reassessment. Finally, distinguish oil from water and fuel-related problems. Liquid identity should not be guessed solely from color in a dark hose.
If the vehicle has recently been through water and stopped running, follow water-ingestion precautions instead of assuming the residue is ordinary ventilation oil. The right interpretation begins with the actual location, material and operating history. Those facts make the difference between a harmless-looking stain that needs context and a developing condition that needs repair. A useful recheck record identifies the same inspection point each time. Write down whether it is before or after the turbocharger, whether a ventilation branch joins nearby and how the condition was observed. Record whether the duct was cleaned or replaced between observations. Otherwise, oil left from the original event may be confused with new accumulation, or a newly inspected section may be compared with an unrelated earlier photograph. The record does not need a guessed measurement if none was taken. Descriptions such as a visible film or liquid collected during professional removal are more honest than an invented volume. Ask the technician which change would warrant returning sooner than the planned inspection. Keep those instructions with the photographs and the oil-use record.


Automotive reference information. Confirm specifications in the manual for your exact vehicle. Original replacement guides link to their research sources. About us