Can you complete the whole repair safely?
You may be able to replace a ball joint yourself if you have the correct application-specific procedure, suitable equipment and the competence to complete and verify every stage. Owning a socket set or having changed brakes does not establish those capabilities. The decision should be made before dismantling, while the vehicle can still be moved safely if appropriate. Ball-joint work can involve suspension loads, specialized removal tools, press fits and safety-critical fastening. If any essential part of the plan is unknown, resolve it or use a qualified repairer. This guide is a go-or-no-go planning check, not a universal replacement procedure. Start with a confirmed diagnosis.
A noise or vague steering complaint is not sufficient reason to dismantle a particular joint. Identify the exact corner and position, the inspection finding and the part required. Our ball-joint inspection guide explains why the test method matters. If the vehicle has aftermarket arms or other suspension changes, identify those components too. An original-equipment procedure may not describe the installed joint. A DIY decision based on the wrong application can fail before the first fastener is touched.
Read the complete repair instructions, including reassembly and final checks. Determine whether the joint is separately serviceable, how it is retained and which parts must be removed for access. Identify all replacement fasteners and retainers before beginning. A repair that requires a complete arm cannot be converted into a separate-joint repair simply because a visually similar part is available. If the instructions are incomplete, obtain the missing information rather than relying on an unrelated video to bridge the gap. The job is suitable for you only when its requirements are understood from beginning to end.
Check your support, tool and information readiness
Safe support is the first practical boundary. The vehicle and any components released during the repair need the support arrangement specified for the procedure. A jack alone is not a work support. Suspension springs and loaded components require particular care; do not assume that lifting a wheel removes every stored force. If you cannot explain how the components remain controlled when the joint separates, do not start that separation. Lack of space or a suitable working surface is a reason to change the repair plan, not to improvise beneath a vehicle. Identify the tools by application rather than by their broad names.
A separator releases a connection such as a tapered stud; a service press and adapters perform a different operation on a press-fit joint. Neither is a universal substitute for the other. Check the tool instructions, usable dimensions and intended contact points. A rental kit that is described as universal may still lack the required receiver or adapter. Confirm availability before the car is dismantled. Inspect borrowed tools for missing or damaged parts instead of assuming that a complete-looking case guarantees suitability. OTC’s ball-joint service instructions illustrate that a service tool is used with defined adapters and operating directions.
Apply only the instructions for the actual tool and vehicle combination. Do not improvise press supports from random sockets or extend a forcing screw with an unapproved drive method. If the setup cannot seat squarely and load the intended surfaces, the tool is not ready to use. Being able to make it fit loosely is not equivalent to selecting the correct equipment. A safe plan includes what you will do if the part resists removal without changing to uncontrolled force. You also need the fastening specifications and a way to apply them correctly.
That may involve torque, an additional angle, a required assembly position or replacement hardware, depending on the joint and related components. Do not use a generic internet torque or align a retaining hole by an unsupported loosening method. Read the procedure for the actual part. A final nut that feels tight does not prove that the taper, clamp or mounting arrangement is correctly assembled. If you lack the required fastening tools or access, include that in the no-go decision. Inspectability matters as much as installation.
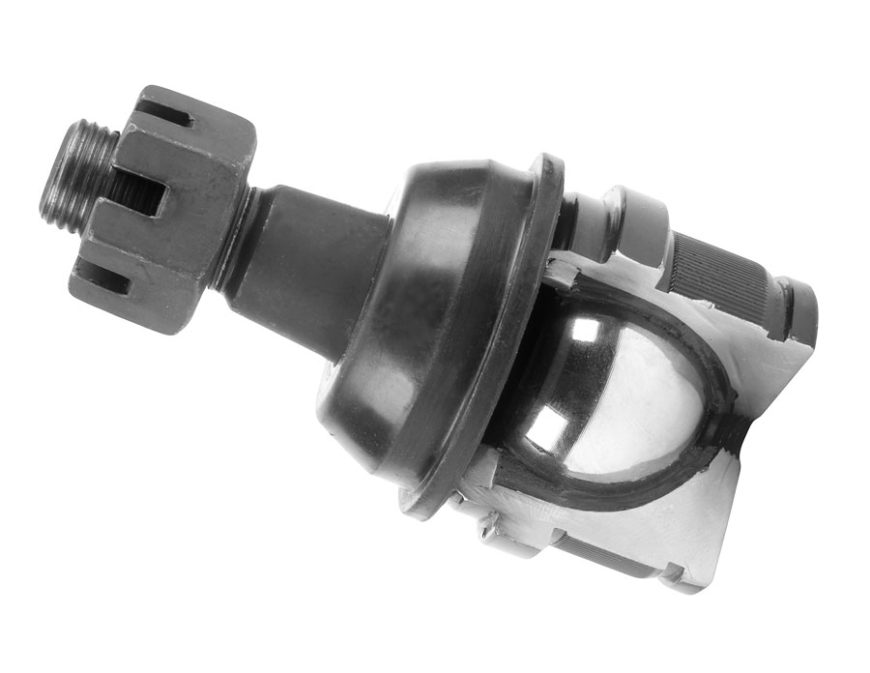
You must be able to recognize a damaged mounting bore, worn mating part, incorrectly seated joint or compromised boot and know the supported remedy. MOOG’s K500422 instructions warn about damaged mating steering-knuckle conditions for that application. This illustrates why fitting a new part is not the only judgment involved. Do not transfer its specific dimensions or procedure to another joint. If a damaged retained component would leave you unable to judge the repair, arrange professional assistance before beginning. Plan the required completion checks, including alignment-related work where specified.
Identify how the vehicle will reach that service if it cannot safely be driven. Do not assume that finishing the assembly automatically makes a road test appropriate. Steering, suspension and any disturbed brake or sensor components need their applicable checks first. If a required verification step is unavailable until another day, the repair remains incomplete until that step is addressed. A safe DIY plan accounts for this gap instead of treating it as someone else's problem. Consider the consequences of stopping midway.
Keep transport available for yourself and a recovery plan for the vehicle. Confirm that the working area can remain occupied without forcing a rushed reassembly. Parts suppliers may close before an unexpected damaged component is identified. Tool rental periods can expire while you wait. None of those pressures changes the repair requirements. A person who can perform the straightforward steps but cannot safely manage a stalled job should choose a different arrangement before dismantling starts.
Budget for more than the replacement part. Required hardware, tools, information, alignment and possible professional help all belong in the comparison. Some shops may not accept a partially dismantled vehicle or may need to repeat inspection before completing it. Ask about that contingency beforehand if it is part of your plan. Our repair-cost guide explains why an advertised part price is not the complete DIY saving. The cheapest plan on paper can become expensive if the car is immobilized with unsuitable tools.
Set specific stop conditions. Stop for unsupported spring loads, unstable vehicle support, tool misalignment, damaged retention surfaces or hardware that does not match the instructions. Stop if the replacement part cannot be verified or the installation direction is uncertain. Stop if a required measurement or final check cannot be completed. These are decision points, not signs of failure or reasons to push harder. Arranging competent assistance at that stage protects the vehicle and the person doing the work.
Credit: www.autozone.com
Decide what work belongs with a professional
A workshop is the better choice when the procedure requires equipment, support arrangements or judgments you cannot provide reliably. This can be true even for an experienced home mechanic working on an unfamiliar suspension. Professional involvement may also be sensible when corrosion or earlier damage makes the repair uncertain. Ask the shop to identify the application and scope rather than requesting a generic ball-joint swap. An estimate should state whether it includes diagnosis, the joint or assembly, required hardware and completion checks. A split arrangement is possible only if responsibilities are agreed clearly.
For example, a shop might accept a removed component for a specified press operation, but it may not assess the entire vehicle installation. Confirm what it will inspect, what it will supply and what remains your responsibility. Do not assume that a successful bench operation verifies vehicle assembly, alignment or roadworthiness. Transporting a component safely and preserving its identification are part of that arrangement. If the shop declines the work, do not reinterpret that as permission to attempt it with an improvised tool.
Experience should be judged against the actual tasks. Familiarity with wheel removal does not establish competence with spring-loaded suspension parts, and access to a press does not establish knowledge of its reaction surfaces. Conversely, a well-equipped person following the correct procedure may be able to complete a suitable application. The useful question is whether you can demonstrate readiness for every required operation and recognize when the situation differs from the instructions. Our difficulty and planning guide focuses on what makes one application more demanding than another.
Use a final go-or-no-go check before dismantling
A reasonable go decision requires a confirmed fault, exact parts identification and complete service information. It also requires stable support, appropriate tools, required hardware and the ability to inspect the retained components. Add a plan for prescribed alignment or other completion checks.
Confirm that you can stop safely if an unexpected condition appears. If any one of those essentials is missing, resolve it before proceeding. Confidence is useful only when backed by a complete plan.
Do not use an online success story as a substitute for these checks. The vehicle in the demonstration may have different joints, little corrosion or prior modifications that are not visible. Edited footage can omit preparation, mistakes and verification.
It can help you understand a procedure you already have, but it cannot supply missing application limits. Likewise, a tool seller's demonstration does not authorize using that tool on every component it appears to reach. Match the information to the installed hardware.
Before returning the car to use, document the parts fitted and the required checks completed. Retain the instructions and invoice for future maintenance or a warranty question. If a warning, noise or steering concern remains, investigate it rather than assuming that new joints rule out a problem.
DIY completion means the repair has been assembled and verified to its requirements, not merely that the old part is off and the wheels are back on. Choose professional help whenever that standard cannot be met with the resources available.


Automotive reference information. Confirm specifications in the manual for your exact vehicle. Original replacement guides link to their research sources. About us