
Check a ball joint using the procedure for the actual suspension and installed component. That means identifying the joint, applying the specified support and loading conditions, locating any abnormal movement and comparing the finding with the correct service criterion. Shaking a hanging wheel or levering beneath a tire is not a universal diagnosis. The same action can reveal different movement depending on what is loaded and which other components are free to move. This guide helps you evaluate an inspection method and its evidence. It does not give a single lifting point or allowable-play number because those would be wrong for some applications.
If you do not have the correct instructions, support equipment and measuring tools, use a qualified workshop. Never work beneath a vehicle supported only by its lifting jack. If the vehicle is unstable, has a visibly displaced wheel or a known unsafe suspension connection, arrange recovery rather than driving it to produce a clearer symptom. For a general explanation of noises, tire wear and steering changes, read our ball-joint symptom guide. Here, the question is more specific: what makes a test valid and what does its result actually demonstrate? Keeping those questions separate helps prevent an uncertain noise from becoming an unsupported parts replacement.
Identify the joint and select the inspection procedure
Begin with the vehicle identification and actual suspension arrangement. A model name alone may not identify all brake, axle or suspension options, and previous modifications can change the installed parts. Establish which corner and which joint are being checked. An upper joint, lower joint or joint in a multi-link arrangement should be identified from the correct diagram rather than inferred from a generic photograph. Record the relevant part number when it can be established safely. MOOG’s looseness guidance distinguishes load-carrying and follower-type joints. That distinction explains why inspection is not simply a matter of taking weight off the tires in any convenient way.
The procedure must place the relevant components in the condition intended for the test. Spring force can affect what movement is visible. A method that is suitable for one layout should not be copied to another merely because both have an upper and a lower joint. Obtain the applicable service criteria before starting. Determine whether the check concerns axial movement, radial movement, a wear indicator, binding, physical damage or some combination. Identify the specified points for applying force and taking a reading.
Confirm whether special tools or additional component isolation are required. If the instructions are incomplete or the part cannot be identified, that uncertainty is a reason to stop and obtain information, not a reason to substitute a familiar internet method. The service document also governs safe support. A hydraulic jack can raise a vehicle but is not a substitute for the required stands or lift arrangement. Suspension components can store or transmit spring loads, and lifting in an incorrect place can change both safety and the validity of the test. Do not disconnect a component just to make movement easier to see.
A qualified technician should determine any necessary disassembly and the controlled method for it. Ask a workshop to state the method in its report when the finding is disputed. The description need not reproduce a whole service manual. It should make clear which joint was examined and whether the required setup was used. This is particularly valuable if one inspection reported no problem and another reported excessive movement. Different test conditions can produce different observations without either report proving that the component changed overnight.
Use a pry bar or indicator only for its specified purpose
- A pry bar applies force; it does not decide what the force should be or where it belongs. The correct procedure defines the contact points and what movement should be observed. Uncontrolled levering can damage a boot, distort a component or introduce movement at another interface. A longer bar is not a more accurate test. Do not use it to push against a surface merely because that surface is easy to reach. The person observing must distinguish motion of the entire assembly from motion within the joint. If the control arm moves with a bushing, that is not automatically clearance between the ball stud and socket. If the wheel moves on its bearing, the ball joint may not be responsible.
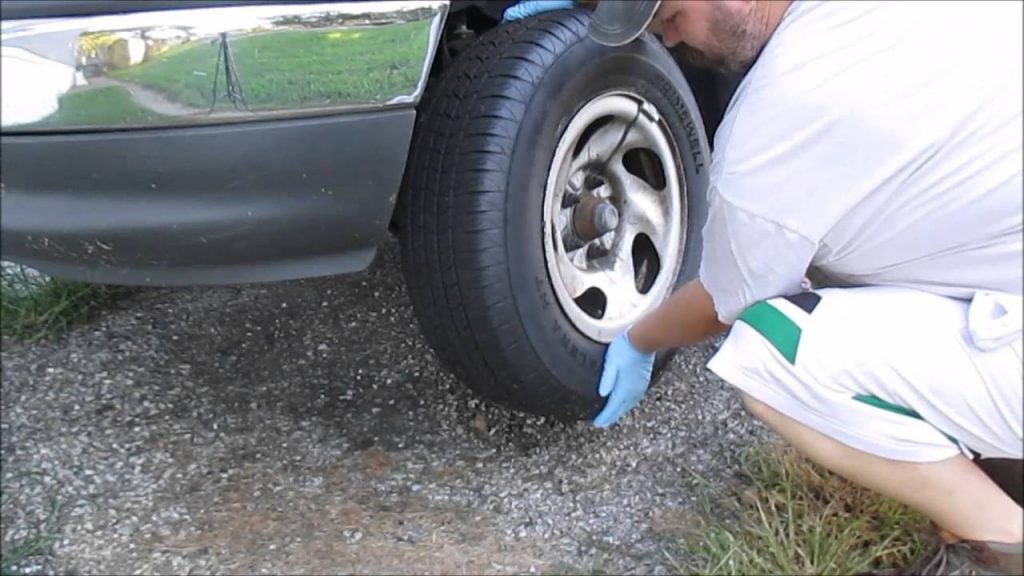
- A useful inspection watches the relevant interfaces rather than relying only on what can be felt at the tire. This is why a wheel-rocking demonstration alone may be incomplete evidence. A dial indicator can quantify movement when the procedure calls for one. Its mounting and contact direction matter. A reading taken from an unsuitable reference point can include flex or movement that does not belong to the joint being assessed. The instrument must be positioned and used according to the specified method. Recording a decimal number does not make an incorrectly arranged test accurate.
- Compare like with like when interpreting a measurement. The limit must apply to the direction, component and setup used. Do not compare a radial reading with an axial limit or use a value from a similar-looking replacement part. There is no universal amount of visible movement that condemns every joint. Nor does a general statement that some play is permitted establish that this particular assembly is acceptable. The applicable criterion and the complete condition assessment control the decision. A result near a limit requires careful measurement and interpretation, not repeated force until the preferred answer appears.
- Check the setup and instrument, then follow the service procedure for resolving uncertainty. If two technicians disagree, ask them to explain the methods and criteria rather than voting by confidence. A clear second inspection can be useful, but the vehicle must be transported appropriately if its condition is unsafe. The same discipline applies to a joint that seems tight. A lack of measurable looseness under one setup does not automatically exclude binding, damage or a problem at its attachment. The test should answer the question it was designed to answer. A negative result is useful evidence within that scope; it is not a blanket guarantee that every part of the steering and suspension system is healthy.
Inspect the boot, housing and attachments separately
- Delphi’s service guidance includes damage assessment as well as excessive free play. Look for the specific condition required by the inspection procedure rather than reducing the job to a single wheel-shake test. Protective boot damage, corrosion at a critical area or a compromised mounting connection may need attention even when no obvious internal looseness is felt. The component’s acceptable condition and available repair method matter. A torn boot and a worn joint are related concerns, but they are not interchangeable observations.
- The boot condition cannot reveal the exact internal clearance or contamination history. Do not claim that a new boot automatically restores an otherwise unassessed assembly. Conversely, do not describe an intact boot as proof that no wear exists. Record what is visible and distinguish it from what was measured or inferred. Check where the housing is retained and where the stud connects.
- A loose housing in its mounting bore is not the same as wear inside the socket. A loose stud nut can allow a different interface to move. Tightening a fastener without assessing any resulting damage may leave the problem unresolved. Our tightening guide explains that distinction and why extra torque does not restore internal bearing material. Do not remove identifying evidence unnecessarily.
- Photograph a damaged area before cleaning or changing its position if that can be done safely. Record recent service, impact history and any altered components. A repair record that simply says ball joint bad loses useful information about whether the cause was wear, attachment damage or installation error. Those distinctions affect both the repair plan and any later warranty discussion.
Turn the inspection into a defensible repair decision
The final report should identify the location, component, observed defect and criterion supporting the conclusion. If movement was measured, include the direction and relevant limit. If physical damage determined the decision, explain the affected area and why it fails the requirement. Separate confirmed findings from unresolved symptoms. A clunk can justify the inspection without becoming proof that every measured defect caused that particular noise.

Credit: www.moogparts.com
Ask which related components were inspected and what remains serviceable. Do not assume that every joint must be replaced together or that the opposite side is automatically good. An estimate should distinguish the failed part, required hardware, consequential damage and optional work. If the joint is integrated into an assembly, the repair scope should explain that rather than presenting a larger part as an unexplained upsell. Do not use lubrication to erase a finding of excessive play.
A quieter component has not regained worn material. Do not use retightening as a substitute for repairing a damaged attachment. If a repeat inspection is planned, specify what will be checked and why. Keeping an unsafe vehicle in use while waiting for a more convenient appointment is not a diagnostic method.
After repair, complete the checks required for the disturbed system, including alignment assessment where specified. Verify the original complaint separately from the installation itself. If a vibration or noise remains, reopen that diagnosis rather than assuming the replacement failed. A good inspection narrows uncertainty; it does not promise that one repaired component explains every symptom.
Keep the findings with the maintenance record. They provide a baseline for later checks and make a recurrence easier to investigate. The useful outcome is not simply a yes-or-no statement that someone shook the wheel. It is evidence that the correct assembly was examined under the correct conditions and that the repair decision follows from what was actually found.


Automotive reference information. Confirm specifications in the manual for your exact vehicle. Original replacement guides link to their research sources. About us