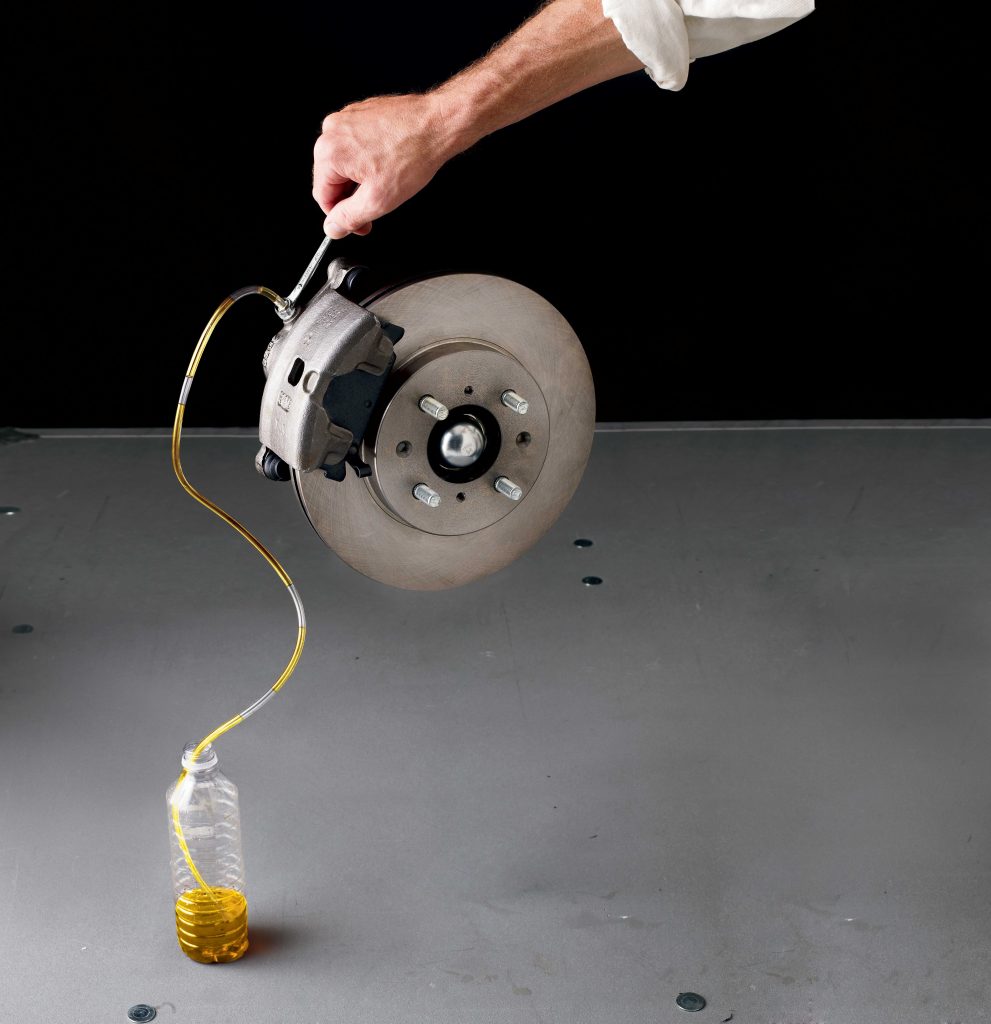

After a caliper replacement opens the hydraulic circuit, complete the bleeding procedure specified for that vehicle and repair. Do not assume that bleeding only the changed corner, starting at the farthest wheel or pumping the pedal a fixed number of times is universally sufficient. The correct sequence, equipment and any electronic routine depend on the system and what happened during the repair. Find those instructions before disconnecting the old caliper so the job has a complete path back to safe operation.
Bleeding restores the hydraulic circuit; it does not finish every check
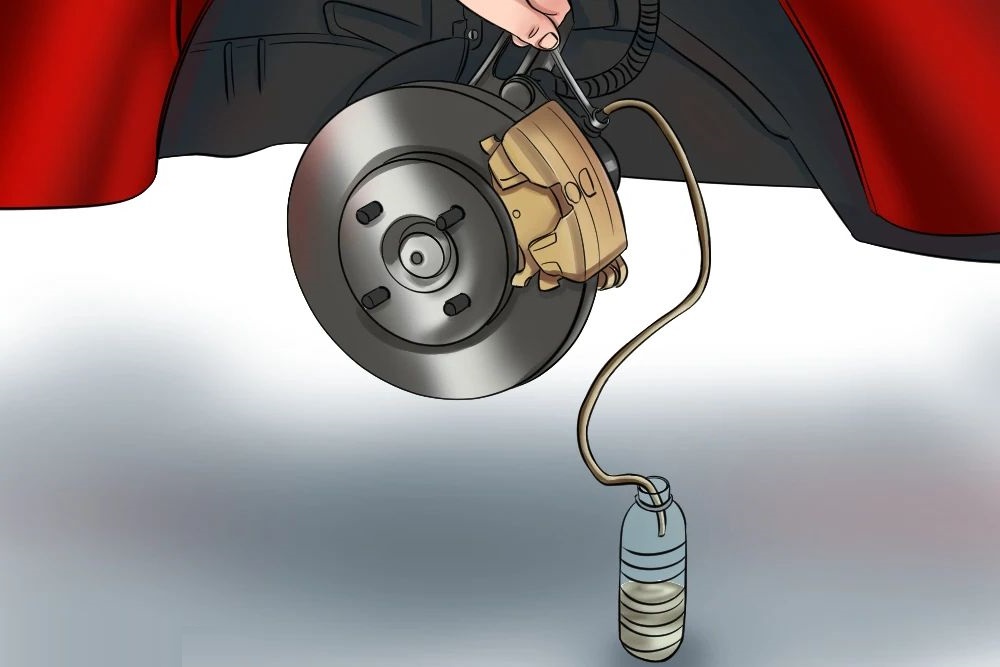
Air admitted during hydraulic work can compress when the brake is applied, changing pedal travel and response. Bleeding removes that air through the prescribed process while maintaining the required fluid supply. It is related to fluid replacement, but the reason for this service is the opened circuit and the need to restore correct operation. A small quantity of spilled fluid does not tell you how much air entered or where it is now located. HELLA’s brake-fluid guidance explains that bleeding order can vary with the vehicle and that some ABS or ESP service conditions may require diagnostic equipment. Treat a generic sequence as background rather than a substitute for the actual instructions. Also remember that bleeding cannot correct an unsuitable caliper, damaged connection or incorrect hose routing. Those installation details need to be correct before the hydraulic process can validate the repair. A clear stream at one bleeder is not proof that every part of the brake system has passed its checks.
Credit: www.brakes-shop.com
Prepare the fluid, procedure and equipment before opening the system
Identify the vehicle, brake configuration and replacement caliper. Obtain the service procedure covering the specific repair, including fluid type, bleeding method, wheel order and completion checks. Read any notes about electronic actuation, isolation or pressure before working. Some systems can operate powered components in circumstances that are not obvious from the ignition switch alone. Do not assume removing a key makes every brake system safe to dismantle. Confirm whether the permitted method uses manual assistance, a pressure device, a vacuum device or a diagnostic routine.
The equipment must suit the vehicle and the specified process. A generic scanner that reads engine codes may not support brake-service functions. If a required function or adapter is unavailable, arrange suitable service before opening the circuit. Do not discover the limitation only after the reservoir has emptied or the car has become immobile. Use the specified fluid from an appropriate clean supply and keep it protected from contamination.
Do not choose by an arbitrary higher DOT number or substitute an unrelated hydraulic oil. Have suitable collection equipment and protective materials ready. Removed fluid should not be poured back into the reservoir. Prepare the required new sealing parts and fasteners so the circuit is not left open while missing components are sourced. Inspect the replacement installation before bleeding.
Confirm the correct part and side, bleeder arrangement, hose connection, routing and support. A caliper placed incorrectly can create an air-removal problem as well as a fitment problem. Follow the application instructions for bleeder orientation and all bleed points. Do not loosen unrelated fittings to create an improvised vent. Brembo’s fitting guidance distinguishes installation, hydraulic service and final checks; the exact vehicle procedure controls your assembly.
Follow the specified sequence and keep the process controlled
Secure and support the vehicle according to its instructions, accounting for the parking-brake state and any required electronic preparation. Never rely on a jack alone while working around the wheel brakes. Keep other people from operating controls unexpectedly during the service.
Where a helper is part of an approved manual method, agree clear commands before beginning. Uncoordinated pedal operation can undermine the intended sequence and create confusion about whether a valve was open or closed at the right time. Verify the reservoir handling requirements and maintain the specified level throughout the process.
Do not allow the supply to run dry. If it does, stop and consult the recovery procedure for that condition rather than merely refilling and continuing as if nothing changed. Air may have entered additional parts of the circuit.
- The required scope can then differ from the original plan for a single-caliper replacement. Record the event so the technician understands what must be addressed. Attach the collection arrangement and operate the bleeding equipment as the service instructions require.
Use the prescribed pressure or vacuum settings where applicable; do not invent a universal setting from another vehicle. The correct adapter and seal matter as well as the indicated number. Protect painted surfaces and electrical components from fluid, and keep the area around the reservoir and fittings clean.
A tidy workspace helps prevent contamination and makes actual leaks easier to identify. Proceed through the specified bleed points and stages. A multi-bleeder caliper may need more than one point serviced in a defined order.
The presence of a conveniently accessible upper screw does not establish that every required point has been addressed. Likewise, the wheel nearest or farthest from the reservoir is not enough information to select a sequence for all modern hydraulic layouts. Follow the system’s instructions and complete every stage before declaring the process finished.
If an electronic routine is required, use equipment that supports the exact system and follow its prerequisites and prompts. HELLA’s ABS and ESP overview describes hydraulic control valves within the system, which helps explain why air-removal procedures can depend on more than the wheel caliper. It does not establish that every replacement automatically needs the same scan-tool cycle.
- The service information and the repair condition determine whether that step applies. Do not try to reproduce a diagnostic bleeding function by driving on a slippery surface and activating ABS. Observe fluid condition and air discharge as directed, but interpret them within the method being used.
-
Apparent bubbles during a vacuum process can require checking the equipment and connection as well as the hydraulic circuit. Do not assume endlessly pumping more fluid will resolve an unidentified setup problem. If expected flow does not occur, pause and investigate the procedure, supply, bleeder and system condition.
Forcing greater pressure without an approved instruction can create damage instead of useful evidence. Close and secure bleed points using the specified method and tightening requirement.
Do not use excessive torque to compensate for an uncertain seal or damaged fitting. Restore protective caps and reservoir components as required, and account for temporary plugs or equipment connections.
Clean spills by an appropriate method for the affected material. Dispose of removed fluid through a suitable waste route.
Hydraulic cleanliness remains part of the job after the last visible bubble disappears. Then perform the prescribed stationary leak and operating checks.
Confirm fluid level, pedal behavior and the repaired connections under the required conditions. Check hose routing and any parking-brake setup that was disturbed.
The caliper must apply and release correctly; a successful bleed does not establish that a guide or pad is free from binding. If the original repair concerned dragging, that release fault needs its own verification as well as the restored hydraulic response.
Troubleshoot an abnormal result before moving the vehicle
A soft, unusually long or sinking pedal after the procedure is a reason to stop and investigate. Do not drive around the block to firm it up. Check the completed installation and the applicable diagnostic instructions rather than assigning every abnormal result to residual air.
Leakage, incorrect components, an incomplete electronic procedure or another system defect can require a different response. A warning light that remains active also needs assessment before normal use. First confirm that the correct procedure was used for the actual system.
Ask whether the reservoir ran dry, whether every specified bleed point was serviced and whether the replacement caliper is correctly oriented. Review any interrupted equipment routine. These factual checks are more useful than changing fluid brands or repeating random wheel sequences.
If the problem exceeds the available equipment or competence, have a qualified brake technician take over and explain what was already done. If no fluid flows from an expected bleed point, do not immediately condemn the new caliper. The technician may need to distinguish a blocked passage, fitting issue, supply problem or incorrect setup.
Conversely, visible flow does not prove a hose releases pressure normally during operation. Treat each observation as one piece of the diagnosis.
A brake that remains applied needs the separate hose-versus-caliper assessment rather than assuming more bleeding cures all drag. Where the pedal improves but the original complaint remains, verify the remaining mechanical and hydraulic functions.
Newly installed pads may require their own manufacturer-directed bedding process, but that begins only after the brake system is ready for service. Bedding cannot compensate for leakage, trapped air or incorrect assembly.
Controlled road verification follows satisfactory static checks and the vehicle’s completion procedure. It is not the first test of whether the brakes can safely stop the car.
Keep a record of the fluid used, parts installed, bleeding method and any complication such as an empty reservoir. If a workshop completes the job, ask whether the required electronic routine and final leak and release checks were included.
This record helps a later technician understand the repair instead of inheriting only the statement that the caliper was changed. The completed outcome is a correctly installed assembly with verified hydraulic response and brake operation, not simply a container filled with old fluid or a pedal that briefly feels firmer.


Automotive reference information. Confirm specifications in the manual for your exact vehicle. Original replacement guides link to their research sources. About us