
Changing TRICO wiper blades starts with identifying the outgoing connection and the replacement product. Release the old blade using its own locking mechanism, fit the correctly selected TRICO blade as instructed and verify the lock before operating the wipers. There is no single release button or installation motion shared by every TRICO blade. A conventional front blade, an Exact Fit replacement, a Force blade and a rear assembly can need different instructions. Use the TRICO installation lookup to find the relevant vehicle or arm-type procedure. This guide explains how to organize the replacement, distinguish a complete blade from a refill and decide what to do when the expected connector is not what you find on the car.
Identify what you are changing
A complete blade replacement removes the wiping assembly from the wiper arm. A rubber refill changes only the flexible wiping element within a compatible assembly. TRICO sells both, including refills with specified rail and claw profiles. Those products require different selection and fitting procedures. Do not pull the rubber out of a newly purchased complete blade because an older repair involved a refill. If the frame or connector is damaged, replacing rubber alone does not address that fault. Our rubber-only replacement guide covers the eligibility decision; the steps here concern a correctly specified complete blade.
Credit: www.wiperbladesusa.com
Prepare the job while the old blade is still attached
Keep the packaging and instructions available until the change is finished. Take a clear photograph of the existing connector if its release is unfamiliar, and look at the actual replacement hardware before beginning. This is particularly useful when changing from one TRICO product family to another: the outgoing mechanism need not resemble the incoming one.
- Record the application: identify the vehicle year, model, market and blade position. Confirm the replacement number against that application rather than selecting only a matching length. Check driver and passenger requirements separately. A rear blade belongs to its own lookup even if its rubber appears similar to a front blade.
- Read the two relevant instructions: use the vehicle handbook for arm access and safe service position, and the blade instructions for the connector. The vehicle’s procedure controls whether the arm can be raised from its parked location. The replacement package controls which adapter or retaining pieces belong in the new assembly.
- Prepare a safe surface: park securely, prevent unintended wiper movement and keep the glass protected while you support the arm. Put small supplied parts somewhere they cannot fall into the cowl. Avoid carrying out the change in strong wind or a cramped position where maintaining control of the arm is difficult.
Complete-blade replacement sequence
1. Match the TRICO product family and connector
TRICO Exact Fit Beam is supplied with a pre-attached adapter selected for its intended application. TRICO Force uses the SWIFT connection system. These descriptions tell you why two TRICO packages may present different fitting hardware; they do not authorize swapping their connectors. Look for the exact product and arm type in TRICO’s instructions. If an adapter arrives preassembled, do not dismantle it simply because a different family’s tutorial includes an adapter change. Confirm the required preparation from the instructions accompanying your item.
2. Position and support the arm
Use any required vehicle service mode before lifting the arm. DENSO’s safe replacement guidance explains that some hoods obstruct arms in their normal parked position and warns against allowing a bare arm to hit the windshield. Raise only as directed by the vehicle maker and remain in control of it. Do not assume that reaching a particular angle means the arm will stay upright without support. A towel or pad can provide additional protection below the work area, but it does not make dropping the arm safe.
3. Disengage the outgoing blade’s retaining feature
Inspect the connection and release its latch, tab or button as specified for that blade. A hook assembly normally separates by moving the blade back toward the arm pivot after its retention is released; another connector can require a different motion. TRICO’s replacement guide explicitly distinguishes attachment mechanisms. If movement requires unexplained force, stop and identify what still holds it. Do not lever against the glass. Keep any loose piece with the removed blade until you determine whether it belongs to that disposable assembly or to the vehicle arm.
4. Install the replacement using its own fitting sequence
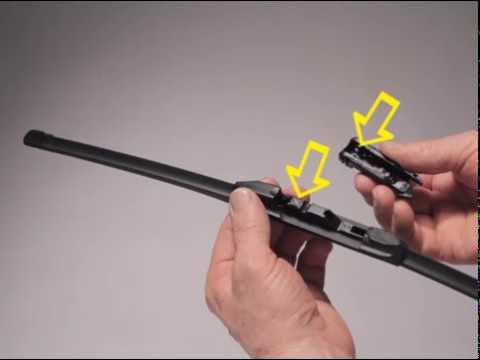
Remove any identified plastic protector from the wiping edge, then prepare only the adapter specified for the connection. Align the arm and new assembly exactly as the matching diagrams indicate. Complete each retaining step and verify the finished connection rather than relying on the sound of a click alone. The adapter must itself be secure where it attaches to the blade. If the part will not lock, recheck the application and configuration; tape, adhesive, a cable tie or a filed-down tab is not a replacement for the designed retaining mechanism.
5. Lower the fitted blade and address the next position
Lower the assembly gently to the windshield before moving to another position. This reduces the time an exposed arm is being handled while other parts are prepared. Keep the newly installed reference associated with its correct side. If the other blade has a different connector or length, repeat the identification step rather than copying the first installation from memory. For a rear blade, use the appropriate rear instructions and the vehicle’s permitted lifting movement; do not assume its arm raises or pivots like the front pair.
6. Check wiping, clearance and parking before driving
Clear the work area, return the vehicle to its normal wiper state as instructed and test with washer fluid on the glass. Observe operation at the relevant settings while parked. The blade should remain attached throughout the stroke and avoid the surrounding trim and other wiper. Check where it rests after switch-off. Stop if the assembly moves at the connector or hits anything. Do not shorten an incorrect blade to clear a collision. Poor wiping after installation calls for an inspection of fit, edge condition and glass cleanliness before assuming the replacement has solved the original complaint.
Rear blades require their own instructions
TRICO Exact Fit Rear uses connectors intended for the matching vehicle’s rear arm. The product name is a range description; it does not mean one rear blade fits every vehicle. Look up the exact application and examine the connection before releasing anything. These checks help avoid damaging a plastic rear arm while trying a front-blade technique.
- Confirm whether the rear assembly being purchased includes the whole blade or a separate insert. A small package can contain either, and its size does not settle that question. Match the supplied part to the job you intend to perform.
- Check the handbook’s limit on lifting the rear arm and any cap or access procedure. Do not force the arm farther from the glass because the front arms allowed more movement. A hard stop needs investigation rather than a stronger pull.
- Identify the rear blade’s release direction from its actual instructions. A pivoting fitting and a sliding fitting can look similar when assembled. The correct movement should come from the design, not from attempts to twist the blade until something gives.
- Verify rear sweep clearance and washer operation after fitting. A front wiper test cannot confirm the rear installation. Our front and rear blade comparison explains the selection differences in greater detail.
If a newly fitted TRICO blade performs poorly
Separate installation faults from existing vehicle or glass problems. A new edge cannot compensate for the wrong length, a damaged arm or an insecure adapter. TRICO’s blade-condition guidance describes visible damage and declining wipe quality; a symptom is a starting point for inspection, not a diagnosis of one component by itself.
- A broad unwiped patch deserves a check of the selected reference, position and blade contact. Inspect while the wipers are off. If the correct assembly still cannot contact the glass properly, obtain an arm and fitment assessment instead of bending parts by trial and error.
- Persistent lines may come from a damaged wiping edge or contamination. Check that no protective strip was left in place and that the windshield was cleaned appropriately. Do not attack a new edge with abrasives in an attempt to reshape it.
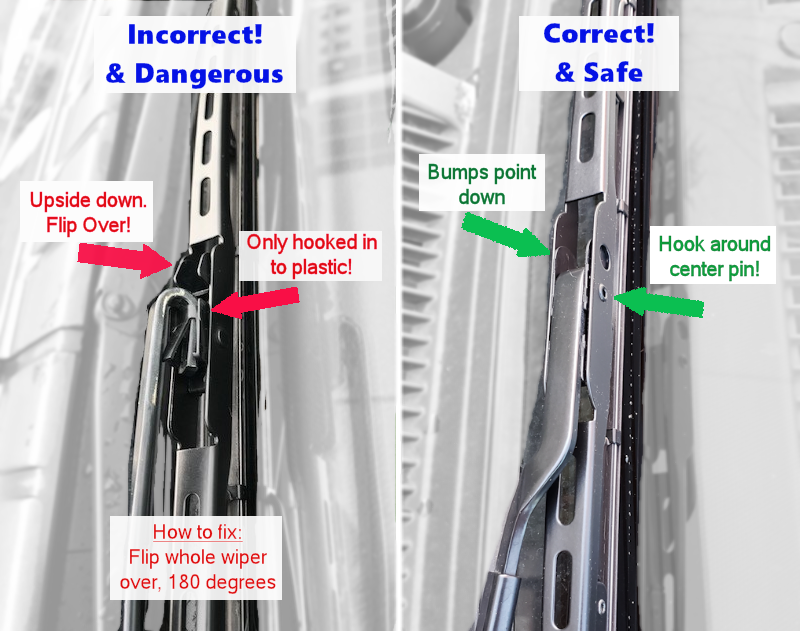
- A loose-looking connector needs immediate verification against the finished installation drawing. Distinguish the intended articulation of the blade from the lock disengaging. If the retained parts can separate during a gentle check, do not operate the wipers until the fault is resolved.
- Noise that starts only after the change should be reported with the blade numbers and conditions in which it occurs. The wiper-noise diagnostic guide helps organize that evidence without prescribing a universal arm adjustment.

Credit: www.tricoproducts.com
Keep these details for a supplier or installer
When the instructions and parts do not agree, a precise description helps more than simply saying the TRICO blade is wrong. Gather the following information without dismantling or modifying a connection that you do not understand.
- The vehicle identification details, blade position and full purchased reference. Include the product family printed on the carton so the supplier does not send instructions for a different TRICO range.
- Photographs of the arm end, outgoing connection and new adapter. Explain which step fails: release, adapter preparation, seating, retention or the operating test. Mention any damaged or apparently missing component.
- The receipt and package contents. Retain these until the issue is settled, and record the final installed reference once the correct fitting is confirmed. Do not claim the part has been successfully installed if it has only been loosely offered to the arm.
Finish with a verified fit for every changed blade
The useful result is an identified replacement that locks correctly and wipes its intended area. Keep the service date and product references so a future replacement begins with reliable information. If you have only bought refills, return to the procedure for that specific reusable assembly. If you have a complete blade, follow its connector instructions through to the operating check. Taking the time to resolve an unfamiliar fitting protects both the windshield and the replacement, and avoids carrying an uncertain connection into wet-weather driving.


Automotive reference information. Confirm specifications in the manual for your exact vehicle. Original replacement guides link to their research sources. About us