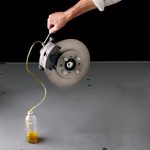

Identify how the parking brake acts before starting
Replacing a rear caliper with a parking-brake function requires the service procedure for the exact brake design. A cable-operated mechanism integrated into the caliper, an electric actuator on the caliper and a separate parking-brake arrangement do not share one removal, piston-reset or setup sequence. Identify which system is installed before ordering parts or releasing any attachment. Simply moving the dashboard switch to off is not proof that an electronic assembly is ready for service. Do not power the motor directly, force the piston or bypass a fault to make the job resemble an older mechanical design.
Start by confirming that the rear caliper is the component that needs replacement. A complaint about weak parking hold, failure to release or a hot rear wheel can involve cables, controls, electrical supply, pad fit, hydraulic restrictions or the caliper itself. The parking brake may act through a separate mechanism even though a rear hydraulic caliper is nearby. Replacing the wrong assembly will not resolve that fault. Ask what diagnostic evidence identifies the part and whether any related damage must also be addressed.
For a mechanically integrated arrangement, identify the cable connection and adjustment process from the vehicle information. Piston handling may involve a winding operation with a particular direction or positioning requirement. HELLA’s integrated-handbrake guidance illustrates why those calipers require mechanism-specific treatment. It does not mean every rear piston turns in one universal direction. Compare the actual assembly with the procedure instead of copying an instruction from a similar-looking car.
For an electrically operated arrangement, identify the supported maintenance and replacement functions. ZF/TRW’s actuator instructions require appropriate diagnostic support for the systems they describe and defer to the vehicle's service instructions. The document concerns a defined actuator repair operation, not a universal recipe for changing all rear calipers. TRW’s diagnostic-tool instructions likewise describe functions for supported systems. Tool coverage and the required vehicle procedure must be confirmed before the car is dismantled.
The useful first outcome is an identified system and a complete service plan. It should say what component is being replaced, what state the parking brake must enter, how the vehicle will be restrained while that brake is unavailable and how both braking functions will be verified afterward. If those points cannot be answered, obtain the necessary information or have an equipped repairer perform the work. A rear brake assembly is not ready for replacement merely because its mounting bolts are accessible.
Prepare the parts, instructions and equipment as one job
Record the VIN, model year, rear brake option and the installed caliper identification. An aftermarket conversion needs its own kit documentation. Confirm the correct side and whether the supplied assembly includes a bracket, guide hardware, parking-brake actuator or other components. A picture showing a complete caliper does not establish what is in the box. Determine which existing parts would transfer and whether they have passed inspection. Do not reuse a suspect actuator or damaged cable merely because the replacement casting does not include one. Check the fluid connection and all required sealing parts.
Identify mounting fasteners that must be renewed, their specified preparation and the installation procedure. Obtain the correct fluid and the equipment needed for the vehicle's bleeding process. A hydraulic caliper change opens the circuit, so bleeding is part of completion rather than an optional extra if the pedal feels poor. The separate guide to why bleeding follows a caliper change explains that distinction. Do not assume a prefilled replacement eliminates the procedure. Plan the parking-brake work before disconnecting anything. A mechanical setup may have defined cable release, piston positioning and adjustment requirements.
An electronic setup may have a supported service function, battery-condition requirements and a completion routine. Use the actual instructions for the system, including how to respond if it will not enter the required state. Do not substitute disconnecting the battery for a service command unless the vehicle procedure specifically calls for that operation at that stage. Loss of power and a commanded maintenance state are not interchangeable concepts. The vehicle must be restrained and supported by the approved method while the parking brake is being serviced. Do not rely on the mechanism you are disconnecting to prevent movement. Use the correct lifting points and properly rated support equipment, and make sure the work area allows secure support of the removed assembly.
The caliper must not hang by its hose or wiring. Plan access to connectors and retainers so they can be released without pulling on wires or stretching cables. If the job began with a seized or overheated brake, assess the pads, disc and other affected parts as part of the plan. If it began with an electrical fault, retain diagnostic findings rather than erasing them before establishing the cause. For a leaking assembly, identify the source and any friction-material contamination. A complete parts list follows those findings. It should not grow or shrink solely according to which assembly happened to be cheapest online.
Follow the model-specific replacement and completion path
Begin with the manufacturer's required preparation and system state. This may include supported diagnostic operations before a connector or actuator is disconnected. Confirm that the required state has actually been achieved, rather than interpreting a noise or dashboard change as sufficient evidence. If the function fails, stop and resolve the fault according to the service information. A failed service command is not an instruction to apply direct battery power or turn an exposed mechanism until it seems loose. During removal, keep the hydraulic, mechanical and electrical tasks distinct.
- Release the specified cable or connector retainers using their intended method. Protect locking tabs, seals and routing clips for the appropriate reuse or replacement decision. Support the caliper before its attachments are fully removed. Handle the hydraulic connection with correct containment and protection against contamination. Do not clamp a hose or improvise a plug unless the applicable instructions permit the method and equipment.
- Do not operate the pedal, parking switch or mechanical lever while the assembly is in a condition where that action is prohibited. A disassembled mechanism can move unexpectedly or be damaged. Coordinate the work so another person does not activate a control while the brakes are apart. The service instructions determine when operation is appropriate again. A generic video that skips these conditions is not a sufficient reference for a different car.
- Compare the replacement with the identified application before installation. Check part number, side, connection arrangement and package contents, and resolve mismatches before making modifications. A unit with a different-looking actuator or bracket requires an explained approved supersession, not an assumption that it will adapt itself. Brembo’s caliper fitting instructions emphasize correct application and proper installation. No amount of diagnostic resetting can make an incompatible hydraulic or mechanical assembly suitable.
Where the approved procedure transfers or replaces an actuator, follow that specific operation rather than separating it as a shortcut to piston retraction. Sealing, seating and fastening requirements matter at that interface. The ZF/TRW document is an example of component-specific instructions, not permission to reuse every old seal or pull misaligned parts together with bolts. If an assembly will not seat as required, investigate alignment and compatibility instead of increasing force. Keep dirt and moisture out of protected areas during the work.
Credit: www.reddit.com
Fit the caliper, hydraulic connection and any disturbed bracket or guide hardware using their own specified instructions. Restore hoses, cables and wiring in the intended routing without twist, tension or interference through the required movement. Fit pads and associated hardware correctly and keep lubricants off friction surfaces. HELLA’s piston-reset guidance explains why an appropriate tool and the correct movement are important when resetting is part of the job. Do not force a piston to compensate for an unfinished parking-brake preparation step.
Complete the hydraulic bleeding procedure and the prescribed leak and pedal checks. Then carry out the applicable mechanical adjustment or electronic parking-brake commissioning sequence in the order the vehicle specifies. These are distinct functions, and one does not certify the other. A firm pedal does not prove that the parking brake holds and releases correctly. A successful switch operation does not prove that air has been removed from an opened hydraulic circuit.
Before the vehicle moves, verify secure attachments, correct routing, absence of leaks and the required operating condition. Address unresolved warnings or unexpected movement rather than clearing a message and assuming the system will relearn during driving. Functional verification must cover both the original complaint and the work performed. A parking-brake hold check must be conducted through the safe prescribed method, not by experimenting on a public slope with an unverified system. If the brake remains applied, leaks or behaves abnormally, the vehicle needs further assessment and may require recovery.
When collecting the vehicle, ask which rear-brake design it has, what fault was confirmed and what setup was completed. Keep the fitted part numbers and any diagnostic or adjustment findings with the service record. This is particularly useful if only one rear caliper was replaced, because the record can identify the condition of the retained side and the verified system functions. Our article on single rear-caliper replacement addresses that scope decision. The replacement process itself remains application-specific: identify the mechanism, prepare its required state, complete the hydraulic and parking-brake work, and verify both functions before normal use.


Automotive reference information. Confirm specifications in the manual for your exact vehicle. Original replacement guides link to their research sources. About us