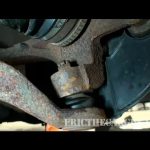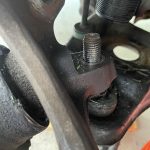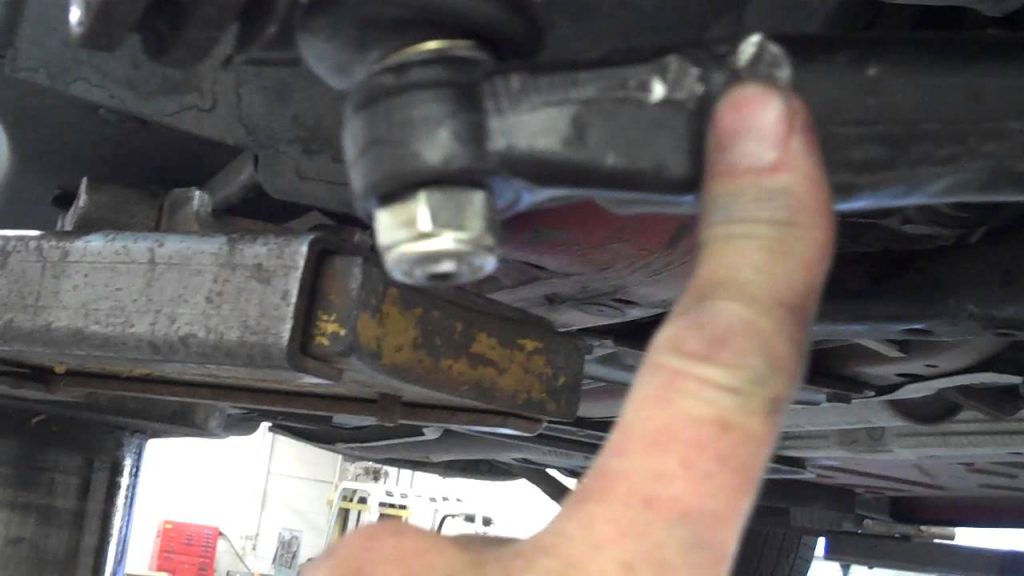

When a ball-joint stud turns with its nut, stop and determine why the nut is not advancing relative to the stud. On a tapered connection, the taper may not yet be seated enough to resist rotation, especially as a self-locking nut begins to resist turning. Incorrect hardware, damaged threads, contamination or a damaged receiving hole can also interfere. The solution is the approved seating or holding method for that assembly, followed by the specified final tightening and locking procedure.
Do not automatically use an impact wrench, grip the stud with locking pliers or lift under an arbitrary suspension point. Those shortcuts can damage parts or destabilize the vehicle without proving the connection is correct. This article concerns a stud that spins during installation, not a joint housing loose in its mounting bore or internal bearing wear. For those broader distinctions, see ball-joint hardware versus internal wear.
The vehicle must remain securely supported throughout the work. If a connection is partly assembled or its condition is uncertain, do not drive it to a workshop or try to seat it by loading the suspension on the road. Arrange suitable recovery when required. A ball joint is a safety-critical suspension connection, and completing the locking feature is not enough if the underlying fit or tightening remains unverified.
Work through fit, hardware and the specified holding method
Start by observing what actually turns. If the stud and nut rotate together, the nut is not making the intended progress on the threads. If the housing moves in its mounting bore, that is a different attachment problem. If a nut turns without advancing while the stud is stationary, investigate the threads and hardware. Describing the movement precisely prevents a seating technique from being applied to stripped threads or an insecure housing. Identify the joint and connection type from the vehicle and replacement-part information. A tapered stud, a pinch-bolt arrangement and another retention design do not share one assembly method. Check that the replacement part matches the vehicle, side and suspension option. An old part's appearance is helpful evidence but not definitive, particularly if previous work was incorrect. Do not force a taper into an opening because the stud passes through far enough to start a nut. Inspect the receiving taper and the stud as required before continuing. MOOG’s taper-fit and torque bulletin calls for a firm fit without rocking and addresses damage in the receiving component.
- A connection that was loose during driving may have damaged the knuckle even if the replacement joint is new. Additional seating force cannot restore the original geometry. If inspection shows a damaged fit, follow the supported replacement decision instead of trying to overcome it with tighter hardware. Confirm that the correct new nut and any specified washer are present. MOOG’s fastener guidance explains that supplied hardware can be part of the intended joint design, including connections involving an insert in the receiving component. Match the thread and locking arrangement before applying tools. A nut that starts roughly or binds unexpectedly should not be driven down in the hope that it will correct itself. Do not substitute a plain nut permanently just because it turns more easily than the specified locking nut. Distinguish expected locking resistance from a thread problem. A self-locking nut is designed to resist rotation, but that fact does not excuse cross-threading or incorrect hardware. Observe the point at which resistance develops and compare it with the installation instructions. Begin the fastener as directed without forcing an uncertain start.
- If the stud begins turning as the locking feature engages, return to the approved seating or holding method rather than escalating speed and torque. Look for the manufacturer's intended counterholding provision, if one is provided. The service information may specify a tool interface on the stud and a compatible way to turn the nut. Use only the identified interface and correct tool size. Do not assume that a recess, flattened area or drilled cotter-pin hole is suitable for holding torque. If a proper interface rounds or the tool slips, stop before more damage removes the remaining repair options. Counterholding and final torque measurement must both be planned. Access that allows a small holding tool and a spanner may not allow an ordinary socket in the same position. Use the service-specified tooling or an appropriate documented torque-wrench arrangement. An unaccounted-for adapter can change how the indicated setting relates to torque at the fastener. Do not replace a measured final procedure with an estimate based on hand force simply because access is awkward. Some assemblies rely on a specified seating method rather than a convenient tool recess.
- MOOG’s self-locking-nut installation example discusses methods for particular lower joints on identified Ford Super Duty applications. Its support and staged assembly instructions are evidence that seating depends on the application. They are not a universal instruction to put a jack under any ball joint, control arm or knuckle. Obtain the exact procedure for your vehicle before applying a load intended to hold the taper. Any prescribed auxiliary support must be compatible with the main lifting arrangement. It must not unexpectedly lift the vehicle off its stands or load a part that is not intended as a support point. Suspension spring forces and component geometry can make a seemingly simple seating attempt hazardous. If the available instructions do not identify the support point and controlled sequence clearly, have a qualified technician complete the installation. A jack is not a generic substitute for a missing holding tool. Do not add grease, anti-seize or threadlocker to the taper or threads unless the applicable procedure specifies it. A product appropriate at a different suspension location may change the conditions assumed for this connection.
Similarly, an added washer can change seating and locking-feature engagement rather than solve a fit problem. Follow the supplied assembly arrangement. Improvised changes can conceal the original mismatch until the vehicle is back in use. Once the stud is held or seated correctly, complete every required tightening stage and locking step. Use the specified final hardware, including replacement self-locking nuts or cotter pins where required. Do not leave temporary seating hardware installed unless it is also the prescribed final hardware. Record the specification and procedure used so that a later inspection can distinguish completed work from a nut merely pulled down until it stopped spinning. MOOG’s overtightening guidance warns about damage from excessive tightening and impact-tool use. A quick burst that appears to stop the spinning does not establish correct seating or final torque. The goal is a sound connection verified by the approved method, not winning a contest against the stud's rotation. If the assembly cannot be completed without unexplained force, recheck the part, receiving hole, hardware and procedure before proceeding.

Credit: www.reddit.com
Questions that determine whether the installation is complete
Does a spinning stud prove the new joint is defective? No. A stud may rotate before its mounting taper is properly seated, and nut resistance can make that rotation visible during assembly. However, that possibility does not prove the new part is healthy either.
Fit, threads, housing attachment and the specified inspection criteria still matter. If something feels inconsistent with the instructions, stop and verify rather than accepting either conclusion from rotation alone. Can locking pliers hold the stud? Do not clamp an unapproved surface to solve the problem.
Damage to threads, a sealing area or a boot can create a new defect. Use the manufacturer's intended tool provision or supported seating method. A tool fitting physically around a part does not establish that the surface was designed to take its force. Avoid holding through the cotter-pin hole with an improvised object.
Can the old nut be used because it turns more freely? Only follow that approach if the applicable manufacturer's procedure explicitly specifies a temporary seating stage with old hardware. The cited MOOG example is application-specific and still requires installation of the correct new final nut. It does not justify reusing a self-locking nut in the finished assembly.
Keep temporary and final hardware clearly distinguished throughout the job. Should the car's weight be used to seat the taper? There is no universal safe instruction to do that. Load direction, support location and suspension design matter.
Follow an approved procedure or use professional assistance. Do not lower an incompletely secured vehicle onto its wheels merely to find out whether the stud will stop spinning. A shifting vehicle is a larger problem than the fastener you were trying to tighten. What if the nut will not align with a cotter-pin hole?
Follow the exact torque and alignment instructions for that fastener. Do not back it off arbitrarily or add washers to achieve a convenient position. An unexpected final position can indicate incorrect hardware or a fit problem that needs checking.
The locking pin prevents a specified type of loosening; it does not replace correct clamping and seating. What if the housing turns instead of the stud? Stop and evaluate housing retention under the relevant service criteria.
That condition cannot be corrected by counterholding the stud and tightening its nut. A press-fit, retaining ring or bolted housing arrangement must be sound independently. Do not improvise adhesive, welding or staking to make a loose housing stay in place.
When is a road test appropriate? Only after the prescribed assembly, torque, locking, stationary inspection and wheel-fastening checks are complete. Include any alignment or other follow-up work required by the components disturbed.
An unresolved connection is not ready for a cautious test drive. If the original symptom involved a loose joint in service, verify that all resulting damage has been addressed before use. The most useful workshop explanation identifies what allowed the stud to spin and how correct assembly was verified afterward.
It should name a seating or holding issue, hardware problem or damaged component rather than simply say that an impact gun fixed it. Keep that explanation with the part and repair records. Correctly stopping rotation is an installation step; confirming a secure, serviceable suspension connection is the finished result.


Automotive reference information. Confirm specifications in the manual for your exact vehicle. Original replacement guides link to their research sources. About us