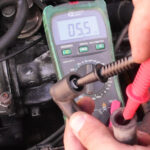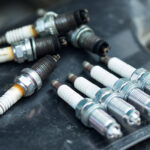

A spark plug boot is the insulating sleeve around the connection at the top of a spark plug. Depending on the ignition system, it forms the end of a plug wire or the lower portion of a coil fitted over the plug. Inside that sleeve, a metal terminal or spring provides the electrical connection. The rubber-like exterior and the conductor therefore have different jobs: one helps contain the high voltage, while the other carries it to the plug. Calling the whole piece a connector is understandable, but it can obscure what actually needs repair. A torn boot, a corroded contact and a failed ignition coil are different findings. None can be confirmed simply because the engine hesitates or because someone has recommended a tune-up.
Locate the boot by following the vehicle's ignition-system diagram, rather than assuming that every visible rubber cap belongs to a spark plug. A wire system has a high-voltage lead between the plug and a separate coil or distributor. A coil-on-plug system places the coil at the plug, often with the boot extending down a recessed well. The wiring-harness connector attached to that coil is a different connection; releasing its latch does not necessarily free the coil from its mounting. DENSO's construction guide distinguishes the spark plug terminal, the ceramic insulator and the connection through either a lead or direct-fitting coil. This distinction also explains why a boot does not screw into the cylinder head or set the electrode gap. Those are features of the plug beneath it.
The sleeve must suit the assembly's shape, temperature exposure and electrical insulation requirements. A boot that resembles the old part is not enough evidence of compatibility: its length, opening, contact arrangement and fit at the opposite end also matter. Niterra describes several ignition-lead constructions, with different conductors and interference-suppression arrangements. Do not transfer a resistance specification or a cap design from one system to another. Before ordering, identify the vehicle, engine and fitted coil or wire-set number, then use an application listing. If an aftermarket coil was installed previously, its service parts may require checking with that supplier. A catalog photograph can help explain a shape, but the application and assembly instructions decide whether the replacement belongs on the vehicle. Keep the plug part number alongside that information. A correct boot cannot make an incorrect plug terminal compatible, and a suitable plug does not establish which boot fits a previously changed coil. If the old and new assemblies differ, resolve that difference through the catalog or supplier before installation. Do not remove a terminal nut merely to make an unfamiliar connection seem to fit.
Credit: www.agscompany.com
A separate boot is not always a separate service part
Some coil-on-plug assemblies have replaceable boots, and some replacement kits include a spring or resistor as well as the sleeve. Standard lists boots and boot kits as distinct products. That establishes that boot-only repair exists; it does not mean every coil can be taken apart. Check the exact kit contents and its application before interpreting a low price as the cost of a complete repair. A missing internal contact cannot be replaced by the rubber portion alone, and a boot kit is not a new coil winding or electronic driver. When comparing estimates, ask whether the proposed part is a sleeve, a sleeve-and-contact kit, a complete ignition lead or a complete coil. The labels can sound similar while describing substantially different work.
The opposite instruction also exists. Delphi's coil-repair guidance tells installers not to disassemble the boot from the coil, citing the possibility of losing a spring or suppressor. Treat that warning as applicable guidance for the assembly being serviced, rather than overruling it because a different manufacturer sells removable boots. This is where an exact part number is more useful than a general video. If the installed coil's instructions prohibit separation, obtain the approved repair approach before pulling it apart. Conversely, finding a serviceable boot does not establish that the rest of the coil is healthy. A successful boot replacement requires both a compatible service part and evidence that repairing that part addresses the actual defect. Ease of disassembly is not a substitute for either requirement.
An inspection should describe what is present before naming the failed component. Note tears, damaged contacts, contamination and marks that may indicate an unintended discharge path; record which cylinder or location was affected. DENSO's failure discussion identifies oil leakage, water intrusion, mechanical damage and electrical-supply problems among issues that can affect ignition coils. It also stresses finding the cause before replacing a defective part. For an owner, the practical question is whether the estimate addresses the source of contamination as well as the contaminated component. Cleaning visible liquid or installing a new sleeve does not show that a leak has stopped. A workshop should distinguish a damaged boot from an internal coil fault or wiring problem rather than treating a generic misfire description as proof of one particular failure.
Marks, stuck boots and sensible handling limits
Not every discoloration means electricity has burned through the boot. NGK explains corona staining: a tan or light-brown area on the exposed upper ceramic can result from particles attracted around the high-voltage region. NGK says that normal stain should not be mistaken for combustion leakage through the plug. This is different from declaring every dark line, crack or damaged surface harmless. Photograph an uncertain mark before cleaning it and have the plug, boot and mating connection assessed together. Its location matters: residue on the external ceramic is not the same observation as deposits on the firing end inside the cylinder. Our guide to repeated spark plug fouling addresses that latter problem. Keeping the two observations separate helps prevent a normal external stain from becoming an unnecessary repair diagnosis.
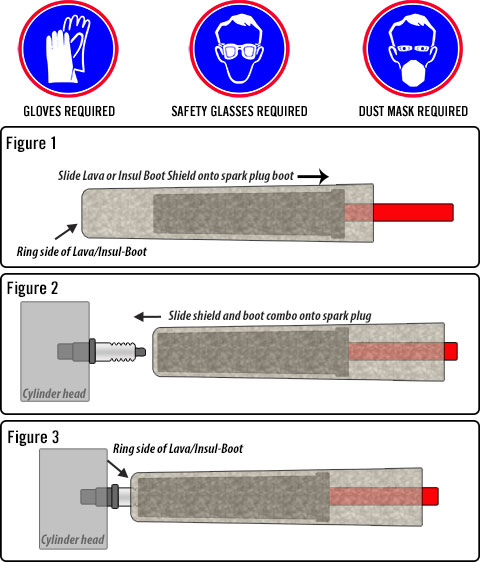
A boot stuck to the ceramic is a handling problem, not permission to pull on anything within reach. Work with the ignition disabled and the engine cooled as the vehicle's procedure requires; do not attempt a live pull-off test. NGK's wire-set instructions say to pull the boot instead of the wire, retain the original routing and replace leads one at a time. Those instructions concern the wire sets described there. A bolted coil or a linked coil assembly may need a different release sequence or dedicated puller. If the boot will not move, stop and identify what is retaining the assembly. Generic pliers, side loading or force through the harness can turn a difficult removal into damaged parts. Do not assume an online twisting or levering technique applies to a deep well, rigid extension or integrated assembly that looks different.
Dielectric grease is an installation material, not a way to rebuild torn insulation or glue a loose contact in place. Where the assembly permits it, follow the specified product and quantity. The Permatex technical sheet for its Dielectric Tune-Up Grease describes a thin application inside the boot and on the plug's ceramic with the ignition off; it also describes the product's role in reducing boot adhesion. That is product guidance, not an instruction to fill every coil cavity, lubricate all terminals or substitute an arbitrary spray. Check for a supplied coating and the component maker's instructions first. Keep boot lubrication separate from spark plug thread treatment: NGK, for example, specifies dry installation of its plated plug threads. A material suitable around one insulating surface is not automatically appropriate on the plug's threads, electrodes or the coil's electrical connectors.

Credit: www.amazon.com
What a complete repair should establish
Before reassembly, the technician needs the correct mating parts, sound insulation, the required contact components and a clean connection prepared according to the applicable instructions. DENSO's coil installation guidance warns that misalignment at the spark plug can cause damage and emphasizes the original orientation. The boot should not be used to force a mismatched assembly into place, and a mounting bolt should not become a substitute for checking alignment. Follow the specified mounting torque and connector-locking procedure rather than judging completion from appearance alone. On a lead system, preserve the firing-order connections and routing supports; on a coil system, verify the correct electrical connector and retaining hardware. These checks answer different questions. A securely latched harness plug does not prove that the high-voltage contact below the coil is seated correctly, just as a boot sitting at the right height does not prove electrical continuity.
After the repair, ask what evidence confirmed the fault and how the result was checked under the conditions that originally produced it. A replaced boot can correct a boot defect, but it cannot guarantee that every hesitation, warning light or intermittent misfire is cured. Keep the part number, cylinder location, contamination findings and any related leak repair on the service record. That makes a recurrence easier to investigate without buying the same parts again on guesswork. There is no single boot-replacement mileage applicable to every ignition design in this guide. Use the vehicle's maintenance information and the condition of the actual assembly. If the discussion expands to replacing every coil during plug service, the coil-and-plug replacement decision is a separate question involving diagnosis, access and application-specific instructions. Identifying the boot accurately is the first step; deciding the repair scope requires the rest of that evidence.


Automotive reference information. Confirm specifications in the manual for your exact vehicle. Original replacement guides link to their research sources. About us