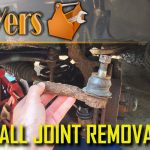
Do not assume a Volkswagen Jetta tie rod end nut is an SAE Grade 8 nut. The correct replacement is the nut specified for the exact vehicle, steering component and connection. A strength label alone cannot identify its thread, locking design, dimensions or installation requirements.
There is also no single nut specification that can safely be assigned to every Jetta generation. Identify the vehicle and the actual tie rod assembly before ordering hardware or applying a tightening value.
Grade and property class are different systems
SAE and ISO describe fasteners using different classification systems. The published scope of SAE J995 covers inch-series steel nuts. ISO898-2 addresses specified property classes for metric nuts. A metric property-class marking should not be casually relabeled as an SAE grade.
Even when two numbers look alike, that does not establish interchangeability. A replacement decision must account for the complete specification. Nor should a bolt-head marking guide be used as if it directly identified every nut design on the vehicle.

Credit: www.amazon.com
First identify which tie rod nut you need
The outer stud attachment and the adjustment locknut are separate connections. They can use different hardware and procedures. Describe the location clearly when asking a parts supplier, and provide the VIN, model year and installed part number if available.
If the tie rod was replaced with an aftermarket assembly, check its supplied hardware instructions as well. Do not assume the original nut is automatically suitable for every replacement stud. Resolve any discrepancy between the vehicle procedure and replacement-part instructions before assembly.
Why a nut that threads on may still be wrong
Starting a nut on a stud is not a complete fitment test. Thread engagement, bearing-face geometry, height and locking function can matter in addition to strength. A hardware-store substitute that appears to fit may not reproduce the intended connection.
Likewise, the wrench size does not identify the thread pitch or prove the required strength. Avoid selecting a replacement from a loose drawer by appearance. Use a confirmed part reference and obtain any required new hardware rather than trying to reconstruct a safety-critical specification from a worn nut.
Use vehicle-specific service information
Volkswagen’s erWin information search provides vehicle-based access to repair information and identifies VIN-based search options. A workshop or suitable service-information provider can use the correct vehicle details to establish the procedure and hardware requirements.
Ask for the part number and the applicable replacement instruction. If a nut must be renewed after removal, a similar-looking used nut is not an equivalent repair. If the required information is unavailable, stop before final assembly rather than adopting a torque or grade from a different model.
Do not derive torque from a grade chart
A general fastener table does not account for the complete tie rod connection. The assembly’s seating, locking arrangement and specified surface condition influence the installation method. Use the vehicle or applicable component procedure.

Credit: www.ebay.com
Do not add lubricant, threadlocker or a washer simply to make the nut tighten more smoothly unless the instructions call for it. If it binds before seating or the stud spins, investigate the installation problem. The tie rod tightening guide explains why more force is not a diagnosis.
What a reliable purchase and repair record looks like
Keep the vehicle identification, the tie rod part number, the replacement nut reference and the service procedure used. That small record is more useful than writing “Grade 8” on an invoice without specifying the application.
The practical answer is therefore to buy the correct Jetta hardware, not to upgrade to an assumed stronger generic nut. The repair is complete only when the entire connection is correctly assembled and the required steering and alignment checks are satisfied.


Automotive reference information. Confirm specifications in the manual for your exact vehicle. Original replacement guides link to their research sources. About us