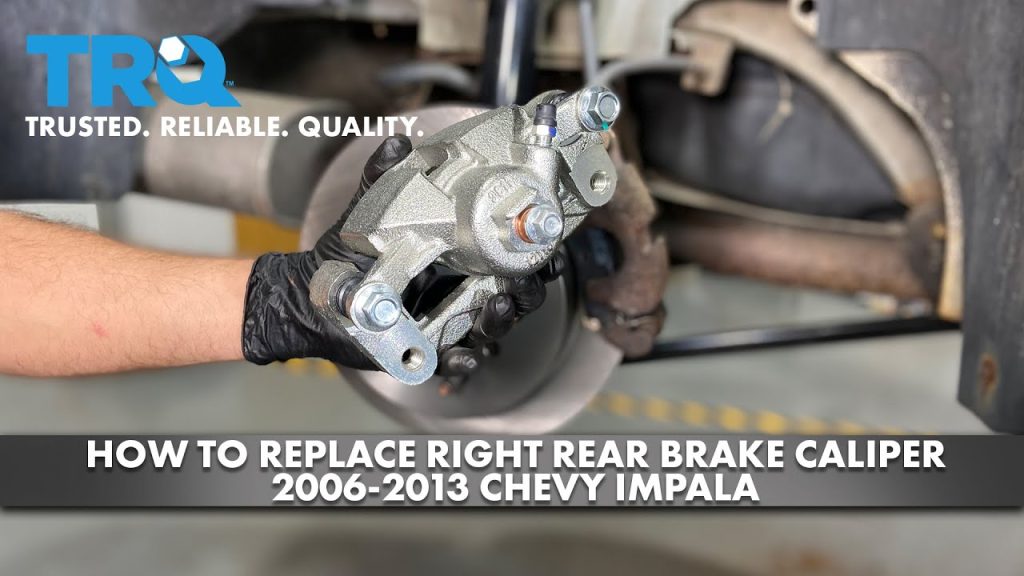

Changing a rear brake caliper is a hydraulic repair that may also involve the parking brake. The complete job includes confirming the fault, matching the replacement, following the vehicle-specific removal and installation procedure, bleeding the opened circuit and verifying both braking functions. Removing the bolts and fitting a similar-looking housing is only part of that work. A procedure for the front axle, or even another rear brake option on the same model, may omit essential steps. Before buying parts, establish whether the caliper actually needs replacement.
A dragging rear wheel can involve pad fit, guides, a parking mechanism or retained hydraulic pressure. A leak may originate at a hose connection rather than the piston. If braking is impaired, fluid is leaking or a wheel has overheated, do not drive it to confirm the diagnosis. Arrange suitable recovery and tell the repairer what happened. This article helps you plan the repair and evaluate its scope; exact torque settings, bleeding sequences and electronic commands must come from the applicable service information.
Credit: www.reddit.com
Confirm the replacement scope before dismantling
Write down the vehicle identification, brake option, affected side and the evidence supporting the diagnosis. A useful inspection report distinguishes a torn boot from an active hydraulic leak, and a seized guide from a piston that cannot move correctly. Wagner’s inspection guidance identifies hose restriction as another possible cause of brake release problems. Replacing the caliper without resolving an upstream restriction can leave the original complaint unchanged. Ask what finding rules the other possibilities in or out rather than treating heat alone as proof. Check the replacement catalogue against the actual installation. Compare mounting arrangement, disc dimensions, hose connection, parking mechanism and supplied hardware. Left and right assemblies may resemble one another but are not interchangeable merely because their bolts line up. The bleeder must be in the specified orientation for effective air removal. Brembo’s caliper fitting instructions call for application suitability to be established before replacement. Preserve the part packaging and identification until the finished installation has passed its checks. Find out what comes in the box. A replacement may include a bracket, guides, actuator or none of those items. Transferring a worn bracket into a new housing does not make its sliding and pad-support surfaces serviceable. Conversely, a sound reusable part does not need replacement simply because it is old. List each component to be transferred, inspected or renewed, including any specified single-use fasteners and sealing hardware. That prevents the vehicle being left dismantled while a small but essential part is missing. The opposite rear brake also needs inspection. Whether both calipers require replacement depends on their condition and applicable guidance, not an automatic assumption that every caliper is replaced as an axle pair. Pads and discs have their own axle-related replacement requirements. An estimate should separate the failed caliper from friction parts damaged by contamination, overheating or uneven wear. Comparing those items individually helps explain why one repair costs more than the price of a bare caliper.
Prepare the rear brake and parking system
- Identify how the parking brake operates before releasing anything. Some rear calipers have an integrated cable mechanism; others incorporate an electric actuator, and some vehicles use a separate parking-brake assembly. HELLA’s integrated handbrake-caliper guidance illustrates why this mechanism changes the service procedure. It should not be assumed that turning every rear piston clockwise or unplugging every electric motor prepares it for removal. The exact procedure may require a service mode, particular adjustment or supported diagnostic equipment. Read the complete replacement instructions before lifting the vehicle. Check whether the electronic system has precautions against automatic operation, whether a supported power supply is needed and what initialization follows installation. Releasing the parking brake changes how the vehicle is secured. Use the specified lifting and support points, suitable stands or a lift, and the required wheel restraint. Never rely on a hydraulic jack alone or on the parking brake that is about to be disconnected. Have the correct fluid, bleed equipment, torque information, clean closure fittings and waste-fluid container ready. Obtain any new hose seals or bolts specified for the connection. A collection of universal tools does not guarantee coverage for this vehicle's diagnostic functions. If the work may require ABS bleeding or a parking-brake calibration that the available equipment cannot perform, arrange that capability before opening the circuit. Finishing the mechanical assembly while leaving air removal or calibration unresolved is not a completed repair.
Remove and assess the old assembly safely
- Let hot components cool naturally before handling them. Record the existing hose and cable routing, retaining clips and electrical connector positions. Support the caliper independently when its mounting is released; the hose, cable and wiring are not lifting straps. Do not press the service pedal or command a parking actuator with the assembly removed unless the service procedure specifically requires a controlled operation with the correct restraints. Unplanned piston movement can create damage and fluid loss. Hydraulic disconnection needs cleanliness and the correct tools for the actual fitting. A banjo connection and a threaded line connection seal differently. Use approved fluid-control methods and appropriate clean caps rather than crushing a hose with locking pliers or pushing an improvised object into an opening.
- Keep debris and incompatible substances out of the circuit. Our caliper brake-line connection guide explains why identifying the connection comes before choosing a wrench or replacement seal. With the assembly accessible, assess the parts that remain on the vehicle. Look for damaged hose routing, compromised guides, abnormal pad wear and evidence of heat damage. Record discoveries that change the repair scope before installing the new part. A replacement caliper cannot repair a contaminated pad or restore a damaged disc surface. If a proposed rebuild is being considered instead, Brembo’s repair-kit information shows that supported repair parts are application-specific; their existence does not make every housing or mechanism repairable.
Install with the correct connections and orientation
- Compare the old and new assemblies without treating the old setup as unquestionable evidence of correctness. Previous work may have introduced a routing or fitment error. Follow the current application instructions for transferred brackets, guide hardware, pad placement and anti-rattle components. Keep friction surfaces free from grease and fluid. Lubricate only the locations specified for the assembly with the required compatible product. More lubricant is not a substitute for free movement or correct part dimensions. Distinguish bracket fasteners, guide fasteners and the hydraulic connection when applying tightening instructions. Each can have a different torque, preparation condition and reuse rule. Do not transfer a number from a similar-looking bolt or add threadlocker, oil or anti-seize unless specified. If threads or mounting faces are damaged, stop and obtain a supported repair decision. Tightening harder to compensate for questionable threads creates another failure path rather than confirming security. Reconnect the hydraulic line with the prescribed seals and seating arrangement. Do not stack washers to correct an alignment problem or use thread tape on a connection that seals elsewhere. Check that the hose is not twisted and that its routing remains correct through the required suspension movement. Refit cable brackets and electrical retainers in their intended positions. A connector that plugs in does not establish that the replacement actuator has been initialized or that its wiring is clear of moving parts.
Bleed, initialize and verify before returning to service
- Replacing the caliper opens the hydraulic system, so plan to bleed it according to the vehicle procedure even if very little fluid escaped. Keeping the reservoir from running empty helps limit complications but does not certify that no air entered. The specified sequence, method and any ABS-related operation take priority over a generic farthest-wheel-first rule. Use the approved fresh fluid and protect the system from contamination. Catching expelled fluid cleanly does not make it suitable to pour back into the reservoir.
- Complete the parking-brake adjustments or electronic initialization required for this installation. Service-mode exit is a specific step, not an assumption that the system will reset itself when driven. Confirm that any warning messages and fault records have been addressed appropriately. Do not repeatedly cycle an actuator against a mechanical problem in the hope that it learns a new position. The service brake and parking brake must each pass their own functional checks.
Before the vehicle moves, complete the prescribed static checks. These include pedal behavior, fluid level, leak inspection, secure fittings and correct component seating. A soft or sinking pedal, fresh wetness or unresolved warning means the work is not ready for a road test. Inspect where fluid may have collected so old residue is not confused with a new leak, while never dismissing unexplained fresh fluid. Recheck the entire repair rather than assuming the newest connection is the only possible source.
Verify wheel installation and fastening according to the vehicle specification. A professional functional check and controlled test follow only after the stationary checks pass. Any bedding procedure belongs to the installed friction components and their instructions; it is not a way to fix a dragging caliper, leak or spongy pedal. Stop further testing if abnormal behavior appears. A successful first stop alone does not establish correct release or parking-brake operation.
Keep a record of the installed part, fluid specification, hardware replaced, bleeding method and completed adjustments. Ask the workshop to identify the original defect and any secondary damage repaired. This makes later symptoms easier to interpret and gives the next technician a useful starting point. The finished result should be a verified rear brake system, not simply a new caliper visible behind the wheel. For questions specifically about opening the hydraulic circuit, see when caliper work requires bleeding.


Automotive reference information. Confirm specifications in the manual for your exact vehicle. Original replacement guides link to their research sources. About us