
Identify the joint and the sealing method first
Before disconnecting a brake line from a caliper, identify the actual joint and obtain the procedure for that vehicle and brake assembly. A flexible hose attached through a banjo fitting is different from a tube nut sealing a rigid pipe, and the visible thread is not always the surface that makes the hydraulic seal. The correct tool, renewal parts and inspection points follow that distinction. Do not begin by choosing the nearest hexagonal head and assuming it is an ordinary mounting bolt. This guide focuses on connection identification and the condition of its mating parts. It complements our hydraulic removal planning guide and the separate discussion of controlling fluid loss. Neither minimal dripping nor successful loosening proves that the joint can be reassembled safely. The connection must use the specified components, seal correctly and retain the intended routing after the work is complete.
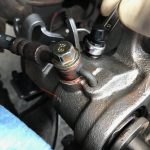
| First decide whether disconnection is necessary. Some pad or rotor service can leave the caliper hydraulically connected and properly supported. A hose should not carry the caliper’s weight, but opening a sound connection merely to move the assembly can add avoidable hydraulic work. Follow the actual service sequence. If removal or replacement does require separation, prepare the complete repair, including the correct fluid, sealing parts, protection and bleeding method, before the circuit is opened. A banjo arrangement typically has an eye-shaped hose end with a bolt passing through it and specified sealing interfaces on either side. The bolt also has a hydraulic function in that arrangement. Its thread, length and passage configuration must suit the assembly, not merely fit the hole. |
A threaded tube connection uses its designed seat and fitting geometry instead. Matching a thread diameter does not establish that the seat is correct. Use the parts information and service illustration to confirm both the fastening and sealing design. Previous repairs can complicate identification. An installed washer, adapter or fitting may be incorrect even if the connection did not visibly drip while parked. Compare the physical arrangement with the supported application information rather than copying every detail uncritically. Photograph routing and parts before disturbance as a record, but treat the manual and correct catalog identification as the reference. If the joint has been modified or its identity remains uncertain, have a qualified technician assess it before separation.
Inspect the connection as a group of matched parts
Examine the hose or pipe, the fitting, the caliper port and any specified sealing hardware as related parts. A leak can come from a damaged mating face, unsuitable seal, incorrect fastener or another defect. Tightening harder does not distinguish those possibilities. The aim is to determine which surfaces are intended to seal and whether each remains suitable for that job. The lowest wet point is not necessarily the source because fluid can travel across the assembly. For a banjo connection, account for every sealing part required by the procedure. Old washers can remain against a mating face and be overlooked when new components are brought to the joint. Do not stack additional washers to resolve a mismatch or change hose orientation. The required material, dimensions and renewal rule come from the application. A washer that looks close in size is not a verified substitute.
Inspect the specified contact surfaces for damage without grinding them to obtain an apparently clean finish. For a tube fitting, distinguish the nut’s fastening role from the designed sealing seat. Do not add thread tape or an arbitrary sealant to make an uncertain connection seem secure. Seat damage, incorrect flare or an incompatible adapter needs the correct repair rather than chemical compensation. A tube nut that turns while twisting the pipe is a stop condition. Continuing can damage the line even if the wrench remains engaged. Corrosion may expand the job into an approved pipe or hose replacement. The flexible section also deserves inspection beyond its end fitting. HELLA’s brake-hose guidance addresses damage and the need for routing without twisting, strain or unwanted contact. This supports inspecting the complete hose and its retainers instead of only the joint being opened.
A new sealing washer cannot restore a damaged hose. Conversely, an intact exterior does not prove every internal flow characteristic is sound if the original complaint concerns brake release. Keep that diagnostic question separate from connection assembly. Compare the replacement caliper port and new components with the specified application before the old assembly is fully removed. Confirm the side, connection style and required orientation. A bolt that bottoms out can feel tight without clamping the intended sealing faces correctly. An adapter that changes the hose’s direction can create clearance problems elsewhere. Resolve discrepancies through the manufacturer or correct parts source rather than forcing components together. The identification stage is where such problems are least costly to correct.
Disconnect only with a complete reconnection and test plan
Use the vehicle’s safe support and restraint procedure and observe any powered-brake isolation or electronic service requirements. Do not assume the ignition switch alone establishes that every brake circuit is inactive. Allow hot components to cool and protect the work area from fluid.
Keep brake dust controlled rather than blowing it into the air. A hydraulic repair requires a clean, stable setup before the first fitting is loosened. Have the exact replacement sealing parts ready, along with suitable clean caps or plugs where the procedure calls for temporary protection.
A random screw or cloth stuffed into a port is not a substitute. The temporary item must protect the opening without damaging the seat or introducing contamination. Account for each protective piece during reassembly so nothing remains where it should not.
- Temporary closure does not create a usable brake circuit for driving with a component disconnected. Select a tool that matches the actual fitting and permits controlled engagement.
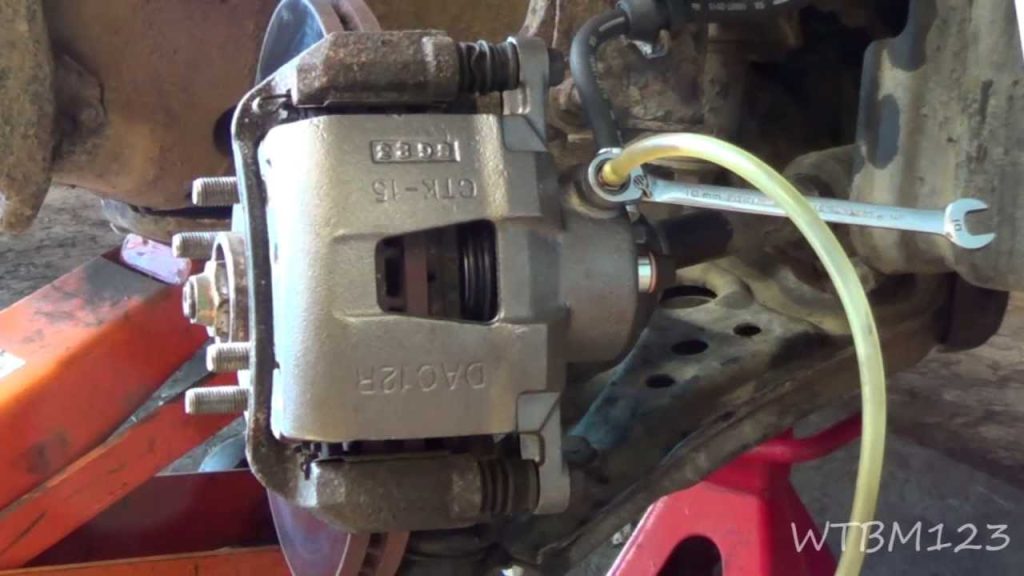
- A line wrench may be appropriate for a tube nut, while a banjo bolt requires a different setup. The tool name alone does not establish the correct size or access.
-
Stop if the head starts rounding, the pipe twists or the tool cannot seat properly. Do not transfer force through the hose to compensate for poor access.
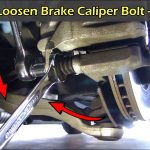
- Support the caliper independently and follow the removal sequence specified for the assembly. Contain fluid as the connection separates and prevent dirt entering either side.
-
Do not pour collected fluid back into the reservoir. Follow the manual’s reservoir-handling requirements and do not allow an unintended loss to expand unnoticed.
- Do not use locking pliers or an improvised clamp to crush the hose in an attempt to make the job dry. This guide does not prescribe a hose-isolation technique.
- Use the applicable service method, or leave the work to a technician equipped to complete it safely. Once separated, inspect the actual interfaces with suitable visibility.
-
Confirm that old seals are removed where required and that the specified mating surfaces are clean and undamaged. Do not pick at a sealing seat with a tool that can score it.
- If damage is found, establish the approved repair or replacement before proceeding. A new seal should not be used to conceal a questionable surface.
- The correct inspection limit comes from the component information, not a universal visual rule. Keep removed parts identified until the condition has been documented.
-
If a supplier or repairer needs to assess a suspected defective component, avoid altering it unnecessarily. A photograph of the fitting and its mating part can help explain a finding.
- Record any unusual adapter, old stacked seal or damaged thread rather than silently reproducing it. These details support a correct repair and a useful service history.
- Install only the specified components in their intended order and orientation. Start threaded parts correctly and stop if engagement is abnormal.
-
Do not use tightening force to pull a misaligned hose end into position. Apply the actual torque and any associated procedure for that connection.
- A nearby mounting bolt’s setting is irrelevant to a hydraulic sealing joint. Brembo’s fitting instructions illustrate why hydraulic reconnection and subsequent checks belong within a complete application-specific repair.
- Restore the hose routing and all required retainers, then check the specified clearances through the relevant steering and suspension movement. A stationary leak-free joint can still be incorrectly routed.
- Look for twist, tension, rubbing or contact with heat sources according to the vehicle procedure. Do not move a safety component out of its designed location to make an unsuitable replacement hose fit.
- Correct routing is part of the repair outcome, not a cosmetic preference. Complete the required bleeding process and stationary leak checks before the vehicle moves.
-
Opening the joint can admit air even when very little fluid is lost. The vehicle’s system determines the sequence and any diagnostic-tool requirements.
- An abnormal pedal, unresolved warning or visible leak means further work is needed. Driving to see whether the connection seals under use is not an acceptable test method.
Verify brake application and release in addition to the hydraulic connection itself. If the original complaint involved a dragging wheel, reconnecting a hose does not by itself establish the cause has been corrected.
If pad or caliper work was also performed, complete the related mechanical and parking-brake checks. Controlled road verification follows satisfactory static checks.

Credit: mechanics.stackexchange.com
Keep the distinction between a sound connection and a fully repaired braking system clear. Ask for an itemized explanation if corrosion or damage expands the job.
The FTC’s repair guidance supports obtaining clear estimates and records of the work. A useful report identifies the connection type, failed interface, renewed parts and final checks.
The successful result is a matched, correctly sealed joint with sound routing and verified brake operation. It is not simply a fitting that came apart without breaking or a repair that happened to spill very little fluid.


Automotive reference information. Confirm specifications in the manual for your exact vehicle. Original replacement guides link to their research sources. About us