
When a brake-caliper bolt will not loosen, pause before increasing force. Confirm which fastener you are working on, how its thread is meant to release and whether the tool fully engages it. Then determine whether the resistance comes from the threaded connection, a rotating guide component, damaged hardware or an unsuitable working position.
Those situations can feel similar through a wrench but require different responses. A longer handle does not answer any of those questions. This guide addresses a resistant fastener during a planned brake repair.
It does not supply a universal extraction recipe or a torque threshold at which every bolt should move. The vehicle and brake-component instructions govern removal, supported recovery methods and replacement hardware.
| If the attachment is already loose, missing or damaged while the vehicle is in use, stop driving and arrange assessment. That is a mounting failure, not a reason to finish tightening an unidentified bolt by feel. |
Successful removal means more than getting the head to turn. The surrounding bracket, receiving threads, guide surfaces, hose and wiring must remain serviceable, and the assembly needs a correct installation afterward.
Before starting, establish how the job will be completed if the old fastener is damaged or cannot be reused. A repair plan that depends on saving every old part regardless of its condition can encourage unnecessary force and poor substitutions.
Establish what is resisting and what may safely move
Start with the service illustration for the actual vehicle and brake package. Distinguish a guide fastener from a bracket mounting bolt, pad-retaining hardware, body hardware and a hydraulic connection. Nearby hexagonal heads can have very different functions. A hose bolt opens the fluid circuit; a body fastener may not be intended for routine pad service. Confirm that the selected connection actually needs removal for the work you are doing. Extra dismantling can create a second repair without helping the first.
Check thread direction using the applicable instructions and a clear view of the fastener. For the ordinary right-hand-thread case, rotation is judged while facing the head along the bolt axis. Reaching from behind can make that movement look reversed. Do not decide direction from which side of the car you are servicing, or conclude that a bolt is reverse-threaded because it is stubborn. Our thread-direction guide explains that orientation issue. Direction must be settled before resistance becomes an excuse to alternate between tightening and loosening.
Inspect the drive feature and select the correct tool. Dirt, corrosion or an incompletely seated bit can prevent proper engagement. A nearly fitting socket may grip at first and then round the head under load. Match the actual profile and size rather than the tool that happens to be closest in the tray. Keep the tool aligned with the fastener as the procedure requires. A tool that rocks, slips or contacts a nearby hose before turning has not established a sound setup.
- Secure the vehicle at its approved support points and follow the relevant parking-brake or electronic service precautions. Do not work around a raised assembly supported only by a jack. Let dangerously hot parts cool before handling them. Arrange access so that your hands and body will not strike sharp or vulnerable parts if resistance suddenly falls. A difficult working angle can turn even a correctly selected tool into an uncontrolled load. Improve the safe access rather than compensating with a sudden kick or improvised extension.
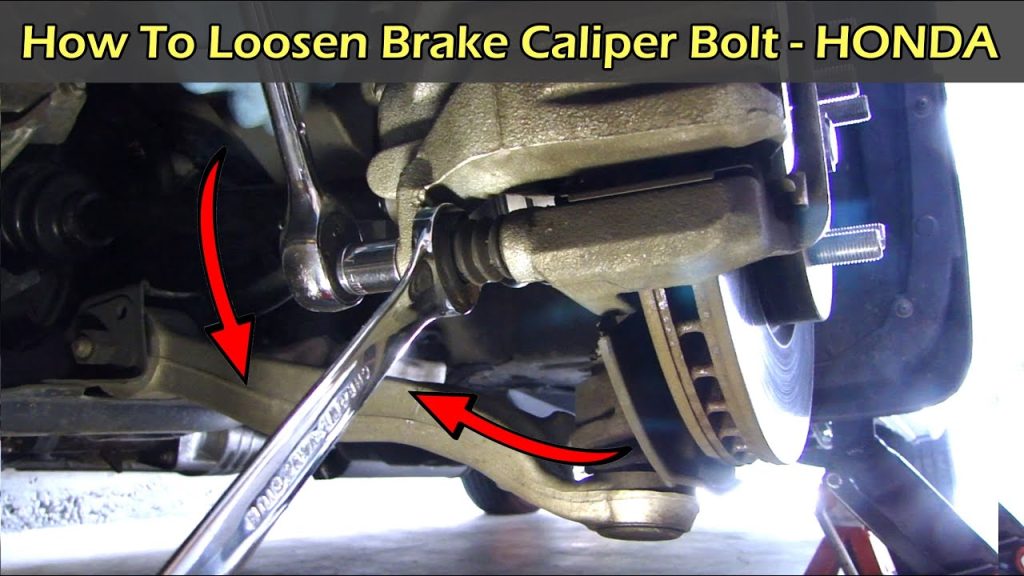
- Observe whether the intended fastener is turning independently. On some floating-caliper arrangements, another guide component may need to be held at its designated flats. If that component spins with the bolt, the apparent failure to unscrew may not be a seized thread. HELLA’s guide-pin guidance shows that the sliding arrangement and its protection need correct handling. Use the prescribed holding feature and tool. Do not grip a rubber boot or polished guide surface with locking pliers to create a makeshift reaction point.
- Also look for movement of the whole caliper or strain on the hose. Removing an attachment can release the assembly’s support, so plan how its weight will be carried. The hose and electrical wiring must not become hangers or restraints. If the service sequence requires the assembly supported before a particular bolt is removed, follow that sequence. Unwanted movement is a reason to correct the setup before continuing. It is not evidence that a bolt is nearly free and therefore safe to keep forcing.
- Consider the fastener’s history without inventing a diagnosis. Recent installation may make incorrect hardware, preparation or prior damage relevant questions. Long exposure may make corrosion relevant. Neither history proves the cause of resistance by itself. A specified locking provision may also affect removal, but it should be identified from the service information rather than assumed from the color of residue. Avoid treating every difficult connection as the same rust problem.
- Once identification, support and engagement are correct, use the removal method permitted for that fastener. The instructions may specify particular tools or replacement rules. If the bolt still resists abnormally, stop and plan recovery rather than treating maximum available leverage as the next automatic step. There is no defensible universal number of attempts or force that applies to all caliper hardware. Preserving the receiving component can matter more than preserving a damaged bolt. A specialist can assess whether controlled extraction or component replacement is appropriate.
- Do not use loosening resistance as a future installation torque. Breakaway effort reflects several conditions and does not recover a missing tightening specification. Before reassembly, obtain the complete instruction for the exact connection, including thread preparation, new-hardware requirements and any staged tightening. Brembo’s fitting instructions refer caliper attachment requirements to the vehicle manufacturer. Their example reinforces why the correct application data is necessary; it does not establish one figure for every stubborn bolt.
Record anything that changes during the attempt: a slipping drive, a rotating pin, a twisting boot, a head that turns without withdrawal or damage to surrounding material. These observations help a technician choose the next step. Saying only that a bolt is stuck loses useful distinctions. Stop before repeatedly reproducing a damaging event. The next action should address the observed condition rather than simply repeat the same unsuccessful setup with more force.
Set clear limits for recovery and inspect before reassembly
A rounded head, broken fastener, damaged thread or deformed mounting point changes the scope from ordinary removal to repair. Do not hide that change by fitting a different bolt that happens to enter the hole. Diameter and pitch alone do not establish length, strength, engagement or suitability. Adding washers, using a longer fastener or changing the thread needs an approved repair basis, not a convenient parts-bin match. If the receiving structure is damaged, its serviceability must be assessed before a replacement bolt is installed. Heat, impact equipment and extraction tools each have application limits.
Nearby seals, hoses, fluid, coatings and electrical parts can constrain what is safe. This article does not recommend heating an assembled caliper or striking it indiscriminately. A procedure used on a detached steel bracket is not automatically appropriate beside rubber and hydraulic components on the vehicle. Seek the component maker’s recovery guidance or qualified service when ordinary supported removal fails. The presence of a powerful tool does not establish permission to use it on every connection. Penetrating chemicals require similar care where their use is permitted.
Protect braking surfaces and incompatible materials, and follow the product and component instructions. Broad spraying through the wheel is not a controlled fastener treatment. Our WD-40 product guide explains why a brand name alone does not identify a suitable brake-service chemical. Residue and overspray can create additional work even if the bolt eventually moves. A treatment should have a defined target and cleanup plan before it is applied. After removal, inspect the fastener and receiving parts under the applicable criteria.

Credit: www.carlsonqualitybrakeparts.com
Do not assume a bolt is reusable because it survived extraction. Conversely, do not condemn the entire caliper without identifying what was damaged and whether a supported component repair exists. Ask the workshop to distinguish a replaceable fastener from a failed bracket, guide or housing. The FTC’s repair guidance is helpful when requesting a clear estimate for additional work. A documented finding explains why the scope changed and what is required to restore the connection.
Prepare and install the specified hardware exactly as directed. Do not add lubricant or stronger threadlocker unless the procedure calls for it. The joint’s intended condition affects tightening and cannot be recreated by choosing a higher wrench setting. Inspect hose and wiring routing after the assembly is restored. Complete any hydraulic or parking-brake service introduced by the repair, and verify operation before normal use.
A fastener successfully extracted is only one stage in returning the vehicle to service. If the attempt ended without a completed repair, keep the vehicle out of use and explain the current state to the repairer or recovery operator. Identify any loosened attachment, opened connection or damaged tool feature so the next person does not assume the brakes are intact. The sound decision can be to stop while the surrounding parts are still recoverable. Loosening stubborn caliper hardware is a controlled diagnosis-and-removal task, not a contest to apply the greatest possible force.


Automotive reference information. Confirm specifications in the manual for your exact vehicle. Original replacement guides link to their research sources. About us