A useful tie rod inspection identifies where unwanted movement occurs and compares it with the correct service criteria. Tire wear, a clunk or a wheel that can be rocked does not, by itself, prove that an outer tie rod end is faulty.
If steering has become unpredictable, a joint appears insecure or the vehicle has suffered an impact, do not perform a road test to confirm the problem. Arrange an inspection and safe transport as necessary.
Begin with the vehicle and the complaint

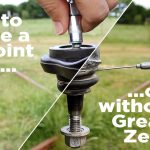
Credit: www.wikihow.com
Record when the symptom occurs: while stationary, during a turn, over bumps or after a repair. Identify the vehicle’s steering arrangement and whether the concern is near the rack, the outer end or elsewhere. This narrows the inspection without selecting a part prematurely.
Ask for the manufacturer’s inspection method before lifting the vehicle or applying force. The required loading condition, direction of movement and acceptable result are design-specific. An internet rule that every joint must show absolutely no movement can misclassify normal articulation or compliance.
Look for damage before interpreting looseness
Check the accessible joint housing, protective boot, stud attachment and adjustment connection for obvious damage or incorrect assembly. A split boot, displaced seal, damaged fastener or bent component should be recorded separately from a measurement of internal play.
Do not use a boot as a handle or puncture it to inspect inside. Cleaning should not damage sealing surfaces. If safe access requires lifting, use approved lifting points and support equipment; do not work beneath a vehicle supported only by a jack.
Localize movement rather than judging the whole wheel
Where the applicable procedure uses a wheel-movement test, the technician needs to observe the individual connections as the controlled force is applied. Movement can originate at an outer socket, an inner joint, the rack, a bearing or another part. The entire wheel’s motion is not a measurement of one component.
A Land Rover bulletin for specified 2005–2009 LR3 vehicles illustrates this distinction: its linkage diagnostic procedure separates tie rod joint movement from steering-gear movement and uses defined comparison criteria. Those LR3 instructions must not be applied as universal limits to another vehicle.
Test conditions can change the result
TRW’s commercial-vehicle inspection guidance warns that design-related axial movement can be mistaken for wear and that the loading condition affects assessment. Its procedures and limits relate to the discussed commercial joints, not every passenger car.
The lesson is to identify the correct procedure, not to combine unrelated test methods. If two shops disagree, ask which joint was observed, how the vehicle was supported, what direction was tested and which limit was used. Those details are more useful than repeating that it “felt loose.”
Separate a worn socket from a loose mounting
Movement inside a joint and movement at its attachment are different findings. A loose stud nut, damaged taper or adjustment connection needs an assessment of the attachment and any resulting damage. A worn internal bearing is not repaired by tightening the external nut.
See what tightening a tie rod end can and cannot fix. If the initial inspection cannot distinguish the source, further diagnosis is preferable to replacing the outer end merely because it is easier to reach.

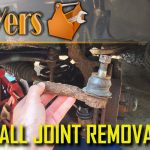
Credit: www.youtube.com
Ask for a result that supports the repair
A clear report identifies the side, component, finding and applicable criterion, with photographs or a demonstration where practical. It should also state whether other steering parts were inspected and whether the vehicle can safely be moved.
After a confirmed fault is repaired, include the required alignment and any related calibration in the work plan. Keep the findings and alignment record; they provide a useful baseline if steering symptoms or tire wear return.


Automotive reference information. Confirm specifications in the manual for your exact vehicle. Original replacement guides link to their research sources. About us