Install a mechanical fuel pump only after confirming the exact engine application and the manufacturer's installation procedure. The pump must match the drive arrangement, mounting interface, fuel connections and required delivery characteristics. A unit that fits the bolt spacing can still be incorrect.
The most important installation question is how the lever or other drive interface engages the engine mechanism; do not use the mounting bolts to force an uncertain fit. This guide addresses conventional carbureted-engine mechanical pumps, not diesel injection pumps or modern high-pressure gasoline pumps.
It explains the checks to complete before removal, the common places where a replacement job goes wrong and the evidence needed before returning the engine to service. Torque, sealant and drive-position instructions must come from the exact application rather than a universal online recipe.
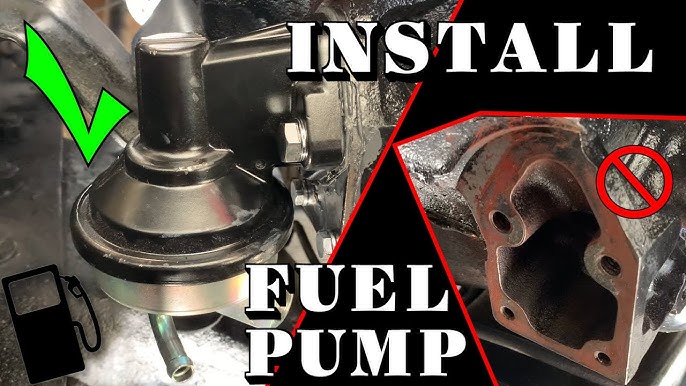
Credit: www.youtube.com
Match the pump, engine and procedure before removal
Start with the engine identification and the installed pump number if it is readable. Include any engine swap, aftermarket camshaft or fuel-system conversion. A vehicle's original model year may not identify the engine now installed. Compare the proposed replacement with a reliable application listing and its instructions. Holley: application information for mechanical pump 12-833 is an example of a pump listing tied to specified engine applications; it is not a statement that the same pump fits all engines from that manufacturer. Confirm the pressure and delivery requirements of the complete fuel system. A higher advertised flow rate does not automatically make a pump suitable for a carburetor.
The pump, any regulator and the carburetor inlet requirements must work together. Do not buy solely by free-flow rating or by the number of ports. If the installation is modified, obtain an approved system plan rather than mixing components on the assumption that more capacity is always better. Read the installation procedure before taking the old pump off. Identify the drive arrangement and any required engine positioning or retaining method. Different engines use different mechanisms, and a procedure for a pushrod-driven pump is not interchangeable with one using another lever arrangement. Gather the correct gasket, fittings, tools and any specified replacement hardware.
A missing small part can create pressure to improvise after the vehicle is already dismantled. Plan fuel containment and electrical or ignition isolation as the engine procedure requires. A stopped engine does not make residual fuel harmless. Keep ignition sources away and work with suitable equipment in an appropriate environment. Do not use an open flame or heat to loosen a fitting. If access requires lifting the vehicle, use proper support. The job involves both a mechanical mounting interface and a fuel system, so precautions for one do not replace precautions for the other.
Document the existing line routing and connections before removal, but compare them with the correct instructions if prior work may have been wrong. Identify inlet, outlet and any additional port by the pump documentation rather than by position alone. An unused-looking port should not be guessed at or plugged without understanding its function. A photograph is useful for remembering the starting arrangement; it is not proof that the starting arrangement was correct. Disconnect fittings with the appropriate tools and support the mating components as required. Avoid twisting a rigid line or loading a fragile pump connection. If a line or fitting is damaged, resolve that condition rather than forcing it onto the replacement.
Inspect the mounting area for evidence of leakage and note whether it comes from the fuel connection, pump body or engine interface. Those locations can indicate different problems and should not be collapsed into one generic pump leak. Remove the old unit according to the engine procedure, keeping control of any drive-related component that the instructions identify. Do not rotate or operate the engine in an unsupported condition merely to see what the mechanism does. Protect the open mounting area from dirt. Compare the removed pump with the specified replacement, including the drive arm or interface, flange and connections.
If there is an unexplained difference, obtain technical clarification before installation. Inspect the mating surface without damaging it. Old gasket material and debris can prevent proper sealing, but aggressive scraping can create a new leak path. Use the specified preparation method and gasket. Sealant is not automatically required, and excess material can cause problems. Follow the instructions for the exact joint rather than applying a favorite product to every surface.
A cracked or distorted component needs an appropriate repair decision, not additional sealant. The condition of the old pump can provide diagnostic evidence. If replacement followed a fuel-delivery complaint, retain the relevant observations and test results. If the surrounding system has a restriction or contamination problem, fitting a new pump alone may not resolve it. Confirm that the diagnosis addressed those possibilities. A mechanical pump should not be replaced merely because the engine is old or because another owner solved a similar symptom that way.

Credit: www.aa1car.com
Engage the drive correctly and verify the complete system
Position the engine and drive components only as the applicable procedure directs. The objective is correct engagement without bending or trapping the pump's operating mechanism. If the pump will not sit as expected, stop and determine why. Do not draw it into place with the mounting bolts as a way of overcoming an unknown obstruction. Resistance may be expected in a particular design, but only the correct instructions establish how that load is handled. Use the specified installation aid or retaining method if the procedure calls for one. Improvised bolts, wedges or sealant used to hold a drive component can create damage or leave foreign material behind. A technique demonstrated for another engine may not apply to yours. Verify any temporary tool is removed at the proper stage and that the final configuration matches the manual. The installation should not depend on an undocumented object remaining inside the engine. Install the correct gasket and tighten the mounting hardware to the specified value and sequence. Do not borrow a torque from a different pump or engine. The fastener, housing and gasket arrangement determine the requirement. If threads are damaged, address them through an approved repair rather than compensating with more force. An apparently secure pump can still have a distorted flange or poor drive alignment if the installation was forced. Connect the fuel lines without using them to pull the pump into position. Confirm port identification and the required fitting or sealing method. Threaded connections of different types do not all use the same sealant, and a tapered fitting should not be confused with a joint sealed elsewhere. Use the exact instructions. Check that lines have suitable clearance from heat, moving parts and sharp edges and are not under unnecessary tension. If the pump allows housing orientation or internal servicing, follow only its supported procedure. Holley: mechanical fuel pump servicing instructions shows that such work can involve spring load and specified replacement gaskets. That is a product-specific operation, not permission to loosen an arbitrary pump body until the ports point where desired. An incorrectly reassembled diaphragm or valve arrangement can undermine a new installation before the engine is started.
Do not add an electric helper pump as an automatic answer to a difficult first start. A conversion or combined arrangement changes supply pressure and control requirements. Holley: electric fuel pump installation and safety controls illustrates that electric-pump installation includes more than connecting a motor. If a mechanical system fails to supply fuel after installation, first check the fit, drive, connections and prescribed priming method. A second pump can mask an installation error while creating another system to manage. Follow the documented commissioning process and cranking limits. Do not pour fuel into an intake or use prolonged cranking as a substitute for a failed supply check. If the expected result is not achieved, stop and investigate. Confirm that the correct fuel is available at the inlet and that the installation matches the procedure. Keep the distinction between a pump that is not delivering and an engine that is not starting for another reason. Inspect for leaks during the prescribed checks. Stop operation if fuel appears or an abnormal odor develops. Identify the exact source before correcting it. Tightening the mounting bolts will not repair a leaking outlet fitting, and tightening a fitting further will not fix a damaged diaphragm. Re-isolate the system before repair. A fuel leak should not be accepted as something that will settle after the engine warms up. Measure the pressure and delivery required by the application and verify the original complaint. A running idle is not the whole acceptance test. If the engine or carburetor has been modified, confirm that the documented requirements for that setup are met. Keep the installed part number and results with the service record. If a symptom remains, continue diagnosis rather than assuming the new pump must simply need adjustment. The installation is complete when the correct pump is properly driven, securely sealed, connected without strain and verified in the fuel system. The useful rule is to stop at unexplained resistance or mismatch. Correct engagement and application-specific instructions are more important than completing the job quickly with a familiar-looking pump and a universal torque number.


Automotive reference information. Confirm specifications in the manual for your exact vehicle. Original replacement guides link to their research sources. About us