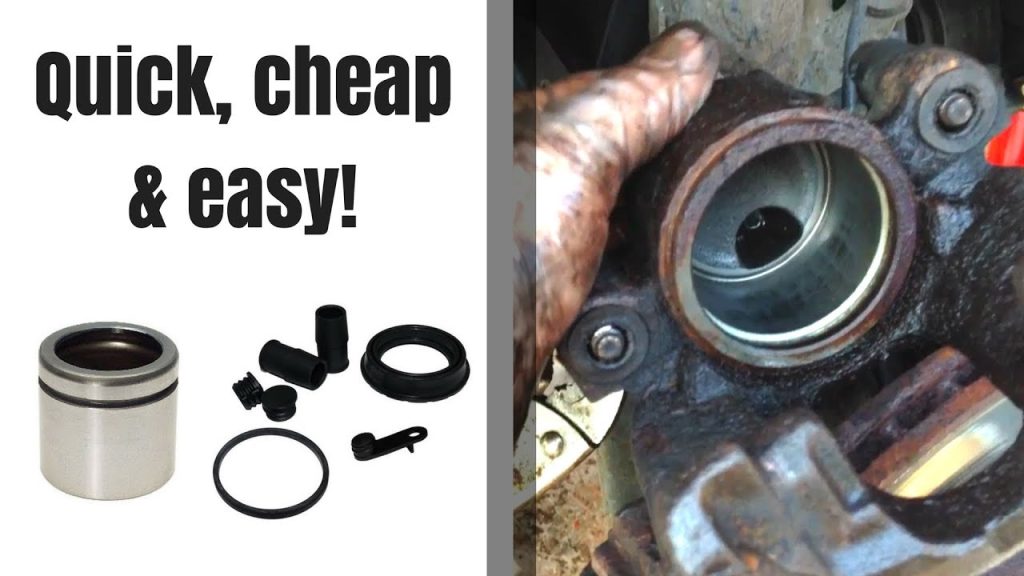

A brake caliper rebuild kit is useful only when it matches the exact assembly and replaces the parts needed for a supported repair. A bag of new seals cannot make a damaged housing, worn guide bore or incompatible piston serviceable. Identify the caliper, diagnose the fault and establish the manufacturer’s inspection criteria before buying a kit. If the assembly is not supported for the proposed repair, use an application-correct replacement rather than improvising a rebuild.
The wording can be confusing: you rebuild a serviceable caliper using appropriate kit components; you do not rebuild the kit itself. Products sold as repair kits can contain very different things. Some address guide hardware, others protective boots or hydraulic sealing parts, and some include pistons. The package name alone does not tell you which faults it can correct or whether it covers every component in your assembly.
This guide focuses on deciding whether a rebuild is justified, selecting the right parts and understanding what a complete repair must include. It is not a universal disassembly recipe. Piston extraction, seal installation, inspection limits and final tests depend on the caliper. If the necessary instructions, equipment or expertise are unavailable, have a qualified brake specialist assess it or fit the correct replacement.
Do not drive with a leaking caliper, an insecure mounting or braking that is compromised while waiting for a kit. Arrange safe recovery where necessary. A rebuild decision is a repair-planning task, not permission to keep using a defective brake until every part arrives. The objective is a verified working assembly, rather than simply fitting new rubber and making the exterior look renewed.
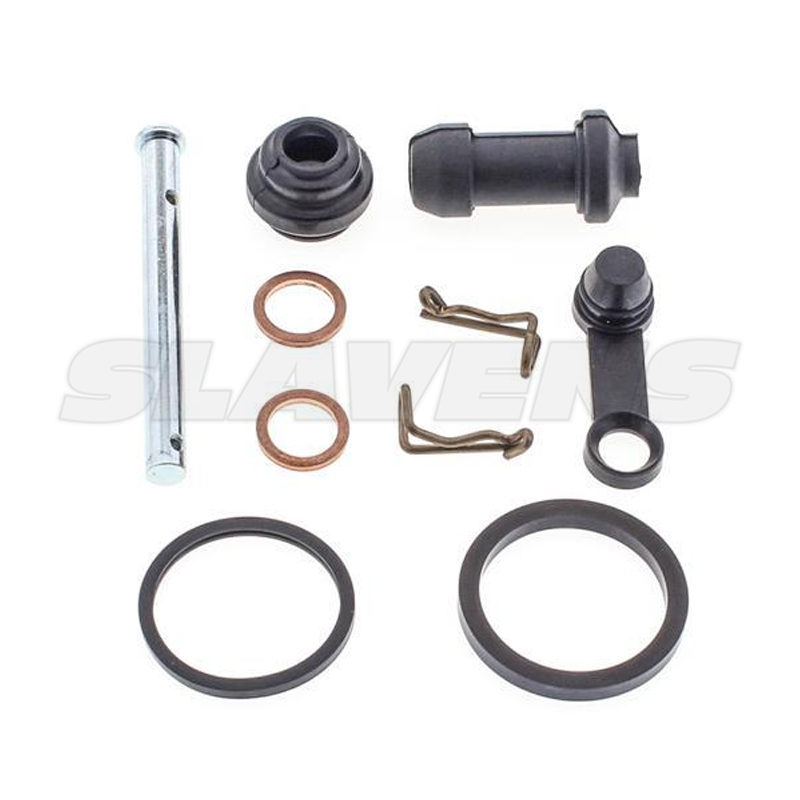
Credit: slavensracing.com
Identify the assembly, fault and kit before disassembly
Start with the vehicle identification, axle and brake package, then inspect the installed caliper markings. Factory options and previous conversions can make a general model lookup incomplete. A casting number may help identify the family without being the exact service part number. Resolve any discrepancy between the vehicle catalogue, installed assembly and proposed kit before opening the hydraulic system. Keep the identification information with the work order. Match the kit through the manufacturer’s application data and the relevant repair instructions.
Do not select a seal only because its diameter appears close to the old part. Shape, material and the intended groove relationship matter, and a used seal may no longer represent its original dimensions. Multi-piston calipers may contain different piston sizes or positions. A kit that fits one bore does not automatically cover the entire assembly. Brembo describes distinct repair-kit families covering guides, dust protection, piston seals and pistons. That is a practical reason to read the actual contents rather than assume that all products called rebuild kits are complete hydraulic overhaul packages.
- Determine which parts the procedure requires renewing and compare that list with the exact package. Order missing service items separately only when their compatibility is established. Diagnose the original problem before deciding which kit is needed. A fluid leak may originate at a hose connection or bleeder rather than a piston seal. A dragging brake may involve pad fit, guide movement, parking-brake operation or a restricted hydraulic return path. Replacing piston seals does not correct all of those faults.
- Record the observations and test results that support rebuilding the hydraulic part of the caliper. Inspect the condition of related components as part of the decision. A damaged protective boot may have allowed contamination into an area that needs closer assessment, but the boot alone does not establish the final extent of damage. A worn mounting feature or severely damaged guide surface may change the repair from a small kit to a larger assembly replacement. Do not assume that the lowest-priced kit addresses everything discovered during inspection. Brembo’s repair-kit guidance discusses replacing individual damaged components or the assembly with qualified assistance.
- The availability of a kit supports a particular repair option; it does not eliminate the need to determine whether the remaining components are reusable. Obtain the applicable limits for the piston, bore, seal groove and other relevant surfaces. If those criteria cannot be established, do not invent an acceptable amount of corrosion or wear. Compare the rebuild and replacement options using the complete scope. Rebuilding may require removal, controlled dismantling, inspection, cleaning, new components, assembly verification and the same vehicle-side hydraulic service as replacement. A replacement may also require new hardware, fluid and setup work.
- Comparing only a seal-kit price with a complete caliper price leaves out most of the decision. Ask what each option includes and what happens if disassembly reveals that the old body must be rejected. Consider who can finish the job and verify it. A specialist should be able to explain the component identification, inspection criteria, parts source and checks included in the service. A promise to polish everything until it moves is not a defined acceptance standard. Ask whether the repair covers an integrated parking-brake mechanism or electronic actuator if that is part of the complaint.
- A hydraulic seal kit may not address those systems. Plan containment and replacement hardware before removal. The hydraulic opening must be protected from dirt, the hose supported and fluid loss controlled under the vehicle procedure. The correct bleeding method and any electronic brake-service requirements must be available afterward. Do not begin dismantling merely because the kit has arrived.
A supported repair requires a complete path from removal to safe return to service. Keep parts organized by assembly and location. Photograph the documented arrangement where useful, but use the workshop procedure rather than memory for reassembly. A prior incorrect repair may be visible in the old arrangement, so copying it is not proof of correctness. Leave body bolts, bridge hardware and actuator parts alone unless the applicable repair instructions explicitly authorize disturbing them.
Rebuild only within the specified inspection and test process
Disassembly should follow the procedure for the identified caliper, using controlled equipment and a clean work area. The method for removing a piston is not interchangeable across all designs. Do not apply unrestrained compressed air or place fingers in a piston’s release path. Wilwood’s rebuild example identifies its caliper and seal kit and warns about controlling piston travel. Its method is an example for the covered design, not a generic pressure recipe for another assembly. For the extraction decision itself, see piston removal and rebuild suitability. Here the important point is that obtaining the piston does not complete the repair.
The remaining inspection determines whether the new kit can be used at all. Stop if the required removal process reveals damage or cannot be performed with the available equipment. Inspect each component under the specified criteria after the approved cleaning stage. Distinguish removable residue from damaged coating, corrosion, scoring or dimensional wear. Do not assume that sanding, honing or polishing is permitted for every piston and bore material. Removing material to make a part feel smooth can change the condition the manufacturer requires. A finger test or photograph cannot substitute for the specified physical assessment.
Examine seal grooves and protective interfaces where the procedure requires it. Debris or damage at those locations can matter even when the piston’s visible face looks acceptable. Use only cleaning methods compatible with the component materials, and prevent abrasive or solvent residue from remaining in the assembly. If the service information prohibits a particular process, a successful result on another caliper does not authorize it here. Reject components that fail the applicable criteria and revise the repair plan. Do not hide a damaged area behind a new boot or reuse a questionable piston because it slides into the bore. The decision can be a supported additional replacement part, a specialist repair expressly permitted by the manufacturer, or replacement of the caliper.
If the chosen kit cannot provide a compliant repair, stop using that kit as the plan. Confirm the new components before assembly. Check the kit identifier, intended locations and the condition of seals and boots. Keep them clean and protected from unknown chemicals. Use the specified assembly fluid or paste only in the stated locations. General guide-pin grease is not automatically suitable for internal hydraulic seals, and an external lubricant recommendation does not authorize putting that product in the brake-fluid circuit. Install seals and protective components using the documented sequence and orientation.
Avoid twisting, pinching or forcing parts into place. If a seal or piston does not seat as expected, investigate the part identity and assembly method rather than using additional force. Do not trim a seal or alter a groove to compensate for a mismatch. The purpose of the kit is to restore the designed arrangement, not create a new one. Service guide hardware separately where it is included in the repair. Follow the design’s location and lubrication instructions, including dry-guide requirements where applicable.
Keep upper and lower parts identified when they differ. A completed hydraulic rebuild with a binding guide can still leave the original brake complaint unresolved. For product-selection limits, see guide-pin lubricant compatibility. Complete the bench checks required by the caliper manufacturer or rebuilder. Do not regard a hand-movable piston or a clean exterior as a complete functional test. Ask the specialist what was measured or verified and retain the results with the parts record.
If the assembly includes a parking-brake mechanism, its required checks are part of the supported repair, not an optional extra after the hydraulic seals are fitted. Refit the caliper using the correct mounting hardware, hydraulic sealing parts and tightening instructions. Brembo’s caliper fitting guidance separates attachment, hydraulic service and final checks. Use the vehicle procedure for the actual application, especially where electronic controls or a specific bleeding routine are involved. Ensure hose and wiring routing remain correct and that nothing is twisted or strained. Bleed and restore the brake system according to the required method.
Check fluid level and inspect for leakage under the prescribed stationary conditions. Confirm normal pedal behavior and proper release before attempting controlled movement. An unresolved soft pedal, active brake fault or leak means the vehicle is not ready for use. Do not use a road test to compensate for incomplete hydraulic checks. Verify that the original complaint has been addressed, not merely that new parts have been installed. A previously overheating wheel may also require assessment of affected pads, rotor and nearby components.
If dragging remains, revisit its cause rather than assuming the rebuilt caliper cannot be involved. A repaired assembly and a repaired vehicle are related but distinct outcomes. Keep the kit number, replaced-component list, rejected-part findings and final checks in the maintenance record. That documentation helps with future parts identification and any repeat concern. A successful rebuild uses compatible parts in a serviceable assembly, follows a supported process and passes the required checks. Where those conditions cannot be met, an application-correct replacement is the more appropriate repair decision.


Automotive reference information. Confirm specifications in the manual for your exact vehicle. Original replacement guides link to their research sources. About us