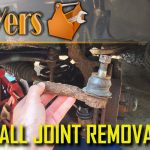
Replacing an outer tie rod end requires more than unscrewing one part and installing another. Confirm which joint is worn, obtain the exact vehicle procedure, use the correct replacement and hardware, and arrange alignment as part of the repair.
The sequence below is a planning framework for conventional outer ends. It is not a universal torque sheet or a substitute for the applicable service instructions. Inner rack joints have additional requirements covered in the inner tie rod guide.

Credit: www.wikihow.com
Confirm the failed part before dismantling
Record the vehicle identification, affected side and whether the fault is in the outer end, inner joint or another component. Ask what inspection finding supports replacement. Similar steering symptoms can lead to different repairs.
Check replacement fitment before taking the vehicle apart. Compare the specified application, connection arrangement and supplied hardware. A component with a similar overall shape may still have a different taper, thread or operating geometry. Do not use the steering knuckle as a test fixture to force a questionable part into place.
Prepare the work and preserve a reference position
Use the manufacturer’s lifting and support instructions, with correctly rated equipment. A jack alone is not safe working support. Make sure the repair procedure’s tools and replacement locking hardware are available before starting.
Recording the existing adjustment position can provide a preliminary assembly reference. It does not prove the old alignment was correct. Delphi’s outer-end replacement guidance also emphasizes comparing the replacement’s dimensions and using a suitable separation tool.
Separate the outer end using the specified method
Identify the stud fastener and its locking arrangement. Remove or release the locking feature as directed before trying to separate the tapered connection. Use the correct puller or separator for the application, with attention to nearby boots, wiring and brake components.
Do not compensate for a poorly fitting tool by striking the threads or levering against vulnerable components. If corrosion or damage prevents controlled separation, reassess the repair method. The stuck tie rod guide addresses that narrower problem.
Install and secure the replacement correctly
Follow the vehicle and part instructions for seating, fastening and any lubrication. A spinning stud or a nut that binds before seating is a problem to investigate, not a reason to increase impact-tool force. Use the required counterholding method where specified.
The stud nut and adjustment locknut perform different jobs and may have different tightening requirements. Fit new locking hardware when the procedure requires it. Do not borrow a torque value from another model or apply thread lubricant unless the specified procedure calls for it.
Treat alignment as part of the job
Counting removal turns or matching a measurement can only approximate the starting adjustment. Differences between old and new parts, existing wear and the original setting limit that method. It cannot verify the final toe angles.
MOOG explains the connection between outer-end replacement, alignment and steering-angle information. Have alignment checked and follow the vehicle’s requirements for steering-angle calibration or related procedures. A centered-looking steering wheel alone is not an alignment result.
Verify before returning to ordinary driving

Credit: www.youtube.com
The completed job needs a secure assembly, correct hardware, intact boots and clearance throughout the required steering movement. An abnormal steering feel, unresolved looseness or uncertain attachment means the vehicle is not ready for traffic.
Plan transport to the alignment facility before beginning a home repair. Do not assume that a roughly set linkage is safe for any distance. Keep the inspection findings, part number and alignment report with the repair record so later tire wear or steering concerns can be assessed against actual evidence.


Automotive reference information. Confirm specifications in the manual for your exact vehicle. Original replacement guides link to their research sources. About us