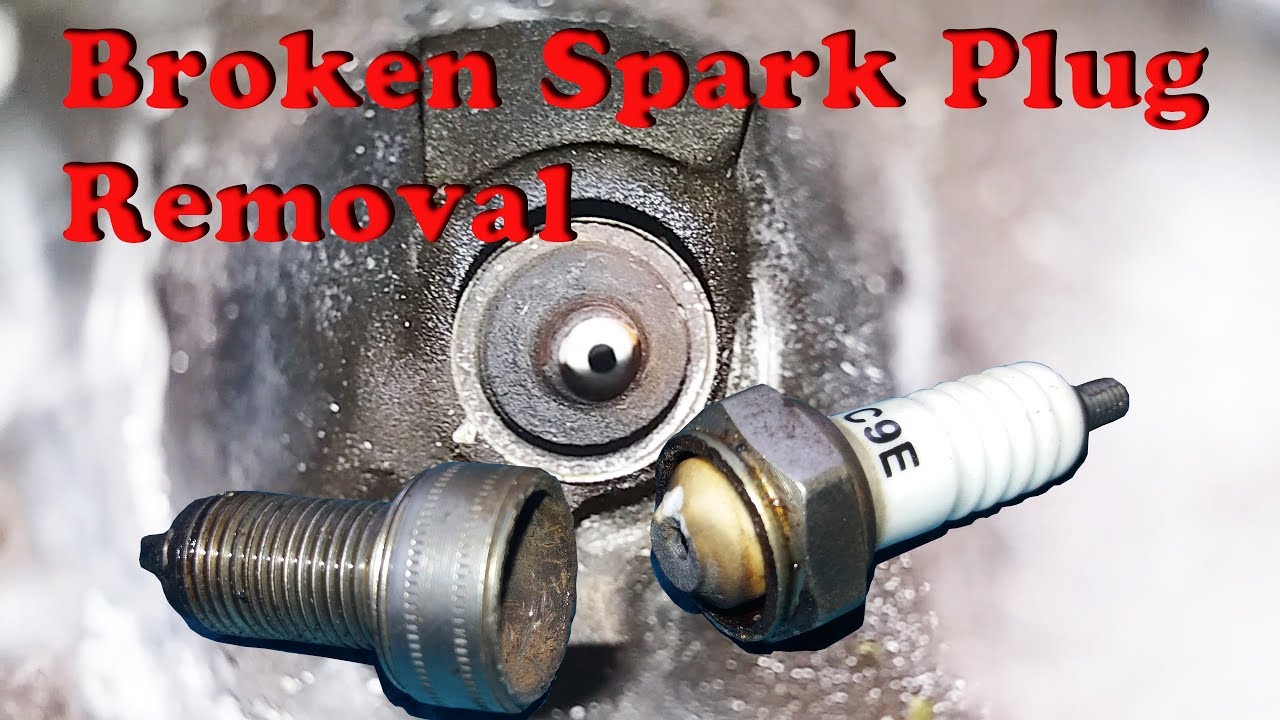

A stuck spark plug changes a routine service into a risk assessment. The useful next step is to establish what is stuck, which engine and plug design are involved, and whether the job can continue without breaking the plug or damaging the head. A longer handle does not answer any of those questions.
If the plug will not respond to normal, controlled hand-tool effort, stop and identify the applicable service procedure before adding force. This guide explains the decision sequence from preparation through inspection and professional extraction.
It deliberately does not supply a universal loosening torque, soaking period or heat treatment: those details can be wrong for an otherwise similar-looking engine. A complete removal also includes accounting for the old plug and confirming the replacement can seat correctly.
Agree on a staged removal work order
Once ordinary loosening has failed, define the next stage before more work begins. Separate diagnosis, controlled extraction, inspection of the bore and any thread repair in the estimate. Give the shop the vehicle and engine identity, affected cylinder and the reason the plug was being changed. Ask what findings would require a revised authorization rather than assuming every stuck plug has the same repair cost. A useful work order records the objective: remove the complete plug, account for fragments and leave a serviceable sealing joint. It should also allow the technician to stop if the chosen extraction method cannot be controlled. An upfront promise of removal without dismantling may be unrealistic until the failure is inspected.
Identify the remaining component before selecting a tool
Ask whether the technician is dealing with an intact plug, a separated threaded shell, fractured ceramic or another component left in the bore. An extraction tool suited to one condition can be unsuitable for another. Tool access and alignment remain important even after the original socket can no longer be used. The workshop should be able to explain what the tool grips and how the head and chamber are protected. A tool kit with a broad vehicle list is not evidence that every attachment fits this failure. If the remaining part cannot be identified confidently, further inspection should precede another attempt. That avoids turning a recoverable fragment into a more complicated obstruction.
Arrange vehicle handling while the engine is incomplete
Tell everyone handling the vehicle that the engine must not be started while plug condition, fragments or introduced liquid remain uncertain. Follow the vehicle procedure for ignition isolation, particularly on a hybrid that can start automatically. If the car must move to a workshop, arrange suitable recovery rather than temporarily reinstalling an unverified plug. Keep keys controlled and identify the incomplete work clearly. A vehicle that needs to be shifted in a parking area still needs a safe handling plan. Document which components were removed so the receiving technician does not mistake an unplugged coil or loose connector for a new fault unrelated to the attempted service.
Credit: www.reddit.com
Provide a record that prevents repeated failed attempts
Give the workshop a concise account of what happened: no movement, initial movement followed by binding, a slipping hex or an audible break. Record the socket and extension used, the approximate engine temperature condition and every chemical applied. Include photographs taken before the area was cleaned. These details do not establish a diagnosis, but they keep the next person from repeating an unsuccessful sequence without knowing its history.
Preserve any recovered pieces in a labeled container and identify the cylinder. Do not discard the old plug because a new one is already waiting. Comparing its construction and missing parts is part of the later completion check.
Disclose all previous chemical treatment
If penetrant, cleaner or another liquid was applied, give the technician the product identity and best estimate of quantity. Do not add another product while waiting for service. A surface that appears dry does not show whether liquid has entered the cylinder or remained deeper in the well. This matters when choosing the next procedure and when deciding whether the engine can safely be turned.
Ask how any remaining liquid will be handled before reassembly. A special manufacturer treatment has a defined purpose and sequence; it is not evidence that a larger amount or a stronger substitute will improve extraction. Honest uncertainty about what was used is better than an inaccurate claim that only a small amount was applied.

Credit: www.youtube.com
Check that the cited service procedure actually applies
When a workshop refers to a bulletin, ask for its applicability to the engine and installed plug design. Model year alone may not be enough when engine build dates or later replacement parts matter. A procedure can contain useful special tooling while still being wrong for an otherwise similar engine. It should not be assembled from isolated instructions taken from unrelated guides.
The same applies to temperature conditions and preparation chemicals. Confirm whether current service information supersedes an older bulletin. This is particularly important if the engine or head has previously been replaced. The repair plan should follow the hardware present, supported by the applicable documentation.
Set clear stop points for an extraction attempt
Before authorizing extraction, ask what would make the technician stop and reassess. Examples include loss of reliable tool engagement, unexpected damage, inability to contain debris or findings that exceed the selected repair system's limits. These are questions about control of the process, not instructions to abandon every difficult job. A competent plan allows for uncertainty without turning repeated unsuccessful attempts into an open-ended operation. Clarify whether additional access work or head removal requires a separate estimate. Ask to be shown the relevant findings if the plan changes. A stopping point agreed beforehand is easier to manage than a dispute after a broken extractor or damaged bore has expanded the job.
Know what the post-extraction inspection includes
Getting the old part out completes only one stage. The technician should examine the removed plug, inspect the bore and seat as appropriate, and establish whether debris remains. Ask what observations support returning the hole to service. A new plug entering the first few threads is not a complete inspection. Neither is an installation torque reading proof that all surfaces are sound. If damage is found, the proposed repair needs to address its location and extent. Keep extraction and repair findings separate on the invoice so you can understand whether the original difficulty was resolved without further machining or required a defined additional procedure.
Distinguish cleaning, thread repair and head replacement
A contaminated but serviceable bore does not require the same work as missing or displaced thread material. Likewise, restoring thread engagement may not correct a damaged sealing seat. Ask the shop to explain which condition it has found and why the proposed treatment addresses it. Do not request a thread insert automatically merely because removal was difficult. Do not reject necessary head work solely because an online demonstration succeeded without it. The aluminum-head assessment covers those repair questions in more detail. Each escalation should be tied to evidence from the actual hole and the applicable repair limits.
Confirm how fragments and debris are accounted for
Ask how the removed assembly will be checked for completeness and how any missing material will be investigated. The appropriate inspection depends on the breakage mode and engine access. A statement that debris will probably burn off is not a substitute for accounting for it. Do not authorize starting the engine as a way to see whether an unknown fragment has cleared. A borescope or further dismantling may be needed where the chamber cannot otherwise be assessed. If machining is part of the repair, chip control and verification also belong in the plan. The aim is to finish with evidence about chamber condition rather than an assumption based on a clean-looking well.
Record the repair for the next service
- Request the cylinder location, replacement part number and any insert or special repair-system identification on the invoice. Keep relevant photographs and the old plug when practical. If the repairer supplies special future removal instructions, retain them with the maintenance record. A later technician needs to know that the head may no longer be an untouched standard assembly. Also record any findings left unresolved, such as oil contamination or abnormal deposits. That prevents the successful extraction from being mistaken for a complete diagnosis of every engine complaint. Clear records are particularly useful if the vehicle changes ownership before the next scheduled plug replacement.
Account for every part after extraction
Compare the removed plug with a correct complete example or the replacement specification. Check that the threaded shell, ceramic and electrode assembly are all present before installing anything. If a piece is missing, treat it as unaccounted for rather than assuming it left through the exhaust. Do not crank the engine to blow debris out. The next step may require a borescope and controlled debris recovery, or more extensive dismantling. A new plug that screws in is not evidence that the combustion chamber is clear.
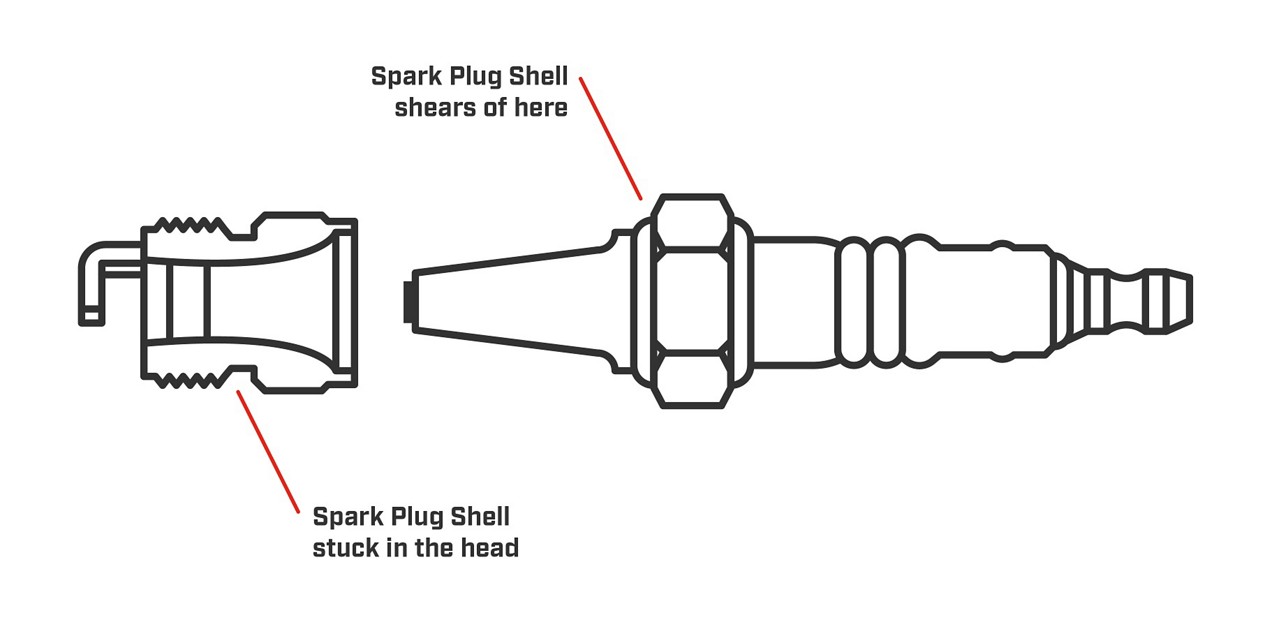
Broken-shell extraction needs the correct failure diagnosis
Champion describes broken-shell extraction and explains why extractor geometry matters. That does not make a generic extractor appropriate for every broken plug. A remaining steel shell, a lodged ground-electrode shield and fractured porcelain present different problems.
Ford's TSB 08-7-6 is an example of a tightly scoped procedure for specified three-valve engines and build dates, with different treatment for distinct breakage modes. Its instructions should not be generalized to every Ford or every stuck plug. If broken material cannot be reliably identified and contained, cylinder-head removal may be the defensible repair route rather than continued blind extraction.
Credit: www.championautoparts.com
Prevent a repeat through correct installation
Once the bore has been inspected and any damage repaired, confirm the replacement part by vehicle and engine rather than matching only the hex size. Thread reach, seat type and heat range all matter.
Start the plug by hand with the correct access and stop if it binds before seating. Use the specified installation torque and thread condition, consulting NGK’s installation guidance where applicable; do not add lubricant merely because the old plug was difficult to remove.
Repair records should identify any insert or special procedure used so future servicing does not proceed on false assumptions. Refit the coil and connectors correctly and check for a new misfire or leakage afterward.
If removal exposed abnormal deposits, investigate their cause instead of assuming fresh plugs have resolved it.
A successful job ends with evidence
The goal is an intact, correctly seated replacement in a verified serviceable hole, with no missing debris and no new running fault. It is not simply getting the old hex to turn. If you are still at the first resistance stage, the separate stuck-plug loosening assessment helps organize the initial checks.
If head threads are the concern, see aluminum-head damage and repair decisions. Keep the service record, part numbers and any workshop findings. Those details are more useful at the next replacement than a claim that one spray or one tool always works.


Automotive reference information. Confirm specifications in the manual for your exact vehicle. Original replacement guides link to their research sources. About us


