Install brake-pad anti-rattle hardware according to the diagram and instructions for the exact caliper and pad set. There is no universal “tabs up” or “spring outward” rule: hardware sold as an anti-rattle clip can be a pad support, an external caliper spring or another retention component.
If you cannot identify the clip and its intended location, stop before assembling the brake. A part that can be forced into place is not necessarily installed correctly, and leaving out required hardware is not a solution to difficult fitment.
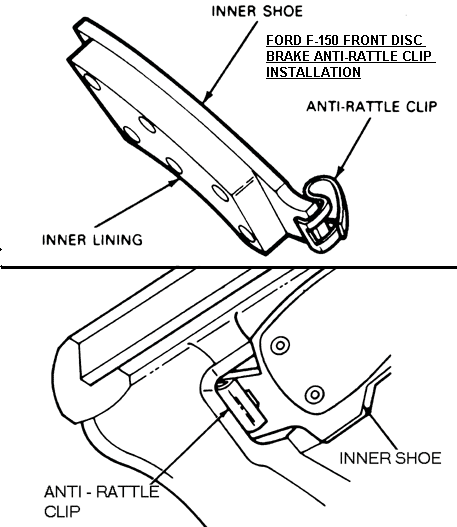
Credit: www.fordification.com
Identify which piece you have
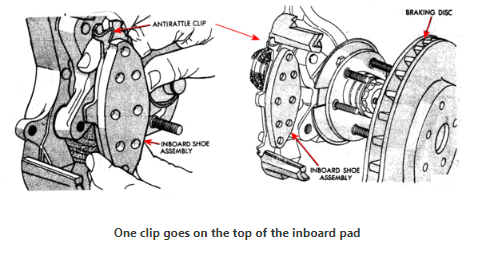
Credit: turbododgeparts.com
Lay out the new pad set and hardware beside the application instructions. Separate the clips from shims, guide-pin components and wear indicators. A wear tab has a warning role and should not be moved merely because it resembles a small spring.
Ferodo describes clips and springs as part of the pad’s engineered installation in its brake engineering guidance. Treat the complete arrangement as an application-specific assembly rather than a collection of interchangeable metal pieces.
Confirm the application before disassembly
Check the vehicle identity, axle and brake option against the part numbers. Similar-looking kits can differ in the shape of a retaining feature or the position of a tab. An old installation is a useful reference only after confirming that it was correct.
Photograph the original arrangement before removal, but use the manufacturer’s diagram to resolve disagreements. If previous work omitted or bent a clip, reproducing that arrangement can repeat the same fault.
Prepare the support surfaces as instructed
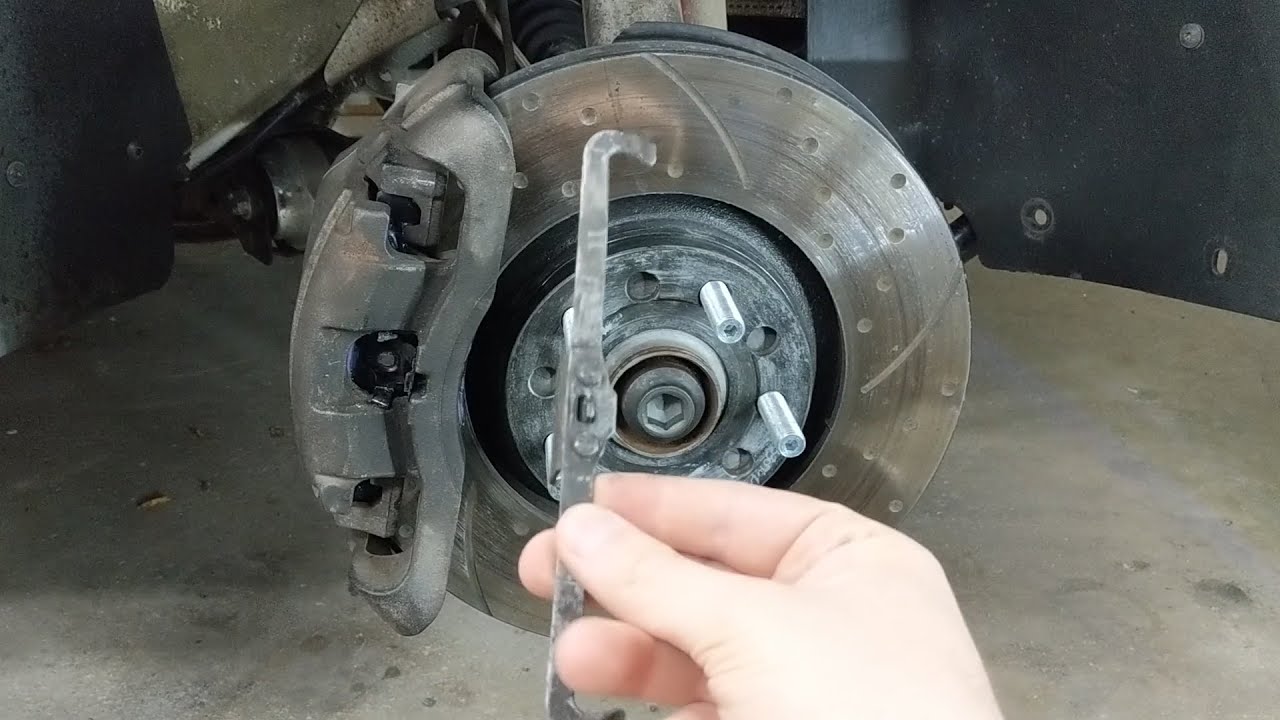
The service procedure determines how the bracket or support is cleaned and inspected. Corrosion beneath a support clip can affect how the pad sits and moves. Do not simply cover a damaged or built-up surface with more lubricant.
Credit: www.youtube.com
Use the specified cleaning precautions for brake dust and keep friction surfaces free from contamination. The brake-lubricant guide explains why product compatibility and application location matter; lubricant cannot correct a wrong clip or damaged support.
Seat each clip without inventing a new shape
Match each component to the diagram, including any inner/outer, upper/lower or directional distinction. Verify that locating features engage and that the clip sits where intended before installing the pad. Do not flatten or trim an unfamiliar tab simply to obtain clearance.
If hardware does not seat, recheck the part number, underlying surface and orientation. Compare the pieces supplied in the kit with its instructions. Do not stack new hardware over old hardware unless the specified design explicitly requires that arrangement.
Check pad fit and clearances
The installed pad must meet the vehicle’s movement and retention requirements. A pad jammed tightly into its support needs investigation; a pad that is visibly loose despite the correct assembly also needs assessment. “It stopped rattling” is not a complete fitment test.
Make sure the hardware is not contacting the disc where it should not and that boots, wires and hoses are routed clear of moving parts. The pad-fit guide explains why neither excessive force nor filing a pad to fit is an appropriate first response.
Finish the brake job, not just the clip installation
Use the specified fastener requirements, complete any piston or parking-brake service procedure, and verify normal brake operation before road use. A new noise, binding wheel, warning or abnormal pedal should be investigated before driving.
Record the hardware kit and pad part numbers. If a shop is correcting a prior installation, ask which piece was wrong or missing and whether it damaged the pad, rotor or caliper. That identifies a repair outcome more clearly than a general claim that fresh clips cure all brake noise.


Automotive reference information. Confirm specifications in the manual for your exact vehicle. Original replacement guides link to their research sources. About us