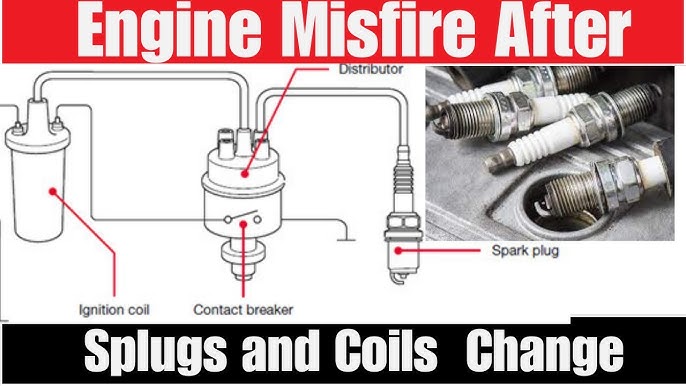

If your car starts misfiring immediately after spark-plug replacement, begin by checking the parts installed and everything disturbed during the job. A connector left loose, a boot not seated, a lead routed incorrectly or a plug damaged during installation can produce a new problem even when the replacement plugs are correct. The timing makes the service work a sensible starting point; it does not prove that every new plug is defective. Save fault codes before clearing them and record whether the engine ran normally before the work. Stop driving if the engine runs severely rough or the malfunction indicator flashes, and follow the owner's warning instructions. Do not try to make the problem disappear with a hard drive. Avoid touching ignition components while the engine runs or pulling a coil to watch for an exposed spark.
The useful first inspection is done with the vehicle secured and ignition off, following the service procedure. If the work required substantial disassembly or access is uncertain, ask the person who performed it to inspect it before more parts are removed. DENSO addresses poor operation after plug replacement and notes that installation or another vehicle problem can be responsible. That supports checking the work rather than assuming that the newest part must be the cause. Start with a simple before-and-after record: why the plugs were changed, the original symptoms, the replacement part number, any components removed, and the exact new complaint. An engine that already misfired before replacement may have an unresolved fault rather than a newly introduced one.
An engine that was smooth before service and now misfires on a cylinder whose coil was difficult to reconnect deserves a different initial inspection. Keep those two situations distinct. If several parts were changed together, list them all. Otherwise, a later technician may spend time investigating an unchanged system while overlooking the actual changes. Keep the old plugs labeled where possible and retain the invoice or packaging. A correct-looking box does not establish what was installed in every cylinder, and a recollection of the brand is not a complete specification.

Credit: www.reddit.com
Check the installation before condemning the new plugs
Confirm exact fitment. Verify the engine identification and full replacement number against a reliable application source. Check any model-specific service update rather than relying only on vehicle year or a similar engine name. A plug that threads into the head can still be the wrong application. If different plugs are used in particular positions on that engine, the service information must identify them. Do not change heat range or gap as an experiment to compensate for uncertainty about fitment. Inspect the connections with the ignition off. Check that each connector disturbed during service is fully engaged and its locking features are intact. Look for a displaced terminal or damaged harness where access was tight. A connector that looks close to its normal position may still need careful inspection; do not yank the wiring to test it. Check boots and their internal contact parts according to the design. A boot sitting on top of a plug instead of properly engaging it can be missed during rushed reassembly. Follow the manufacturer's instructions for seating and any specified boot lubricant, keeping that separate from lubricating the plug threads. Verify wire routing where wires are fitted. Some engines use individual coils, while others use ignition leads that must reach the correct cylinder and follow the proper route. Champion emphasizes correct lead routing and cylinder connections. Do not assume the shortest available path is correct. Use the engine's routing diagram, particularly if more than one lead was removed at a time. If the wiring arrangement is uncertain, stop rather than making repeated starting attempts with guessed connections.
Consider damage introduced during access. A new plug can suffer damage before it ever fires. NGK Australia explains that a misaligned socket or sideways force can damage the insulator, including damage that is not immediately obvious from the outside. Dropping a plug is another reason to assess it rather than assuming the packaging protects it indefinitely. Do not tighten a suspect plug again in the hope of correcting an electrical problem. Remove and inspect it only through the proper cool-engine procedure. Review seating and torque. NGK explains the consequences of incorrect spark-plug tightening. Use the exact application instructions, including the required thread condition and the correct tool. A torque reading alone cannot make a cross-threaded or debris-obstructed installation correct. If there was unusual resistance during installation, report it. Do not treat an additional fraction of a turn as a universal cure. Look beyond the ignition component itself. If an intake duct, vacuum connection or another assembly was moved to gain access, inspect its reassembly as part of the job review. Do not assume a misfire code excludes a problem introduced nearby. The inspection should follow what actually changed on this vehicle. Avoid disconnecting more systems simply because a generic checklist mentions them. If the initial review finds no error, a workshop can proceed with cylinder-specific testing rather than replacing every coil or injector. A bounded investigation preserves the value of each finding and reduces the chance of creating a second fault while chasing the first.
Check the specified gap without damaging the electrode
Spark-plug gap matters, but it is one check among several. DENSO explains that gap and combustion conditions affect the voltage needed for ignition. An unsuitable gap can therefore contribute to a misfire, especially when the operating demand changes. That does not establish that every post-service misfire requires regapping. Find the specification for the exact application and the plug manufacturer's instructions before touching the electrodes. A label saying pre-gapped does not replace fitment verification, and a gap measurement is not permission to bend every plug type. Some fine-electrode designs require particular care or should not be adjusted by the installer. Use the permitted measuring method, avoid loading the center electrode, and replace a damaged plug rather than forcing it into shape.
Record the observed gap if it differs from the requirement. Do not describe it merely as a little large, because the repairer needs the actual value, unit and applicable specification. Also distinguish the plug's gap from its heat range, reach and seat design; correcting one dimension cannot fix the wrong part. If all plugs were adjusted with an unsuitable tool, tell the shop. That history may explain why several cylinders behave differently after service. A generic online number from another engine should not override the manufacturer's instructions. Once the plug specification and installation are verified, move back to the complaint and the diagnostic evidence. A code for one cylinder can guide inspection of that cylinder's ignition connection and related components, but it is not a direct order to replace its injector.
If the problem existed before the plug change, consider whether plugs were only a proposed solution to an unresolved fault. A technician may need further electrical, fuel or mechanical checks based on the vehicle and the findings. If a controlled component comparison is used, record what was moved and how the symptom changed. Do not perform arbitrary swaps at home that lose cylinder identity or disturb a high-pressure fuel system. One changed observation should lead to a clear next test rather than a larger collection of unverified parts. For a plug found wet during this investigation, the separate guide to gas-wet spark plugs explains why unburned fuel does not automatically prove excessive injection. If oil is present around the boot, distinguish an external leak from the firing-end condition before changing the diagnosis. The key is keeping the service-related evidence intact while investigating whatever remains unexplained.

Credit: www.youtube.com
Verify the correction before calling the job complete
After a demonstrated error is corrected, confirm that the original post-service complaint is gone. The engine should start and operate normally under the relevant safe conditions, and the shop should review the diagnostic results rather than relying only on an extinguished warning lamp. Clearing a code removes a stored record; it does not repair the reason it appeared. Keep a note of the correction, such as a verified connector fault or an incorrect part, with the installed plug numbers. If the symptom returns, the next inspection can then distinguish recurrence from a separate problem. Ask the workshop to explain any remaining uncertainty before approving more components. A useful handover identifies what was found, what was corrected and how the result was checked.
It does not merely state that new plugs were fitted again. Do not continue driving through severe rough running while waiting to see whether the engine adapts. A fault introduced by a loose connection or a damaged plug is not a normal break-in stage. If the installation review cannot safely be completed at home, arrange professional diagnosis or recovery as appropriate. The most efficient starting point remains the same: verify the exact parts, review the disturbed connections and routing, assess installation damage and check the specified gap. Only then broaden the investigation according to evidence. This sequence respects the timing of the complaint without claiming that every misfire after maintenance has the same cause.


Automotive reference information. Confirm specifications in the manual for your exact vehicle. Original replacement guides link to their research sources. About us


