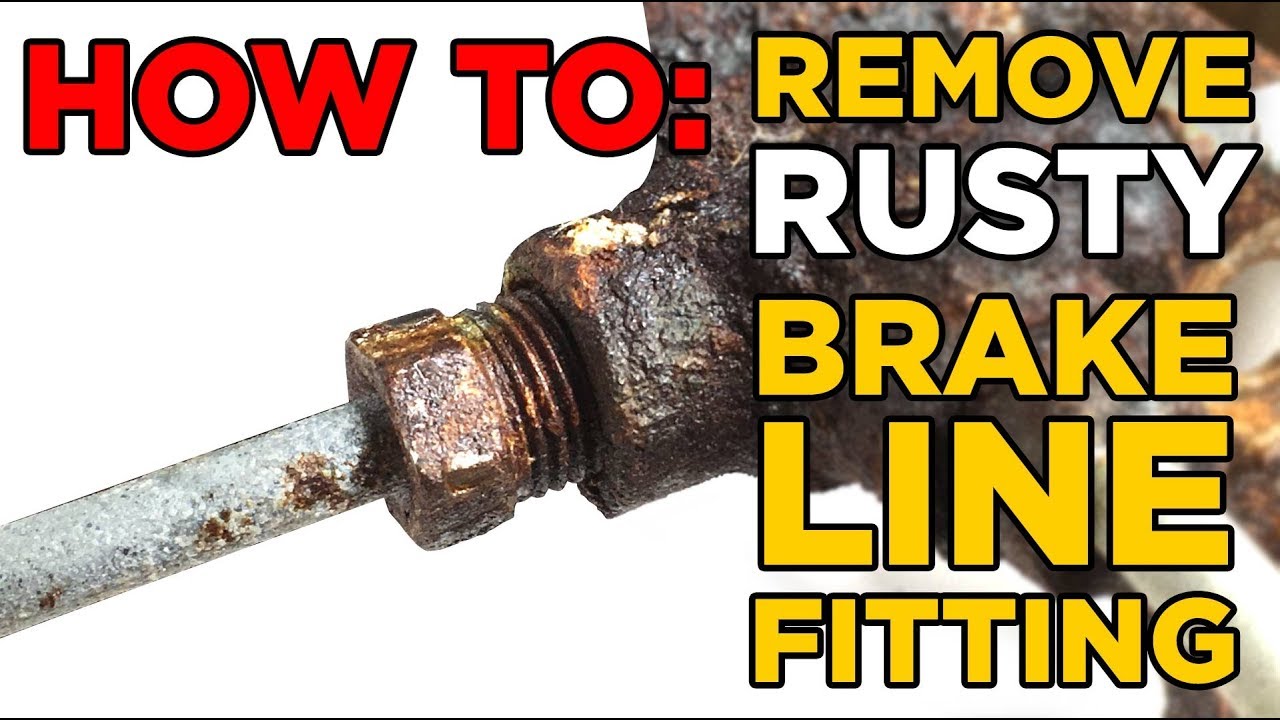

A stuck brake-line fitting needs a removal plan, not simply a longer wrench. First identify the connection, inspect the tubing and decide which parts must be preserved. Use correctly fitting line-service tools and watch whether the tube turns with the nut. If the line twists, the flats deform or the receiving component moves unexpectedly, stop before the damage spreads.
Do not use a torch as a routine way to free a brake fitting, and do not drive with a leaking or damaged hydraulic line. Corroded connections often turn a small repair into a line-replacement job. Planning for that possibility before opening the circuit is safer than improvising a connection after the old line breaks. This guide explains those decisions; the vehicle’s service procedure still controls the actual repair.
Identify what is seized and what is already damaged
A tube nut can resist turning because of corrosion at its threads or around the tube passing through it. Those conditions are not identical. If the nut grips the tube, rotating the nut can twist the line rather than release it. A flexible hose’s end fitting or a union can also move if it is not supported as the procedure requires. Identify the surfaces intended to turn and those that must remain stationary. Clean enough external dirt to see the connection without introducing debris into the system. Inspect the nut flats, exposed tube and receiving component. Look for heavy corrosion, cracks, previous tool damage and an existing leak. HELLA’s brake-line guidance identifies corrosion and external damage as important inspection findings.
A damaged line should not be preserved at any cost merely because it has not yet broken during removal. Trace the line beyond the immediate fitting. Check its supports and accessible adjacent sections. Corrosion near one connection may coexist with deterioration elsewhere. The repair scope should follow the inspected condition and approved service method. Do not choose a convenient cut point without establishing that the remaining line and proposed connection are suitable. Establish why the connection needs to be opened. Replacing a failed hose, removing a caliper and replacing a corroded rigid line can require different plans.
If the tube will be replaced, preserving its damaged nut may have little value. If the receiving component is expensive or difficult to access, protecting its port becomes especially important. A repairer should explain which parts are salvageable and where uncertainty could expand the work. Check the bleeding requirements and access before disassembly. A seized bleeder or an electronic service requirement can affect the repair plan. AGS’s brake-line assembly instructions discuss preparation at the line ends and checking the ability to complete bleeding. Their general fabrication guidance does not replace the vehicle-specific procedure. Determine the complete restoration process before fluid is lost from the open circuit.
Choose tools and access that protect the connection
| Select a correctly sized flare-nut or appropriate line-service wrench for the actual fitting. The tool must sit fully on usable flats. A nearly fitting wrench can round an already weakened nut. Confirm whether the size is metric or fractional rather than assuming from the vehicle’s origin. If access prevents proper engagement, improve access according to the service procedure instead of working from an unstable angle. Where the connection requires counterholding, use the intended flats and suitable second tool. Do not transfer the loosening load through a fragile bracket, a flexible hose or an unsupported component. The counterholding point must be part of the connection’s designed service arrangement. Gripping arbitrary surfaces can damage a housing or distort a line while appearing to hold it still. Prepare containment and suitable protection for painted and vulnerable surfaces. Keep the workspace clean and have approved caps or plugs ready for opened connections. |
Use the protective equipment required by the products and procedure. Prevent anyone from operating the brakes while the circuit is being worked on. Secure the vehicle using the prescribed lifting and support points if under-vehicle access is necessary. A penetrating product may be part of an external corrosion-release approach where compatible with the surrounding materials and the service instructions. Follow its label and allow the specified conditions; there is no universal dwell time that guarantees release. Keep it out of the hydraulic circuit and away from brake friction surfaces. Do not flood an assembly indiscriminately and assume all nearby rubber, coatings and seals tolerate the product. The presence of a specialist gripping tool does not guarantee that a severely damaged nut can be saved. If the available tool cannot engage securely, reconsider the repair scope. A controlled replacement plan is often preferable to repeatedly slipping on the same flats. Do not strike or extend a tool beyond its intended use to compensate for poor engagement.
Use visible movement as a stop-or-continue decision
- With the correct access and tools established, follow the specified removal procedure while observing the connection. Watch the rigid tube immediately behind the nut. It must not be wound up as the nut turns. Also watch the receiving fitting, bracket and any flexible hose. Unexpected movement tells you where the load is going and may mean the setup needs to change. Stop if the tube starts to twist, flatten or kink.
- Do not twist it back and assume it is undamaged. Stop if the wrench begins rounding the flats or the receiving component distorts. Greater force does not resolve a wrong load path. Reassess the condition, tool engagement and whether the affected line or component now needs replacement. Do not use uncontrolled flame heating around the fitting.
- Brake fluid, penetrating products, protective coatings, rubber components and nearby systems make casual torch use an unsuitable generic recommendation. A difficult connection deserves an appropriate professional removal or replacement method. A successful release is not worthwhile if heat has damaged components that are then left in service. Avoid generic hammering, impact-tool or locking-plier recipes. Different receiving components tolerate different service methods, and corrosion can weaken the assembly unpredictably.
- There is no universal safe removal torque for a seized brake tube nut. If the specified method cannot release it without damage, escalation should be based on the particular component and repair instructions rather than a steadily larger improvised tool. When replacement becomes necessary, identify the correct endpoints and connection arrangement. A technician may need to remove a larger section or an associated component to obtain controlled access. That is a repair-planning decision, not a reason to cut blindly next to the stuck nut.
- Preserve useful routing information and protect the receiving port from debris during any supported removal process. After separation, inspect both mating parts. A nut coming free does not mean its threads or the port’s sealing seat are serviceable. Check for damaged threads, distorted flare surfaces and corrosion that prevents an acceptable connection. Do not chase or modify a safety-critical port casually to make a replacement nut fit.
- Follow the supported repair or replacement route for that component. Keep external corrosion-release products and removed debris out of open hydraulic parts. Use appropriate clean protection while waiting for replacement components. Do not leave an open line exposed on a dirty bench or under the vehicle. Cleanliness is part of the repair, not an optional final wipe.
If contamination may have entered, assess that issue before reconnecting the system. If a new rigid line is required, its tube, nut and flare must match the application. AGS’s fitting guidance distinguishes thread engagement from complete connection compatibility. Do not substitute a generic compression union or an improvised adapter to avoid identifying the correct parts. Our guide to double-flare preparation explains the separate forming and inspection decisions when that end type is required.
Restore routing and the specified connection
- Route and support the replacement line correctly. Do not pull a short or misaligned tube into place by tightening its nut. Restore clips, brackets and protective features disturbed during access.
- Confirm the necessary clearance for steering, suspension and nearby heat sources. A connection that seals while parked can still be part of an unacceptable installation if the line is left unsupported or rubbing. Use the specified installation tightening procedure and value.
- The force needed to remove a seized old fitting is not the torque for installing its replacement. Avoid unapproved thread tape, sealant or lubricant on a flared connection.
The correct sealing surfaces must meet as designed. If a connection leaks, diagnose its fit and condition rather than repeatedly tightening it beyond the intended requirement.

Credit: m.youtube.com
Complete verification before returning to use
Complete the vehicle’s required bleeding and verification process. Use the specified brake fluid and determine whether diagnostic equipment is necessary. Check repaired connections under the prescribed conditions before the vehicle is moved. Resolve fluid loss, abnormal pedal behavior and warning indications.
Do not substitute a tentative road test for a completed static safety check. For an owner reviewing a quotation, ask which part seized, whether the tube was already corroded and what additional parts became necessary. The explanation should distinguish pre-existing deterioration from damage during removal.
Ask whether adjacent lines and the receiving component were inspected. Request a description of the completed leak and functional checks. Those details are more useful than a promise that a fitting was finally made to turn.
Credit: forum.ih8mud.com
Keep a repair record and reject temporary bypasses
Do not accept a crushed or blocked line as a temporary driving solution while parts are ordered. Our explanation of why pinching a brake line is not a repair separates that shortcut from legitimate hose manufacturing.
If the circuit cannot be restored safely, keep the vehicle out of use and arrange appropriate transport.
The goal is an intact, correctly connected braking system, not removal of the old nut at any cost.
For future service, keep the repair record and the specification of any fabricated replacement.
Do not add grease, paint or sealant to fittings as an improvised anti-seizure treatment.
Follow the approved protection and maintenance guidance.
Regular inspection can identify deterioration before a line leaks, but no inspection interval guarantees that every corroded fitting will later release without replacement.
Ask the shop to identify the replacement line endpoints on the invoice, especially when only one section of a long circuit was renewed.
Record the vehicle-specific fluid specification and any service procedure used to complete bleeding.
This gives the next repairer a clearer starting point than a note saying only that a seized fitting was loosened.


Automotive reference information. Confirm specifications in the manual for your exact vehicle. Original replacement guides link to their research sources. About us


